Introduction
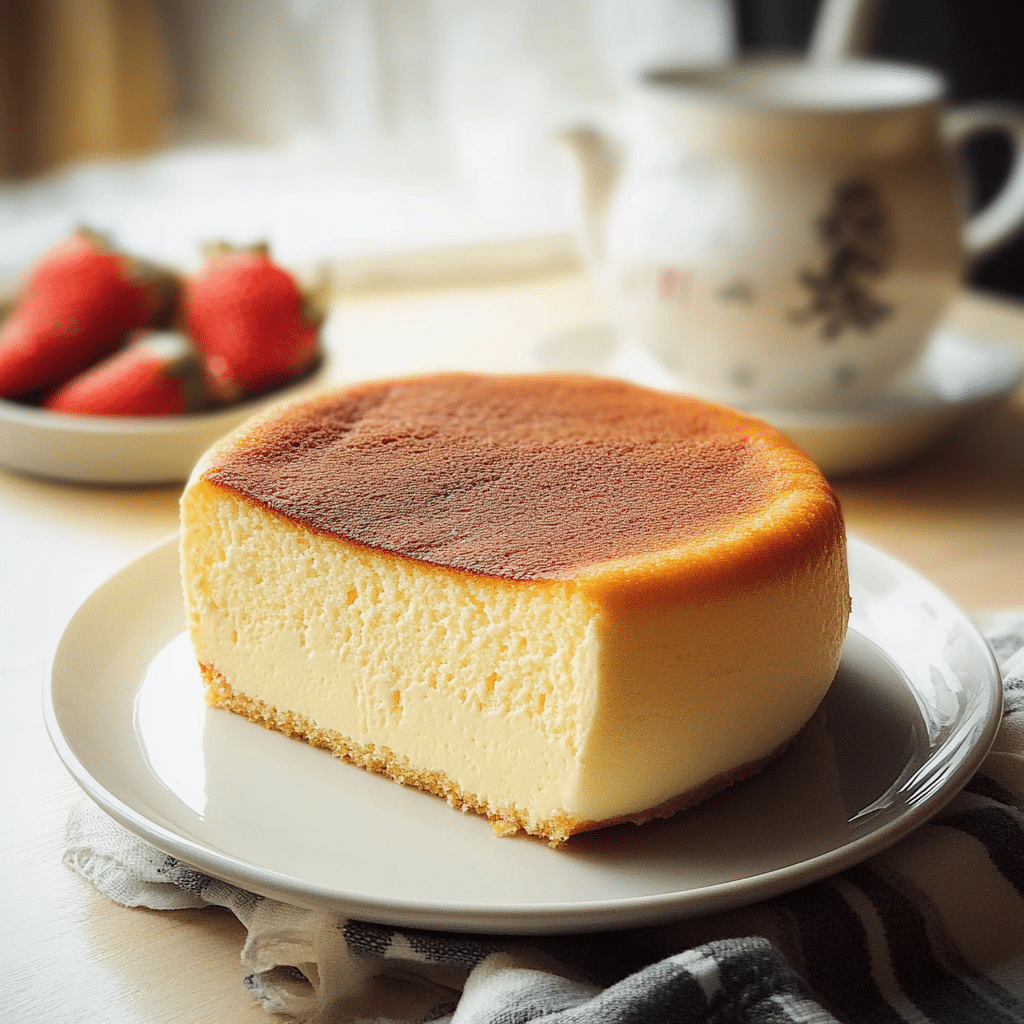
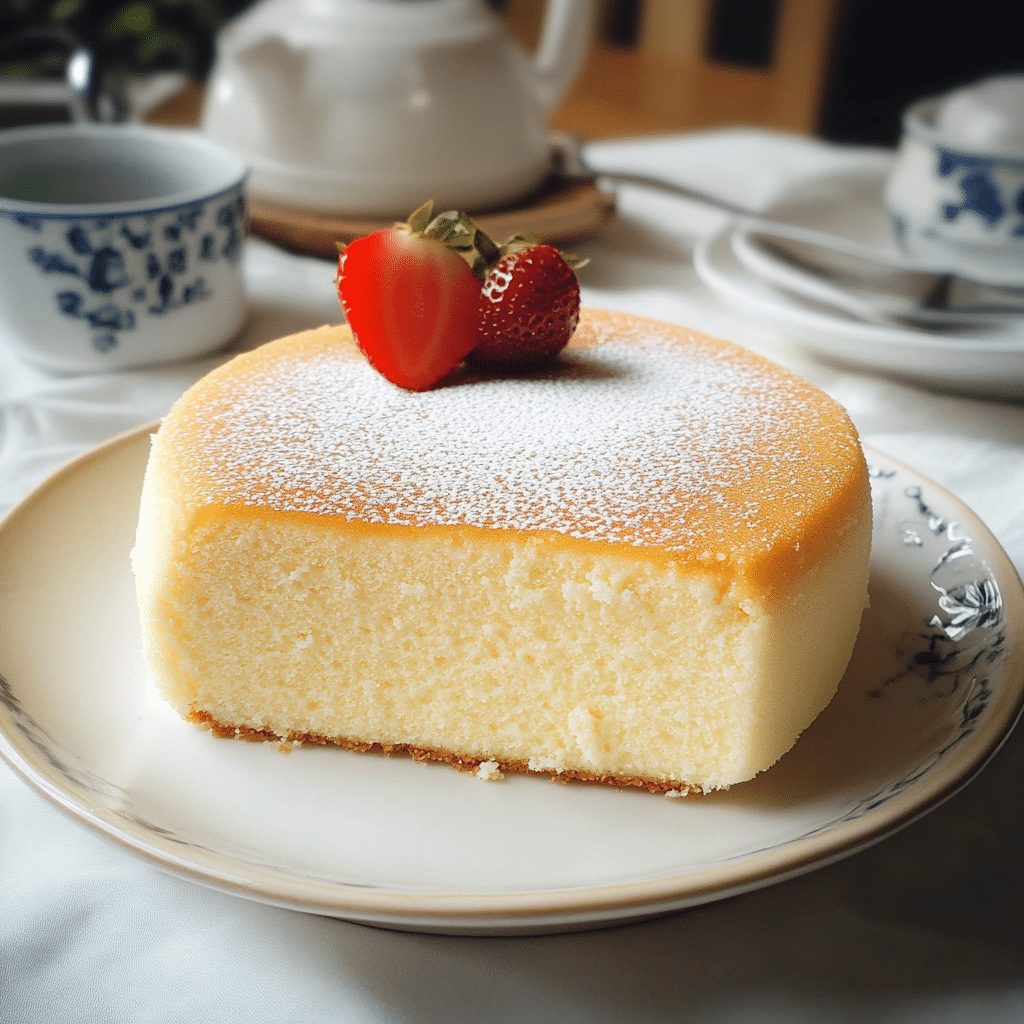
If you’re looking for a dessert that combines the best of both worlds—light, fluffy texture with rich, indulgent flavor—then Japanese Cotton Cheesecake is your perfect match. With its signature airy structure and delicate sweetness, this cheesecake has become a beloved treat worldwide, often hailed as the lighter, softer cousin of the traditional New York-style cheesecake. But don’t let its ethereal texture fool you; this Japanese-inspired dessert delivers a bold, creamy flavor that’s sure to satisfy your sweet tooth. Whether you’re hosting a dinner party or simply craving a new, fun baking challenge, this cheesecake will definitely impress your guests and elevate your dessert game.
Let’s dive into the recipe and discover how easy it can be to create this melt-in-your-mouth masterpiece at home.
Why You’ll Love This Recipe
Here are some reasons why you’ll fall head over heels for Japanese Cotton Cheesecake:
- Light as Air: The texture is famously soft and cloud-like—almost like eating a sweet, fluffy pillow!
- Perfectly Balanced Flavor: With just the right amount of sweetness, it’s not too rich, making it a great choice for anyone who loves a subtle dessert.
- Less Sweet Than Traditional Cheesecakes: If you’re not a fan of overly sweet treats, this is the cheesecake for you.
- Simple Ingredients: You don’t need a long list of hard-to-find items. Most of the ingredients are pantry staples!
- Impressive Yet Easy: The best part? Despite its show-stopping appearance, this recipe is surprisingly simple to make, even for beginners.
- Adaptable: You can customize it with different toppings like fresh berries, a dusting of powdered sugar, or even a drizzle of honey or caramel.
- Crowd-Pleaser: It’s the kind of dessert that’s bound to make everyone say, “Wow, you made this?”
Preparation Time and Cook Time
- Total Time: 3 hours (includes chilling time)
- Preparation Time: 30 minutes
- Cook Time: 1 hour
- Cooling Time: 1.5 hours (before serving)
- Servings: 8-10 slices
- Calories per slice: Approximately 200-250 calories (varies depending on portion size)
- Key Nutrients: Protein: 7g, Carbohydrates: 22g, Fat: 14g
Ingredients
Let’s gather everything you need to create this fluffy wonder:
For the Cheesecake:
- 1 package (8 oz) cream cheese, softened
- 1/2 cup milk (preferably full-fat for richness)
- 1/4 cup unsalted butter
- 1/2 cup granulated sugar
- 1 teaspoon vanilla extract
- 3 large eggs (separated)
- 1/4 cup all-purpose flour
- 2 tablespoons cornstarch
- 1/4 teaspoon salt
- 1/4 teaspoon cream of tartar
For the Topping (Optional):
- Fresh berries (strawberries, blueberries, or raspberries)
- Powdered sugar for dusting
- A drizzle of honey or caramel sauce (optional)
Ingredient Highlights
- Cream Cheese: Provides the cheesecake’s signature creamy texture while maintaining a subtle tanginess.
- Butter: Adds richness to the batter, enhancing the smoothness and flavor.
- Eggs: The key to the airy texture. Separating the whites from the yolks helps create the fluffiness that makes this cheesecake unique.
- Cornstarch: Helps stabilize the batter, giving it a perfect, smooth consistency.
- Vanilla Extract: Adds a hint of warmth and depth of flavor to the cake.
Step-by-Step Instructions
Creating a cloud-like Japanese Cotton Cheesecake requires a few key steps. But don’t worry, I’ll walk you through each one with ease!
Prepare the Baking Pan
- Preheat Oven: Preheat your oven to 320°F (160°C). This temperature ensures a slow and steady bake, which is key to achieving that signature fluffy texture.
- Prepare the Cake Pan: Line a 9-inch round cake pan with parchment paper. You’ll also want to wrap the outside of the pan with aluminum foil to prevent water from seeping in during the water bath process. Tip: Use a springform pan for easier removal, but make sure it’s tightly sealed so no water leaks in!
Make the Cheesecake Batter
- Melt the Cream Cheese, Butter, and Milk: In a saucepan over medium heat, combine the cream cheese, butter, and milk. Stir continuously until the mixture is smooth and fully melted. Remove from heat and let it cool slightly.
- Whisk in the Dry Ingredients: In a separate bowl, sift together the all-purpose flour, cornstarch, and salt. Add this dry mixture into the warm cream cheese mixture and whisk until smooth. Then, whisk in the vanilla extract.
- Separate the Eggs: Separate the egg whites from the egg yolks, placing the whites in a large mixing bowl and the yolks in another bowl. Tip: Make sure no yolk gets into the whites. Even a tiny bit can prevent them from whipping properly!
- Add the Egg Yolks: Whisk the egg yolks into the cooled cream cheese mixture, blending them thoroughly. The mixture should be smooth and thick.
Whip the Egg Whites
- Beat the Egg Whites: In a clean bowl, beat the egg whites with cream of tartar until they form soft peaks. Gradually add the sugar and continue beating until stiff peaks form. This will give the cake its signature fluffy texture. Tip: If you’re using a hand mixer, be patient! It’ll take a few minutes for the whites to reach the right consistency.
- Fold the Egg Whites into the Batter: Gently fold the whipped egg whites into the cream cheese mixture in three additions. Be careful not to deflate the air you’ve worked so hard to whip into the whites. The key here is to fold—not stir—until just combined.
Bake the Cheesecake
- Prepare the Water Bath: Place the prepared cake pan into a larger baking dish and add hot water to the outer pan. The water should come halfway up the sides of the cake pan. This water bath helps maintain moisture and prevents cracks in the cheesecake’s delicate texture.
- Bake: Carefully place the pan in the oven and bake for 50-60 minutes. The cake should be golden on top and slightly jiggly in the center. If it still looks wet or undercooked, let it bake for an additional 10-15 minutes.
- Cool: Turn off the oven and leave the cheesecake inside for an additional 10 minutes with the door slightly ajar. Then, remove it from the oven and allow it to cool in the pan on a wire rack. Once cooled, refrigerate it for at least 1-2 hours or overnight for the best results.
Serve the Cheesecake
- Remove from Pan: Once the cheesecake has chilled and set, carefully remove it from the pan. You can either serve it as is or decorate with fresh berries, a dusting of powdered sugar, or a drizzle of caramel or honey for added flavor.
- Slice and Enjoy: Slice the cheesecake with a sharp knife, cleaning it between cuts for smooth, clean edges. Tip: For an ultra-smooth slice, dip your knife in warm water before cutting!
How to Serve
Here are some fun serving ideas for your Japanese Cotton Cheesecake:
- With Fresh Berries: Top your cheesecake with a few fresh strawberries, blueberries, or raspberries for a pop of color and a burst of freshness.
- Chilled: For the ultimate melt-in-your-mouth experience, serve the cheesecake chilled straight from the fridge.
- With Toppings: Add a drizzle of honey, caramel, or even a little whipped cream for extra indulgence.
- A Personal Touch: Garnish with a few mint leaves or edible flowers for a refined, elegant touch.
- Perfect for Afternoon Tea: Serve alongside a cup of tea for a delightful afternoon snack or dessert.
Additional Tips
Maximize your enjoyment of Japanese Cotton Cheesecake with these helpful tips:
- Use Room Temperature Ingredients: Ensure that your cream cheese and eggs are at room temperature before beginning. This will help everything come together more smoothly.
- Don’t Overmix: When folding in the egg whites, be gentle. Overmixing can deflate the air, making the cheesecake dense instead of fluffy.
- Chill Thoroughly: For the best texture, allow the cheesecake to chill for at least 2 hours—or even overnight. This helps the flavors settle and the cheesecake firm up.
- Use a Toothpick Test: If unsure whether your cheesecake is done, insert a toothpick into the center. It should come out clean but still have a slight jiggle when you shake the pan.
- Opt for Full-Fat Ingredients: For the richest flavor and texture, use full-fat cream cheese, butter, and milk.
Recipe Variations
Here are a few variations to make your Japanese Cotton Cheesecake even more exciting:
- Matcha Version: Add a tablespoon of matcha powder to the dry ingredients for a green tea twist.
- Fruit Flavors: Mix in a few tablespoons of fruit puree like mango or strawberry into the cream cheese mixture before baking for a fruity variation.
- Chocolate: Melt some dark chocolate and swirl it into the batter before baking to create a decadent chocolate version.
faq section
Here’s a quick FAQ section to answer some of the common questions I’ve received about making Japanese Cotton Cheesecake. I hope these tips help clear up any confusion and make your baking experience even smoother!
- 1. Why is my Japanese Cotton Cheesecake sinking in the middle?
- Possible Cause: The cheesecake might not have been fully set before you removed it from the oven. This dessert is delicate, so it requires proper cooling time to firm up.
- Solution: Let the cheesecake cool in the oven with the door slightly ajar for 10 minutes. Then, cool it completely at room temperature before refrigerating. This helps it set properly.
- 2. Can I make this cheesecake without a water bath?
- Possible Cause: A water bath helps maintain a moist baking environment, preventing the cake from cracking or drying out.
- Solution: While the water bath is recommended for best results, if you’re in a pinch, you can skip it. Just keep the oven temperature low and check the cheesecake closely towards the end of baking to avoid overbaking.
- 3. Can I use low-fat cream cheese or milk?
- Possible Cause: While using low-fat ingredients may lower the calorie content, they can affect the rich, creamy texture that makes this cheesecake so special.
- Solution: For the best texture and flavor, it’s recommended to use full-fat cream cheese and milk. However, if you prefer a lighter version, you can substitute low-fat options, but the result may be slightly less fluffy and creamy.
Japanese Cotton Cheesecake
- Total Time: 3 hrs.
Ingredients
For the Cheesecake:
- 1 package (8 oz) cream cheese, softened
- 1/2 cup milk (preferably full-fat for richness)
- 1/4 cup unsalted butter
- 1/2 cup granulated sugar
- 1 teaspoon vanilla extract
- 3 large eggs (separated)
- 1/4 cup all-purpose flour
- 2 tablespoons cornstarch
- 1/4 teaspoon salt
- 1/4 teaspoon cream of tartar
For the Topping (Optional):
- Fresh berries (strawberries, blueberries, or raspberries)
- Powdered sugar for dusting
- A drizzle of honey or caramel sauce (optional)
Instructions
Prepare the Baking Pan
- Preheat Oven: Preheat your oven to 320°F (160°C). This temperature ensures a slow and steady bake, which is key to achieving that signature fluffy texture.
- Prepare the Cake Pan: Line a 9-inch round cake pan with parchment paper. You’ll also want to wrap the outside of the pan with aluminum foil to prevent water from seeping in during the water bath process.
Tip: Use a springform pan for easier removal, but make sure it’s tightly sealed so no water leaks in!
Make the Cheesecake Batter
- Melt the Cream Cheese, Butter, and Milk: In a saucepan over medium heat, combine the cream cheese, butter, and milk. Stir continuously until the mixture is smooth and fully melted. Remove from heat and let it cool slightly.
- Whisk in the Dry Ingredients: In a separate bowl, sift together the all-purpose flour, cornstarch, and salt. Add this dry mixture into the warm cream cheese mixture and whisk until smooth. Then, whisk in the vanilla extract.
- Separate the Eggs: Separate the egg whites from the egg yolks, placing the whites in a large mixing bowl and the yolks in another bowl.
Tip: Make sure no yolk gets into the whites. Even a tiny bit can prevent them from whipping properly!
- Add the Egg Yolks: Whisk the egg yolks into the cooled cream cheese mixture, blending them thoroughly. The mixture should be smooth and thick.
Whip the Egg Whites
- Beat the Egg Whites: In a clean bowl, beat the egg whites with cream of tartar until they form soft peaks. Gradually add the sugar and continue beating until stiff peaks form. This will give the cake its signature fluffy texture.
Tip: If you’re using a hand mixer, be patient! It’ll take a few minutes for the whites to reach the right consistency.
- Fold the Egg Whites into the Batter: Gently fold the whipped egg whites into the cream cheese mixture in three additions. Be careful not to deflate the air you’ve worked so hard to whip into the whites. The key here is to fold—not stir—until just combined.
Bake the Cheesecake
- Prepare the Water Bath: Place the prepared cake pan into a larger baking dish and add hot water to the outer pan. The water should come halfway up the sides of the cake pan. This water bath helps maintain moisture and prevents cracks in the cheesecake’s delicate texture.
- Bake: Carefully place the pan in the oven and bake for 50-60 minutes. The cake should be golden on top and slightly jiggly in the center. If it still looks wet or undercooked, let it bake for an additional 10-15 minutes.
- Cool: Turn off the oven and leave the cheesecake inside for an additional 10 minutes with the door slightly ajar. Then, remove it from the oven and allow it to cool in the pan on a wire rack. Once cooled, refrigerate it for at least 1-2 hours or overnight for the best results.
Serve the Cheesecake
- Remove from Pan: Once the cheesecake has chilled and set, carefully remove it from the pan. You can either serve it as is or decorate with fresh berries, a dusting of powdered sugar, or a drizzle of caramel or honey for added flavor.
- Slice and Enjoy: Slice the cheesecake with a sharp knife, cleaning it between cuts for smooth, clean edges.
Tip: For an ultra-smooth slice, dip your knife in warm water before cutting!
- Prep Time: 30 min.
- Cooling Time: 1.5 hrs
- Cook Time: 1 hr
Nutrition
- Serving Size: 8-10 slices
- Calories: 200-250 kcal
- Fat: 14g
- Carbohydrates: 22g
- Protein: 7g
Conclusion
With its light and fluffy texture and subtle sweetness, Japanese Cotton Cheesecake is a delightful treat that will leave everyone asking for more. It’s surprisingly easy to make, and the best part? You can customize it to fit your tastes or special occasions. So why not give it a try? I’d love to hear how it turns out! Don’t forget to snap a photo and tag me on social media—I love seeing your delicious creations!
Happy baking!

