Introduction
Alright, let’s dive into the joy of making Rum Balls! If you’re like me, you might have fond memories of these little treats appearing around the holidays. My grandmother used to make a batch every year, and they’d sit proudly on a festive plate, nestled between cookies and fudge. Now, they’re one of those recipes I turn to when I want something easy yet indulgent – perfect for when time is tight but I still want a homemade touch.
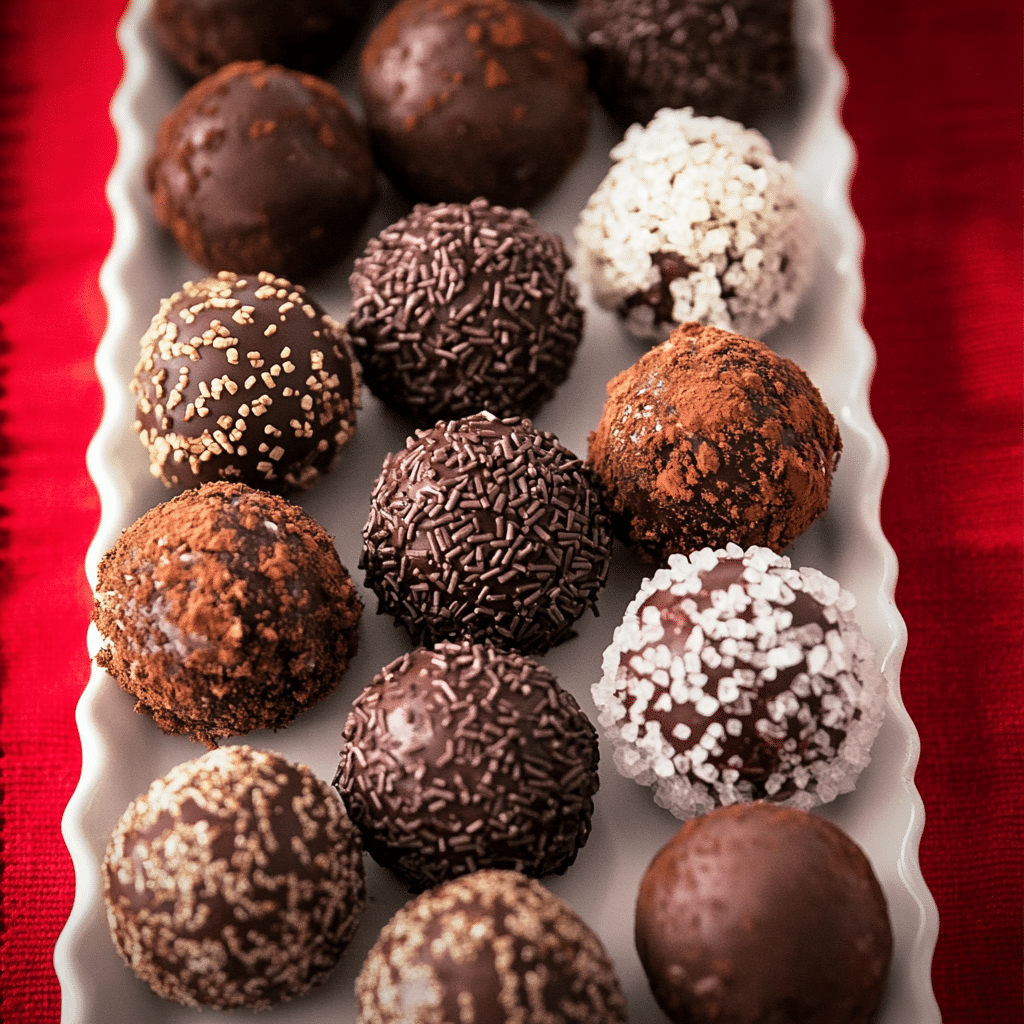
Rum Balls are fantastic because they’re no-bake, which means less fuss and more time to relax. You don’t need to be a pro baker here—just mix everything up, roll, and you’re good to go! What I love most about them is their versatility. You can swap out the type of nuts, adjust the rum to your liking, or even roll them in sprinkles or coconut flakes for a different look. And the taste? Think rich chocolate mingling with a subtle warmth from the rum. It’s like a grown-up version of your favorite holiday candy!
If you’re new to making holiday treats, this recipe is a great confidence booster. You’ll be amazed at how something so simple can pack such a punch in flavor. Plus, they make adorable, thoughtful gifts. Wrap them up in little boxes or jars, and they’re ready to spread some holiday cheer. Trust me, once you try these, they’ll likely become one of your favorite traditions too!
Why You’ll Love This Recipe
Here’s why Rum Balls are an absolute must-have:
- Quick and Easy: Just mix, roll, and chill—no baking required!
- Rich Flavor: The combination of chocolate and rum is deliciously indulgent.
- Perfect for Gifting: Make a batch and package them up as holiday gifts.
- Freezer-Friendly: They store well, making them perfect for making ahead.
- Customizable: Easily adjust the rum level or add extra flavors to suit your taste.
- Great for Holiday Gatherings: Serve them at parties or add them to a holiday cookie platter.
- Kid-Friendly (Without the Rum): Substitute rum flavoring for a kid-friendly version.
- Easy to Scale: Easily double or triple the recipe for large batches.
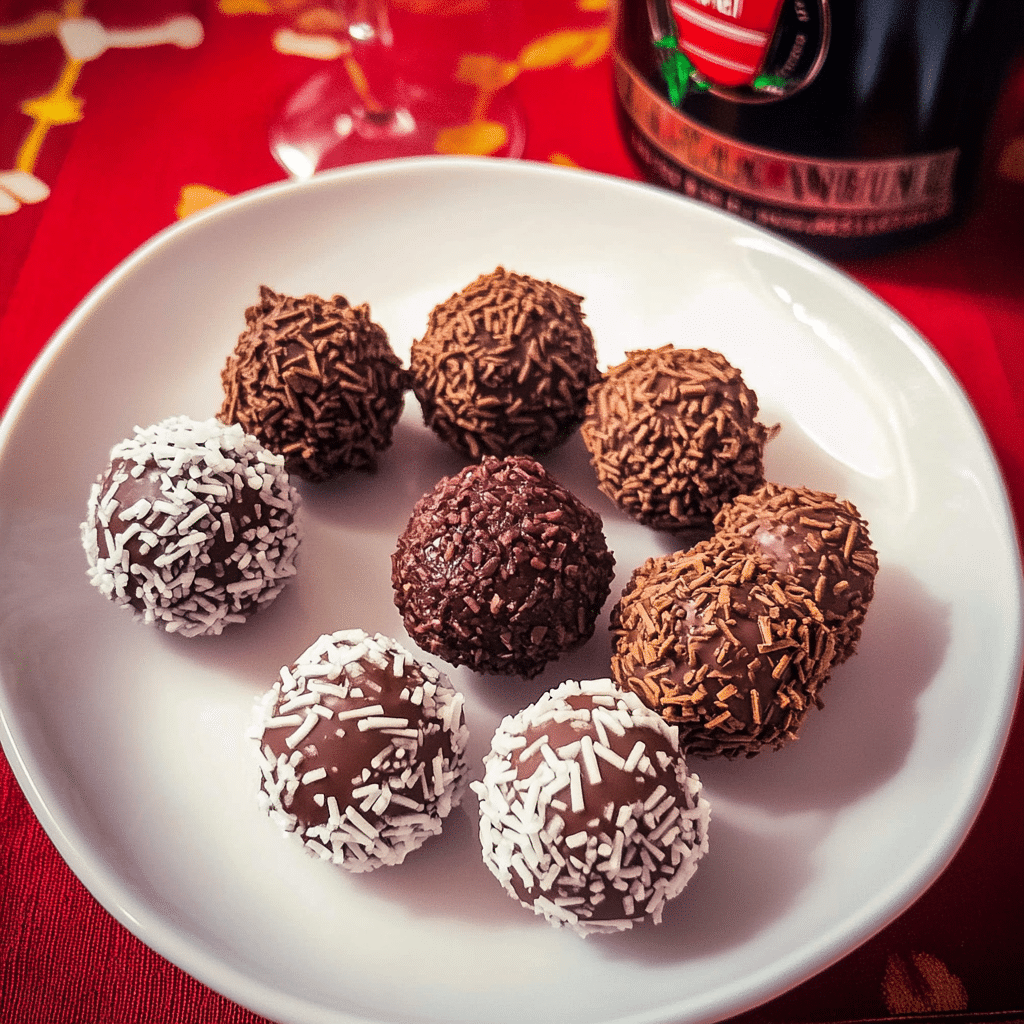
- Elegant Presentation: These little treats look gorgeous rolled in powdered sugar or sprinkles.
- Make-Ahead Option: Perfect for prepping in advance and storing until ready to serve.
Preparation Time and Chill Time
- Total Time: 45 minutes
- Preparation Time: 15 minutes
- Chill Time: 30 minutes
- Servings: 24 rum balls
- Calories per rum ball: Approximately 80 calories
- Key Nutrients: Fat: 4g, Carbohydrates: 10g, Protein: 1g
Ingredients
Gather these ingredients to create your delicious Rum Balls:
- 1 cup crushed vanilla wafers
- 1 cup powdered sugar, plus extra for rolling
- 1/2 cup finely chopped nuts (walnuts or pecans)
- 2 tablespoons unsweetened cocoa powder
- 3 tablespoons light corn syrup
- 1/4 cup dark or spiced rum
- Sprinkles, cocoa powder, or extra powdered sugar for rolling (optional)
Ingredient Highlights
- Vanilla Wafers: Provides a sweet base and texture to the rum balls.
- Dark or Spiced Rum: Adds warmth and depth of flavor (or substitute rum flavoring for a non-alcoholic version).
- Nuts: Adds crunch and complements the chocolate and rum flavors.
- Powdered Sugar: Sweetens the mixture and creates a soft coating.
Step-by-Step Instructions
Follow these simple steps to make your Rum Balls:
Prepare the Mixture
- Crush the Wafers: In a mixing bowl, combine the crushed vanilla wafers, powdered sugar, nuts, and cocoa powder.
- Add Wet Ingredients: Stir in the corn syrup and rum until the mixture is moist and holds together when pressed.
Form the Balls
- Shape the Mixture: Roll the mixture into 1-inch balls between the palms of your hands.
- Coat the Balls: Roll each rum ball in powdered sugar, cocoa powder, or sprinkles for a decorative finish.
Chill
- Refrigerate: Place the rum balls on a parchment-lined tray and chill for at least 30 minutes before serving to allow the flavors to meld.
How to Serve
Try these creative serving ideas for your Rum Balls:
- Arrange on a Holiday Platter: Display the rum balls on a festive serving plate.
- Gift-Wrapped Jars: Place them in small jars with holiday ribbons for a thoughtful gift.
- With Other Desserts: Add them to a cookie platter with holiday cookies and truffles.
- Individual Wrapping: Wrap each ball in a mini paper liner for easy serving.
- As a Cocktail Garnish: Serve with your favorite holiday cocktail for a unique pairing.
- Serve in Decorative Tins: Add to holiday tins for a classic gift option.
- Create a Dessert Bar: Include rum balls on a dessert buffet with other festive treats.
- For a Potluck: Bring them to a holiday potluck for an easy, no-fuss dessert.
- With Coffee or Hot Cocoa: Serve alongside a warm drink for a cozy treat.
- Add to Charcuterie Board: Place a few on a dessert charcuterie board for variety.
Additional Tips
Here are some tips to perfect your Rum Balls:
- Chill for Better Flavor: Let the flavors develop by chilling for a few hours before serving.
- Use Fresh Nuts: Freshly chopped nuts enhance the flavor and texture.
- Adjust Rum Level: Feel free to add a little more or less rum to taste.
- Non-Alcoholic Version: Substitute rum flavoring for a non-alcoholic option.
- Store Properly: Keep in an airtight container in the fridge to maintain freshness.
- Experiment with Coatings: Try different coatings, like shredded coconut or crushed peppermint.
- Use a Food Processor: For a smoother texture, pulse the mixture in a food processor.
- Roll in Hands Lightly: Slightly dampen your hands to prevent sticking when rolling.
- Freezer-Friendly: Rum balls can be frozen for up to 3 months.
- Flavor Variation: Add a dash of vanilla or almond extract for extra flavor.
Recipe Variations
Explore these fun variations on classic Rum Balls:
- Coconut Rum Balls: Add shredded coconut to the mixture for a tropical twist.
- Peppermint Rum Balls: Mix in crushed peppermint for a festive holiday version.
- Spiced Rum: Use spiced rum for a warm, holiday-inspired flavor.
- Nut-Free Option: Omit nuts and add more crushed wafers for a nut-free version.
- Gluten-Free Option: Use gluten-free wafers for a gluten-free treat.
- Espresso Rum Balls: Add a teaspoon of instant espresso powder for a mocha flavor.
- Almond Rum Balls: Substitute almond extract and finely chopped almonds for a nutty twist.
- Chocolate-Dipped: Dip the balls in melted chocolate for an extra indulgent treat.
- Orange Zest: Add a hint of orange zest to the mixture for a citrusy kick.
- No Rum: Substitute rum with apple juice for a non-alcoholic option.
Freezing and Storage
Store your Rum Balls to keep them fresh and flavorful:
- Storage: Store rum balls in an airtight container in the refrigerator for up to 2 weeks.
- Freeze for Later: Freeze the balls in a single layer in a freezer-safe container for up to 3 months.
- Thawing: Thaw frozen rum balls in the refrigerator before serving.
Special Equipment
Here are some basic tools you’ll need for Rum Balls:
- Mixing Bowl: For combining all the ingredients.
- Spoon or Scoop: To measure out even portions of the mixture.
- Baking Sheet: For chilling the rum balls.
- Plastic Wrap: To cover and chill the mixture, if needed.
FAQ Section
Answers to common questions about Rum Balls:
- Can I make these non-alcoholic?
- Absolutely! Substitute the rum with rum extract or apple juice for a similar flavor without the alcohol.
- How long do rum balls last?
- Stored in an airtight container, rum balls can last up to 2 weeks in the refrigerator or up to 3 months in the freezer.
- Can I use different types of alcohol?
- Yes, you can use bourbon, whiskey, or even a flavored liqueur to give the rum balls a unique twist. Just keep in mind that this may alter the flavor profile.
- How do I store rum balls?
- Store them in an airtight container in the refrigerator. They can also be layered with parchment paper to prevent sticking.
- Can I make rum balls in advance?
- Definitely! Rum balls actually taste better after a day or two in the fridge, as the flavors meld over time. They’re perfect for make-ahead treats!
- Can I use different types of nuts?
- Yes, feel free to substitute the pecans with almonds, walnuts, or hazelnuts. Each will bring its own unique flavor to the rum balls.

Rum Balls
- Total Time: 45 min.
Ingredients
- 1 cup crushed vanilla wafers
- 1 cup powdered sugar, plus extra for rolling
- 1/2 cup finely chopped nuts (walnuts or pecans)
- 2 tablespoons unsweetened cocoa powder
- 3 tablespoons light corn syrup
- 1/4 cup dark or spiced rum
- Sprinkles, cocoa powder, or extra powdered sugar for rolling (optional)
Instructions
Prepare the Mixture
- Crush the Wafers: In a mixing bowl, combine the crushed vanilla wafers, powdered sugar, nuts, and cocoa powder.
- Add Wet Ingredients: Stir in the corn syrup and rum until the mixture is moist and holds together when pressed.
Form the Balls
- Shape the Mixture: Roll the mixture into 1-inch balls between the palms of your hands.
- Coat the Balls: Roll each rum ball in powdered sugar, cocoa powder, or sprinkles for a decorative finish.
Chill
- Refrigerate: Place the rum balls on a parchment-lined tray and chill for at least 30 minutes before serving to allow the flavors to meld.
- Prep Time: 15 min.
- Cook Time: 30 min.
Nutrition
- Serving Size: 24 rum balls
- Calories: 80 kcal
- Fat: 4g
- Carbohydrates: 10g
- Protein: 1g
Conclusion
I’m so excited for you to try these Rum Balls! There’s something so satisfying about rolling these little treats by hand and seeing them transform into perfect, bite-sized delights. They’re not only easy to make but also incredibly versatile—you can adjust the rum level or experiment with different coatings to make them uniquely yours. And since they store so well, they’re perfect to prepare ahead of time for holiday gatherings or as a thoughtful homemade gift for friends and family.
Once you’ve finished making them, take a moment to admire your handiwork (and maybe sneak a taste or two!). I’d love to hear how you enjoyed the process—whether it brought back memories, became a new holiday tradition, or even just added a little extra fun to your day.
So please, leave a comment, share your experience, or show off your beautiful creations! Don’t forget to snap a photo and tag me on social media—I absolutely love seeing your delicious creations and celebrating all the festive flavors with you. Enjoy every bite!

