Introduction
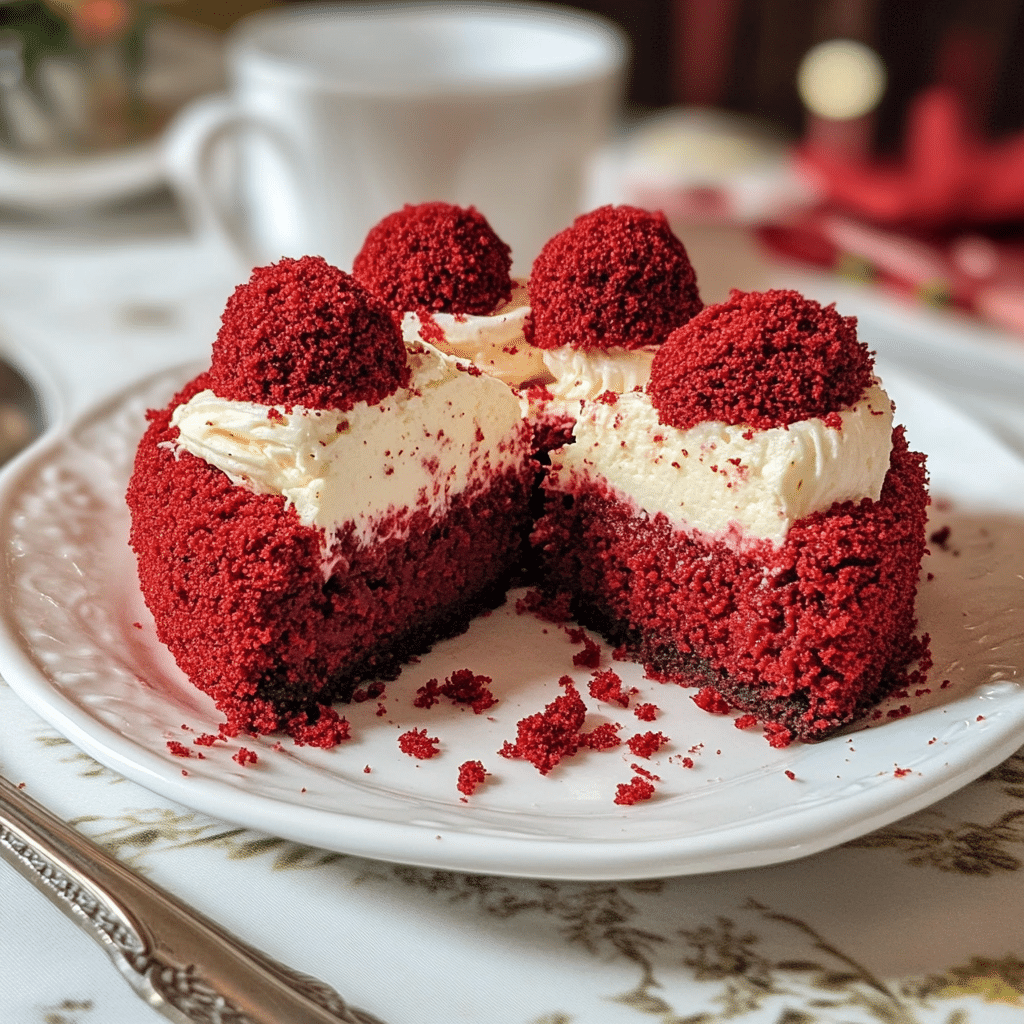
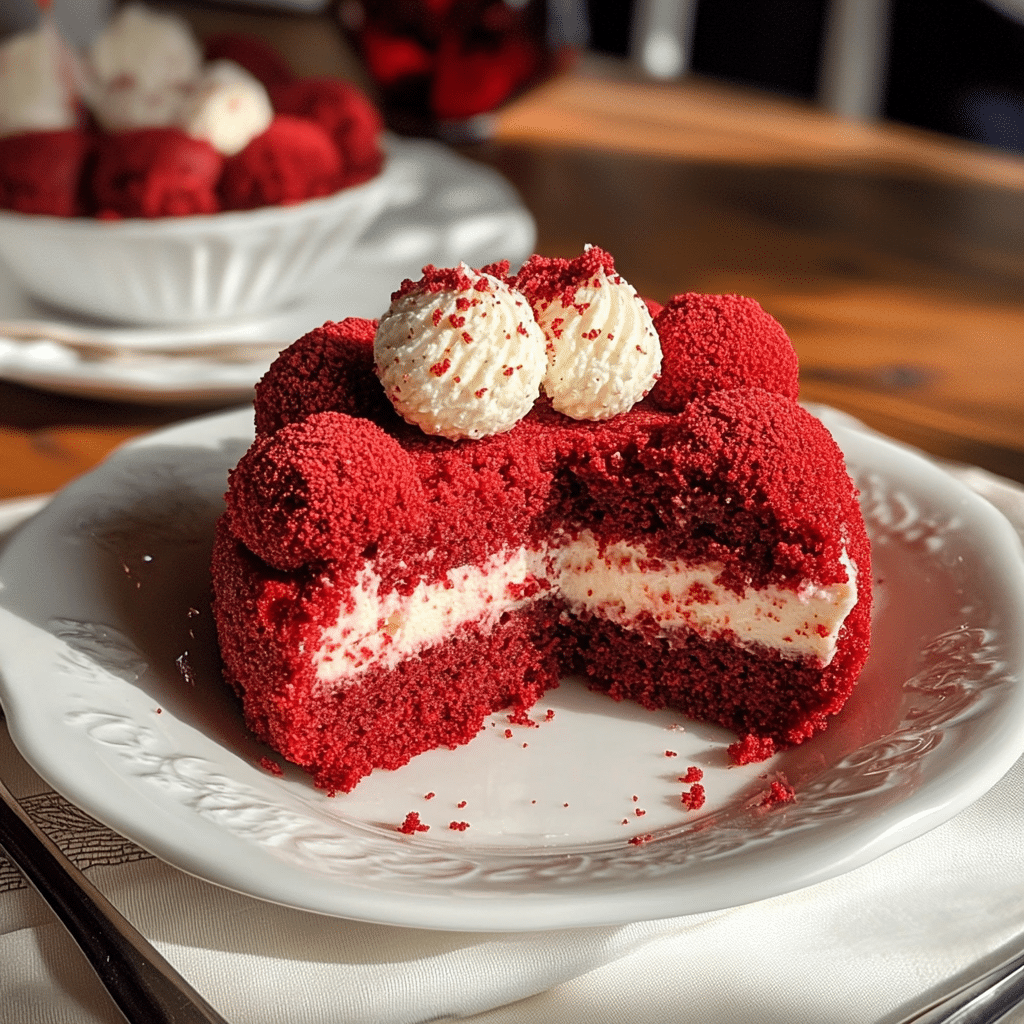
Are you ready to wow your guests with an unforgettable dessert? Red Velvet Cheesecake is the perfect combination of two indulgent favorites—rich, velvety red velvet cake and creamy, decadent cheesecake. This recipe is guaranteed to steal the spotlight at any celebration. Whether you’re hosting a dinner party, celebrating a special occasion, or just craving something luxurious, this dessert will impress everyone. The stunning layers of red velvet and smooth cheesecake create a visual feast, while the contrasting flavors and textures offer a mouthwatering experience. Let’s dive into why Red Velvet Cheesecake is a must-try and how you can make it easily at home!
Why You’ll Love This Recipe
There are so many reasons why Red Velvet Cheesecake is a showstopper dessert:
- Gorgeous Presentation: The vibrant red color and distinct layers make this cheesecake a visual masterpiece that will have everyone talking.
- Unbeatable Flavor: The slight cocoa flavor of the red velvet perfectly complements the rich, tangy cream cheese filling, creating a harmonious balance of tastes.
- Perfect for Any Occasion: Whether it’s a birthday, holiday gathering, or just a weekend treat, this cheesecake fits every occasion.
- Rich and Decadent: Every bite is a heavenly blend of soft, fluffy cake and creamy, smooth cheesecake filling—what could be better?
- Simple Ingredients, Elegant Results: You don’t need complicated ingredients to create a dessert that looks and tastes like it came from a five-star bakery.
- No Water Bath Required: A traditional cheesecake often requires a water bath to prevent cracks, but this red velvet version is much more forgiving and simple to make.
- Make Ahead: This cheesecake can be made in advance, which is perfect for planning ahead and reducing stress before your event.
- Impress Your Guests: The striking layers and flavors will leave your friends and family in awe—no one will believe you made this from scratch!
Preparation Time and Cook Time
- Total Time: 4 hours (including cooling time)
- Preparation Time: 30 minutes
- Cook Time: 1 hour
- Cooling Time: 2 hours
- Chill Time: 2 hours
- Servings: 10-12
- Calories per serving: Approximately 400-450 calories
- Key Nutrients: Fat: 30g, Carbohydrates: 35g, Protein: 7g
Ingredients
For the Red Velvet Cheesecake, gather these ingredients:
the Red Velvet Cake Layer:
- 1 ½ cups all-purpose flour
- 1 cup granulated sugar
- 1 tablespoon unsweetened cocoa powder
- 1 teaspoon baking soda
- ½ teaspoon salt
- 1 large egg
- ½ cup vegetable oil
- 1 teaspoon vanilla extract
- 1 teaspoon white vinegar
- ½ cup buttermilk
- 2 tablespoons red food coloring
For the Cheesecake Layer:
- 3 packages (8 oz each) cream cheese, softened
- 1 cup granulated sugar
- 1 teaspoon vanilla extract
- 3 large eggs, at room temperature
- ½ cup sour cream, at room temperature
- 2 tablespoons all-purpose flour
Ingredient Highlights
- Red Food Coloring: The key to creating the signature red velvet look that makes this dessert so eye-catching.
- Buttermilk: Adds a subtle tanginess that complements the richness of the cake and cheesecake layers.
- Cream Cheese: A must-have for the cheesecake filling, bringing a smooth and rich texture that melts in your mouth.
- Sour Cream: Contributes to the creamy texture of the cheesecake while enhancing its flavor.
Step-by-Step Instructions
Follow these steps for a flawless Red Velvet Cheesecake:
Prepare the Red Velvet Cake Layer
- Preheat Oven: Preheat your oven to 350°F (175°C). Grease and line the bottom of a 9-inch springform pan with parchment paper. This helps with easy removal later.
- Mix Dry Ingredients: In a medium bowl, whisk together the flour, sugar, cocoa powder, baking soda, and salt until fully combined.
- Combine Wet Ingredients: In a separate large bowl, whisk together the egg, vegetable oil, vanilla extract, vinegar, buttermilk, and red food coloring.
- Combine Wet and Dry Ingredients: Gradually add the dry ingredients to the wet ingredients, mixing until smooth and well combined.
- Bake the Cake: Pour the red velvet batter into the prepared pan and smooth the top. Bake for 20-25 minutes, or until a toothpick inserted into the center comes out clean.
- Cool the Cake: Remove from the oven and allow the cake to cool in the pan for 10 minutes. Transfer to a wire rack to cool completely.
Prepare the Cheesecake Layer
- Prepare the Cream Cheese Mixture: In a large bowl, beat the softened cream cheese with an electric mixer until smooth and creamy. Add the sugar and vanilla extract, and beat until well incorporated.
- Add the Eggs: Add the eggs one at a time, beating well after each addition. Be sure not to overmix to prevent air bubbles in the cheesecake.
- Add the Sour Cream and Flour: Mix in the sour cream and flour, beating just until combined. The mixture should be smooth and creamy without lumps.
- Assemble the Cheesecake: Pour the cheesecake mixture over the cooled red velvet cake layer in the springform pan. Use a spatula to spread it evenly.
- Bake the Cheesecake: Bake at 325°F (163°C) for 50-60 minutes, or until the edges are set but the center is still slightly wobbly. This will ensure a creamy, smooth cheesecake filling.
- Cool the Cheesecake: Turn off the oven and let the cheesecake cool inside with the door slightly ajar for 1 hour. This helps prevent cracks from forming. Afterward, transfer to a wire rack and cool completely at room temperature.
- Chill: Once cooled, cover the cheesecake and refrigerate for at least 2 hours, or preferably overnight, to let the flavors set and the cheesecake firm up.
How to Serve
Here are some fun serving suggestions to elevate your Red Velvet Cheesecake experience:
- Slice with Precision: Use a sharp knife dipped in warm water to slice the cheesecake into clean, even pieces for a professional presentation.
- Garnish with Whipped Cream: Top each slice with a dollop of freshly whipped cream or whipped cream cheese for added indulgence.
- Add a Fresh Fruit Topping: Fresh raspberries or strawberries are a perfect match for the richness of the red velvet cheesecake.
- Chocolate Drizzle: Drizzle some melted chocolate or chocolate ganache over the top for an extra layer of decadence.
- Serve on Elegant Platters: Display your cheesecake on a beautiful cake stand for an impressive visual effect.
- Pair with Drinks: Serve with a glass of chilled red wine, coffee, or a creamy milkshake for a perfect dessert pairing.
- Add Crushed Nuts: Sprinkle crushed walnuts or pecans on top for a nutty crunch that contrasts the creamy cheesecake.
- Mini Cheesecakes: For a unique twist, make mini versions of the cheesecake in cupcake tins for individual servings.
- Make a Cheesecake Bar: Set up a cheesecake bar with different toppings, such as chocolate chips, crushed cookies, and fruit, so guests can customize their slice.
- Seasonal Decor: For festive occasions, add seasonal decorations like edible flowers or sprinkles to make it even more special.
Additional Tips
Maximize your Red Velvet Cheesecake experience with these helpful tips:
- Room Temperature Ingredients: Ensure your cream cheese, eggs, and sour cream are at room temperature for a smoother, lump-free filling.
- Prevent Cracks: Avoid overmixing the cheesecake batter to reduce the risk of cracks. Also, letting the cheesecake cool slowly in the oven helps prevent sudden temperature changes that could cause cracking.
- Use a Springform Pan: This type of pan makes it easy to remove the cheesecake without damaging the sides, resulting in a beautiful presentation.
- Chill Overnight: For the best texture and flavor, chill your cheesecake overnight. This allows the layers to set properly and enhances the taste.
- Refrigerate Leftovers: Store any leftover cheesecake in an airtight container in the fridge for up to 5 days.
- Freezing Option: If you want to save a portion for later, slice the cheesecake and wrap individual pieces in plastic wrap, then store them in a freezer-safe bag for up to 3 months.
Recipe Variations
Here are some creative ways to change up your Red Velvet Cheesecake:
- Chocolate Cheesecake Layer: Swap the cheesecake layer with a chocolate cheesecake for a double chocolate experience.
- Red Velvet Cake Pops: Use the red velvet cake and cheesecake filling to make bite-sized cake pops for a fun dessert option.
- Mini Red Velvet Cheesecakes: Make individual-sized cheesecakes by dividing the mixture into mini springform pans or cupcake tins.
- Red Velvet Trifle: Layer crumbled red velvet cake, cheesecake, and whipped cream for a fun twist on the traditional cheesecake.
- Lighter Version: Use low-fat cream cheese and a sugar substitute to reduce the calories in this rich dessert.
faq section
If you’re considering making Red Velvet Cheesecake, you might have a few questions. Below are some common queries along with helpful answers to ensure your dessert turns out perfect!
- Can I make the cheesecake in advance?
- Yes! In fact, making the cheesecake the day before is ideal. This gives the flavors time to meld, and it’s one less thing to worry about on the day of serving. Just make sure to refrigerate it properly until you’re ready to serve.
- Why is my cheesecake cracked?
- Cracking can happen due to overmixing the batter, which incorporates too much air, or from rapid cooling. To avoid this, mix your ingredients on low speed, and cool the cheesecake gradually. Let it cool in the oven with the door slightly ajar for an hour before transferring to a wire rack.
- Can I substitute the red food coloring?
- While red food coloring is what gives the cake its signature hue, you can substitute it with other natural colorants, such as beet juice, though it may change the flavor slightly.
- How do I store leftovers?
- Store any leftover cheesecake in an airtight container in the fridge for up to 5 days. If you have a lot left, you can freeze individual slices wrapped in plastic wrap and stored in a freezer-safe bag for up to 3 months.
- Can I make a gluten-free version?
- Absolutely! Simply swap out the all-purpose flour with a gluten-free flour blend. Be sure to check that the other ingredients, like the baking soda and cream cheese, are gluten-free as well.
Red Velvet Cheesecake
- Total Time: 4 hours, including chilling
Ingredients
For the Red Velvet Cake Layer:
- 1 ½ cups all-purpose flour
- 1 cup granulated sugar
- 1 tablespoon unsweetened cocoa powder
- 1 teaspoon baking soda
- ½ teaspoon salt
- 1 large egg
- ½ cup vegetable oil
- 1 teaspoon vanilla extract
- 1 teaspoon white vinegar
- ½ cup buttermilk
- 2 tablespoons red food coloring
For the Cheesecake Layer:
- 3 packages (8 oz each) cream cheese, softened
- 1 cup granulated sugar
- 1 teaspoon vanilla extract
- 3 large eggs, at room temperature
- ½ cup sour cream, at room temperature
- 2 tablespoons all-purpose flour
Instructions
Prepare the Red Velvet Cake Layer
- Preheat Oven: Preheat your oven to 350°F (175°C). Grease and line the bottom of a 9-inch springform pan with parchment paper. This helps with easy removal later.
- Mix Dry Ingredients: In a medium bowl, whisk together the flour, sugar, cocoa powder, baking soda, and salt until fully combined.
- Combine Wet Ingredients: In a separate large bowl, whisk together the egg, vegetable oil, vanilla extract, vinegar, buttermilk, and red food coloring.
- Combine Wet and Dry Ingredients: Gradually add the dry ingredients to the wet ingredients, mixing until smooth and well combined.
- Bake the Cake: Pour the red velvet batter into the prepared pan and smooth the top. Bake for 20-25 minutes, or until a toothpick inserted into the center comes out clean.
- Cool the Cake: Remove from the oven and allow the cake to cool in the pan for 10 minutes. Transfer to a wire rack to cool completely.
Prepare the Cheesecake Layer
- Prepare the Cream Cheese Mixture: In a large bowl, beat the softened cream cheese with an electric mixer until smooth and creamy. Add the sugar and vanilla extract, and beat until well incorporated.
- Add the Eggs: Add the eggs one at a time, beating well after each addition. Be sure not to overmix to prevent air bubbles in the cheesecake.
- Add the Sour Cream and Flour: Mix in the sour cream and flour, beating just until combined. The mixture should be smooth and creamy without lumps.
- Assemble the Cheesecake: Pour the cheesecake mixture over the cooled red velvet cake layer in the springform pan. Use a spatula to spread it evenly.
- Bake the Cheesecake: Bake at 325°F (163°C) for 50-60 minutes, or until the edges are set but the center is still slightly wobbly. This will ensure a creamy, smooth cheesecake filling.
- Cool the Cheesecake: Turn off the oven and let the cheesecake cool inside with the door slightly ajar for 1 hour. This helps prevent cracks from forming. Afterward, transfer to a wire rack and cool completely at room temperature.
- Chill: Once cooled, cover the cheesecake and refrigerate for at least 2 hours, or preferably overnight, to let the flavors set and the cheesecake firm up.
- Prep Time: 30 min.
- Cooling Time: 2 hrs
- Cook Time: 1 hr
Nutrition
- Serving Size: 10-12 servings
- Calories: 400-450 kcal
- Fat: 30g
- Carbohydrates: 35g
- Protein: 7g
Conclusion
This Red Velvet Cheesecake is truly a show-stopping dessert that combines elegance with flavor. Its stunning red velvet cake and creamy cheesecake layers will leave everyone at the table amazed. Whether it’s a special occasion or just because, this cheesecake is sure to impress. Don’t forget to snap a photo and tag me on social media—I love seeing your delicious creations!

