Introduction
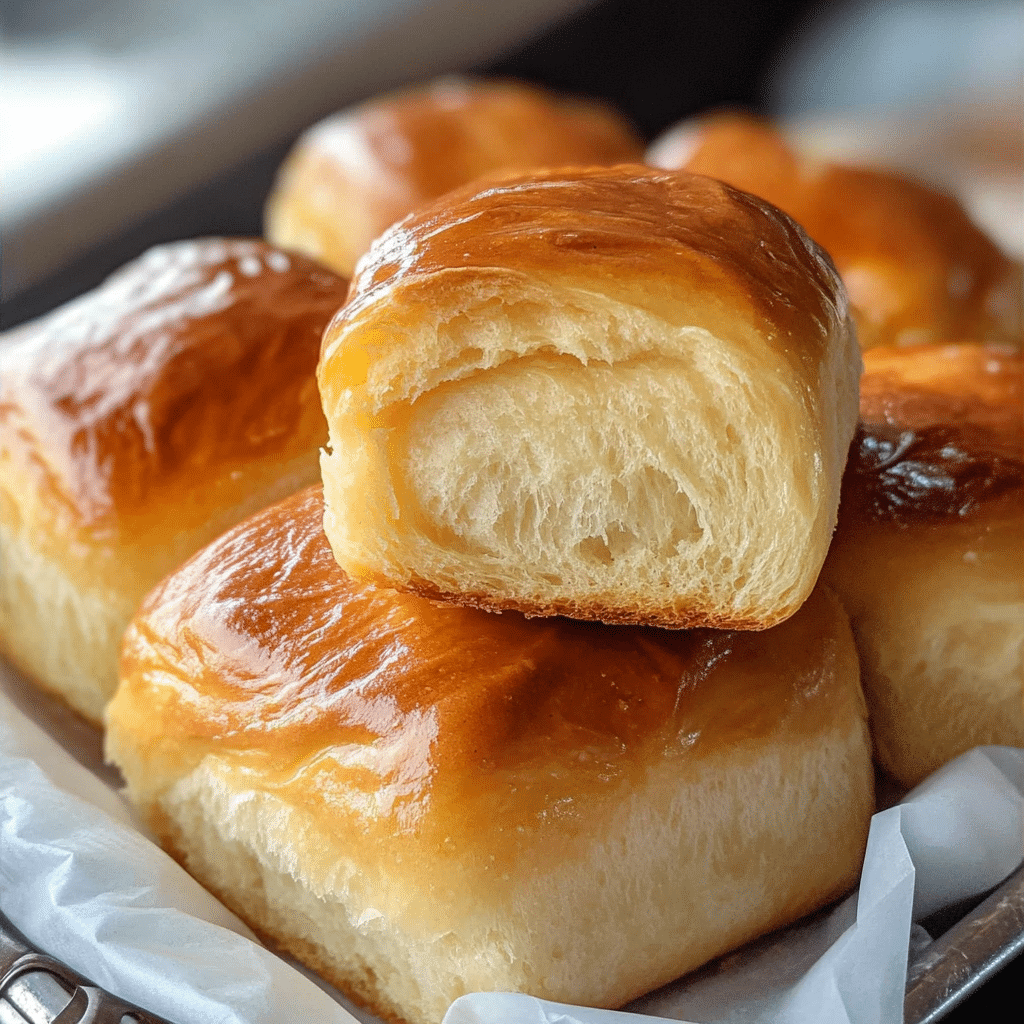
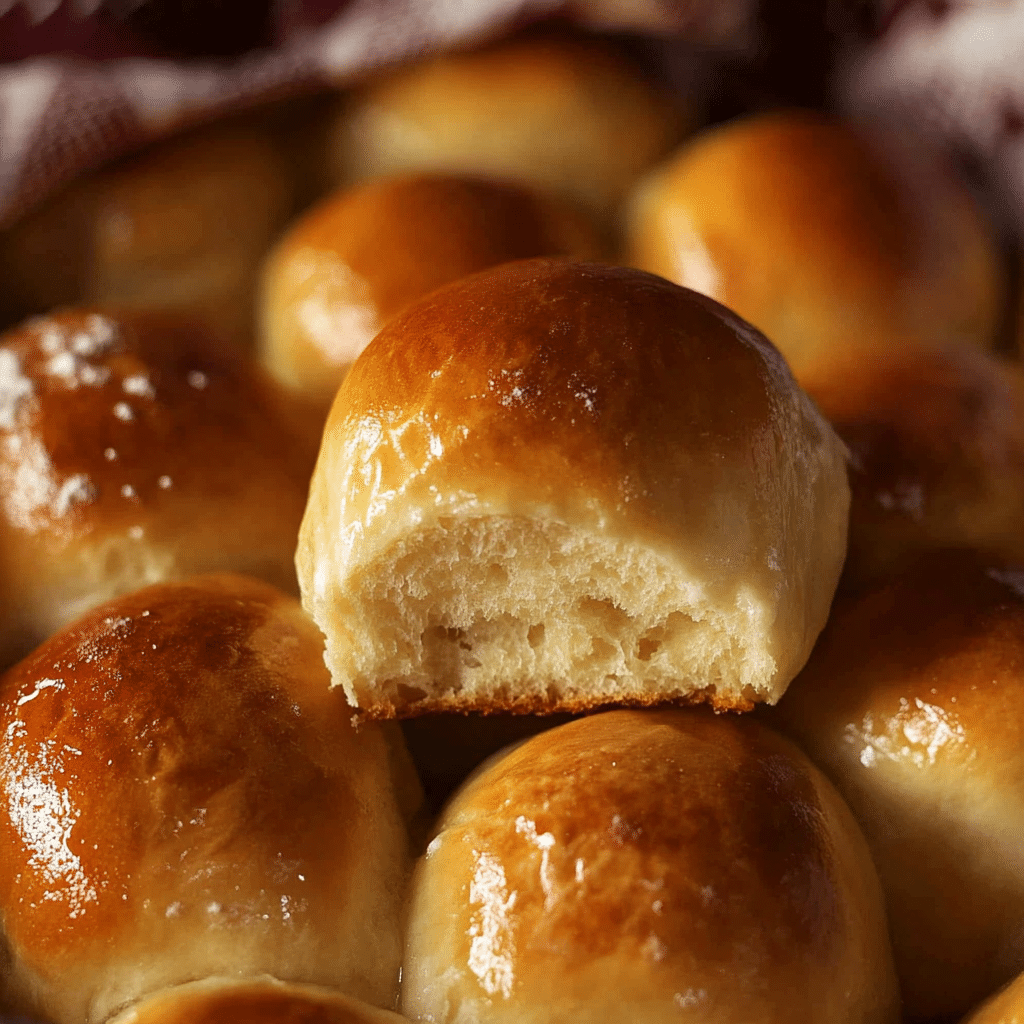
Ah, Old Fashioned Yeast Rolls—they’re a true classic that brings comfort and warmth to any meal. These fluffy, golden rolls are soft on the inside with a delicate crust, making them the perfect addition to any dinner table. Whether you’re serving them with a holiday feast, a cozy family dinner, or just because you’re craving something homemade, these rolls will never disappoint. There’s something special about the smell of freshly baked bread wafting through your home, and the best part is, these rolls are surprisingly easy to make! With a few simple ingredients and some time for the dough to rise, you’ll have the perfect batch of yeast rolls ready in no time. Let’s dive into why you’ll love these rolls and how to make them from scratch!
Why You’ll Love This Recipe
There are so many reasons to fall in love with these Old Fashioned Yeast Rolls:
- Fluffy & Soft: These rolls are pillowy soft with just the right amount of fluff, making them perfect for sopping up gravy or mopping up a delicious stew.
- Buttery Goodness: With just the right amount of butter, these rolls have a rich, melt-in-your-mouth flavor that will have everyone coming back for more.
- Made From Scratch: There’s nothing like the satisfaction of baking bread from scratch—plus, the smell of them baking will make your house smell incredible!
- Versatile: These rolls are a perfect side for any meal, from Sunday roasts to weeknight dinners.
- Simple Ingredients: You don’t need fancy ingredients—just flour, yeast, butter, and a little patience for the dough to rise.
- Easy to Customize: Add herbs or cheese to make them your own, or keep them simple for a traditional taste.
- Perfect for Sharing: These rolls are ideal for family gatherings and dinner parties. They’re a crowd-pleaser for sure!
- Great for Meal Prep: You can make the dough ahead of time and bake them fresh when you need them.
- Classic Comfort: Sometimes, nothing beats the simplicity and goodness of a classic homemade roll.
Preparation Time and Cook Time
- Total Time: 2 hours 30 minutes
- Preparation Time: 20 minutes
- Cook Time: 15-20 minutes
- Rise Time: 1 hour 30 minutes
- Servings: 12 rolls
- Calories per roll: Approximately 150 calories
- Key Nutrients: Protein: 3g, Carbohydrates: 30g, Fat: 4g, Fiber: 1g
Ingredients
Here’s everything you’ll need to make your Old Fashioned Yeast Rolls:
For the Dough:
- 2 1/4 teaspoons active dry yeast (one packet)
- 1 cup warm water (around 110°F/43°C)
- 1/2 cup milk, warmed
- 1/4 cup sugar
- 1/4 cup butter, melted
- 1 teaspoon salt
- 4 cups all-purpose flour, plus extra for rolling
- 1 egg (for the dough)
For the Topping:
- 2 tablespoons butter, melted (for brushing on top)
Ingredient Highlights
- Yeast: The key to these rolls’ softness and fluffiness. It gives them that wonderful rise and light texture.
- Sugar: Helps activate the yeast and adds a touch of sweetness.
- Milk: Adds richness and moisture to the dough.
- Butter: Gives the rolls that rich, buttery flavor we all love.
- Flour: The foundation of the dough, creating the perfect texture for the rolls.
Step-by-Step Instructions
Now, let’s get started on making these Old Fashioned Yeast Rolls. Don’t worry if you’re new to working with yeast—just follow these simple steps, and you’ll be rolling in no time!
Prepare the Dough
- Activate the Yeast: Start by placing the warm water in a small bowl. Sprinkle the yeast and sugar over the water, then stir to combine. Let it sit for about 5 minutes until it becomes foamy. This is how you know your yeast is active and ready to go!
- Mix Wet Ingredients: In a large mixing bowl, combine the warmed milk, melted butter, and salt. Stir to mix everything together.
- Add the Yeast Mixture: Once the yeast has activated, add the foamy yeast mixture to the milk and butter mixture. Stir until well combined.
- Add the Flour: Gradually add the flour, one cup at a time, mixing as you go. Once the dough starts to come together, turn it out onto a floured surface and knead it for about 5 minutes, or until smooth and elastic.
- Let It Rise: Place the dough in a greased bowl, cover it with a clean kitchen towel, and let it rise in a warm place for about 1 hour, or until it has doubled in size. This is the magic of yeast—watch it work its wonders!
Shape the Rolls
- Preheat the Oven: Once your dough has risen, preheat your oven to 375°F (190°C).
- Divide and Roll: Punch down the dough to release the air bubbles. Then, divide it into 12 equal portions. Roll each portion into a ball by gently tucking the edges underneath, creating a smooth top. Place each ball in a greased 9×13-inch baking dish, making sure the rolls are just touching each other.
- Second Rise: Cover the baking dish with a towel and let the rolls rise for another 30 minutes, until they’re puffy and touching each other.
Bake the Rolls
- Brush with Butter: Before baking, brush the tops of the rolls with a little melted butter. This gives them a beautiful golden color and a rich flavor.
- Bake: Place the rolls in the oven and bake for 15-20 minutes, or until they are golden brown on top. Your kitchen will smell amazing while they bake!
- Cool: Once done, remove the rolls from the oven and let them cool slightly before serving. Don’t forget to brush them with a little extra melted butter for that irresistible shine.
How to Serve
There are so many ways to enjoy your freshly baked Old Fashioned Yeast Rolls. Here are a few ideas:
- As a Side Dish: These rolls are the perfect complement to any meal, from a Sunday roast to a simple pasta dish. Serve them with butter, honey, or your favorite spread.
- Make Sandwiches: Use the rolls as sandwich buns! They’re the perfect size for making classic sandwiches or even sliders.
- Serve with Soup or Stew: These rolls are ideal for dunking into a hearty soup or stew. They’ll soak up all that delicious broth and leave you craving more.
- Breakfast Rolls: Warm them up and serve with a dollop of jam, jelly, or butter for a delightful breakfast.
- Gift Them: Pack them up in a cute basket and give them as a thoughtful gift to a friend or family member. Who wouldn’t love homemade rolls?
Additional Tips
These helpful tips will make sure your rolls turn out perfectly every time:
- Use Warm, Not Hot Water: If your water is too hot, it can kill the yeast, so make sure it’s just warm to the touch.
- Let the Dough Rise in a Warm Place: For the best results, place your dough in a warm, draft-free area to rise. A turned-off oven with the light on works great!
- Knead Gently: Don’t overwork the dough. Knead it just enough to get a smooth texture.
- Check for Doneness: If you’re unsure if the rolls are done, tap them lightly on the top. They should sound hollow if they’re fully baked.
- Brush with Butter: Don’t skip brushing the tops of the rolls with butter right before and after baking. It gives them that irresistible flavor and golden shine.
- Make-Ahead: You can make the dough the day before and refrigerate it overnight. Just let it come to room temperature before shaping and baking.
Recipe Variations
Want to mix things up? Here are some ideas for variations:
- Herbed Rolls: Add chopped fresh herbs like rosemary or thyme to the dough for a savory twist.
- Cheese Rolls: Incorporate shredded cheese into the dough, or sprinkle some on top before baking for cheesy goodness.
- Garlic Rolls: Brush the rolls with garlic butter after baking for a garlic-infused flavor that’s irresistible.
- Whole Wheat Rolls: Substitute part of the all-purpose flour with whole wheat flour for a heartier, healthier option.
Freezing and Storage
To keep your rolls fresh:
- Storage: Store leftover rolls in an airtight container at room temperature for up to 3 days.
- Freezing: You can freeze the rolls after baking. Allow them to cool completely, then wrap them tightly in plastic wrap and place them in a freezer-safe bag. To reheat, simply warm them in the oven for a few minutes.
- Make-Ahead: If you want to save time, you can prepare the dough ahead of time and refrigerate it overnight. Then, just shape, rise, and bake the next day!
faq section
Making Old Fashioned Yeast Rolls for the first time? Or maybe you’re wondering about a few tips and tricks to make them even better? Don’t worry, I’ve got you covered! Here are some frequently asked questions that might help answer any doubts you have.
- Can I use instant yeast instead of active dry yeast?
Yes, you can! If you’re using instant yeast, you don’t need to activate it in warm water first. Simply add it directly to the flour with the other dry ingredients and proceed as usual. - Why didn’t my dough rise?
If your dough didn’t rise, there could be a few reasons:- The yeast might have been expired or not properly activated.
- The water was either too hot or too cold, killing the yeast.
- The room was too cool—yeast loves warmth! Try letting your dough rise in a warmer spot.
- Can I make these rolls ahead of time?
Absolutely! You can prepare the dough the day before and refrigerate it overnight. Just let it come to room temperature before shaping and baking. - How do I store leftover rolls?
Keep your rolls in an airtight container at room temperature for up to 3 days. For longer storage, you can freeze them and reheat when needed. - Can I add herbs or garlic to the dough?
Yes! Feel free to add herbs like rosemary or thyme, or even garlic powder, to the dough to give it an extra burst of flavor. Garlic butter brushed on top after baking also adds a lovely touch. - Why are my rolls dense instead of fluffy?
This can happen if the dough wasn’t kneaded enough to develop the gluten or if it wasn’t given enough time to rise. Be sure to knead the dough until it’s smooth and elastic, and give it enough time to rise in a warm spot.
Old Fashioned Yeast Rolls
- Total Time: 2 hours 30 minutes
Ingredients
For the Dough:
- 2 1/4 teaspoons active dry yeast (one packet)
- 1 cup warm water (around 110°F/43°C)
- 1/2 cup milk, warmed
- 1/4 cup sugar
- 1/4 cup butter, melted
- 1 teaspoon salt
- 4 cups all-purpose flour, plus extra for rolling
- 1 egg (for the dough)
For the Topping:
- 2 tablespoons butter, melted (for brushing on top)
Instructions
Prepare the Dough
- Activate the Yeast: Start by placing the warm water in a small bowl. Sprinkle the yeast and sugar over the water, then stir to combine. Let it sit for about 5 minutes until it becomes foamy. This is how you know your yeast is active and ready to go!
- Mix Wet Ingredients: In a large mixing bowl, combine the warmed milk, melted butter, and salt. Stir to mix everything together.
- Add the Yeast Mixture: Once the yeast has activated, add the foamy yeast mixture to the milk and butter mixture. Stir until well combined.
- Add the Flour: Gradually add the flour, one cup at a time, mixing as you go. Once the dough starts to come together, turn it out onto a floured surface and knead it for about 5 minutes, or until smooth and elastic.
- Let It Rise: Place the dough in a greased bowl, cover it with a clean kitchen towel, and let it rise in a warm place for about 1 hour, or until it has doubled in size. This is the magic of yeast—watch it work its wonders!
Shape the Rolls
- Preheat the Oven: Once your dough has risen, preheat your oven to 375°F (190°C).
- Divide and Roll: Punch down the dough to release the air bubbles. Then, divide it into 12 equal portions. Roll each portion into a ball by gently tucking the edges underneath, creating a smooth top. Place each ball in a greased 9×13-inch baking dish, making sure the rolls are just touching each other.
- Second Rise: Cover the baking dish with a towel and let the rolls rise for another 30 minutes, until they’re puffy and touching each other.
Bake the Rolls
- Brush with Butter: Before baking, brush the tops of the rolls with a little melted butter. This gives them a beautiful golden color and a rich flavor.
- Bake: Place the rolls in the oven and bake for 15-20 minutes, or until they are golden brown on top. Your kitchen will smell amazing while they bake!
- Cool: Once done, remove the rolls from the oven and let them cool slightly before serving. Don’t forget to brush them with a little extra melted butter for that irresistible shine.
- Prep Time: 20 min.
- Rise time: 1 hour and 30 minutes
- Cook Time: 15-20 min.
Nutrition
- Serving Size: 12 rolls
- Calories: 150 kcal
- Fat: 4g
- Carbohydrates: 30g
- Fiber: 1g
- Protein: 3g
Conclusion
If you’ve never tried making homemade Old Fashioned Yeast Rolls, now is the time! These rolls are soft, buttery, and perfect for any meal. From the comforting smell of fresh bread filling your home to the joy of biting into that soft, warm roll, these are the kind of rolls that make every meal feel special. So, roll up your sleeves, gather your ingredients, and get ready for a batch of homemade goodness that everyone will love.
Don’t forget to snap a photo and tag me on social media—I love seeing your delicious creations!

