Introduction
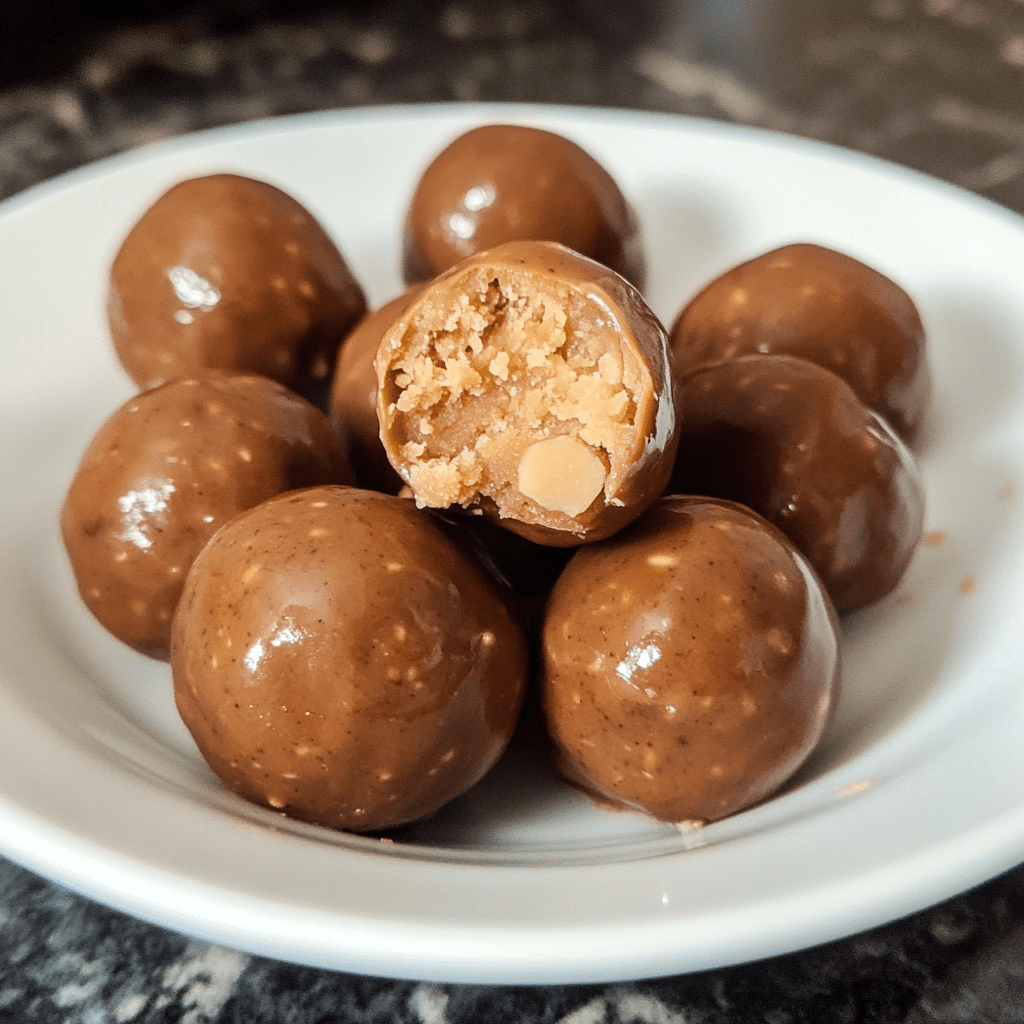
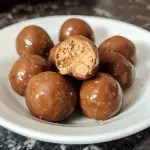
Get ready for a nostalgic treat with Old-Fashioned Peanut Butter Balls! These delightful bites are a classic dessert that never goes out of style. With their creamy peanut butter centers coated in rich, smooth chocolate, they’re the perfect combination of sweet and salty indulgence. Whether you remember them from childhood family gatherings or are discovering them for the first time, these peanut butter balls are sure to become a household favorite.
What makes these treats truly special is their simplicity. With just a handful of ingredients and no baking required, they’re easy enough for beginners but delicious enough to impress everyone. Plus, they’re wonderfully versatile—you can roll them in sprinkles, crushed nuts, or leave them plain for a classic look. They’re perfect for holiday parties, potlucks, or just a fun kitchen activity with the kids.
One bite of these peanut butter balls, and you’ll be transported to the warm, comforting flavors of yesteryear. The rich peanut butter filling, made with a touch of butter and powdered sugar, is the star of the show. Dipped in a silky layer of chocolate, they’re irresistible.
These old-fashioned treats are also a great option for make-ahead desserts. Store them in the fridge for a quick snack or festive gift—they’re guaranteed to be a hit wherever they go. So grab your mixing bowl and get ready to whip up a batch of these timeless sweets. Your taste buds will thank you!
Why You’ll Love This Recipe
Here’s why Old Fashioned Peanut Butter Balls will quickly become your favorite treat:
- Classic Flavor Combo: Peanut butter and chocolate—what’s not to love?
- No-Bake Simplicity: No oven required, making it a perfect treat for hot days or busy schedules.
- Kid-Friendly: Little ones love helping roll the balls and dip them in chocolate.
- Make-Ahead Friendly: These store beautifully, making them perfect for gift-giving or prepping ahead of time.
- Customizable: From toppings to fillings, there’s so much room for creativity.
- Perfect for Sharing: Ideal for potlucks, holiday gatherings, or just to brighten someone’s day.
Preparation Time and Yield
- Total Time: 30 minutes
- Preparation Time: 20 minutes
- Chilling Time: 10 minutes
- Servings: 24 peanut butter balls
- Calories per ball: Approximately 150 calories
Ingredients
You’ll need just a few pantry staples to whip up these tasty treats:
For the Peanut Butter Mixture:
- 1 ½ cups creamy peanut butter
- ½ cup unsalted butter, softened
- 1 teaspoon vanilla extract
- 3 cups powdered sugar
For the Chocolate Coating:
- 2 cups semi-sweet chocolate chips
- 1 tablespoon coconut oil (optional, for smoother coating)
Optional Toppings:
- Sprinkles
- Crushed nuts
- Sea salt flakes
Ingredient Highlights
- Creamy Peanut Butter: Provides the rich, nutty base for the balls. Stick to a traditional brand for best results.
- Powdered Sugar: Sweetens and binds the peanut butter mixture.
- Semi-Sweet Chocolate Chips: Creates a perfectly balanced coating without being overly sweet.
Step-by-Step Instructions
Follow these simple steps to create your Old Fashioned Peanut Butter Balls:
1 Make the Peanut Butter Mixture
- Combine Ingredients: In a large mixing bowl, beat together the peanut butter, softened butter, and vanilla extract until smooth and creamy.
- Add Powdered Sugar: Gradually mix in the powdered sugar, one cup at a time, until the mixture forms a stiff, dough-like consistency.
2 Roll the Balls
- Form the Balls: Scoop out tablespoon-sized portions of the mixture and roll them into smooth balls between your palms.
- Chill: Place the peanut butter balls on a baking sheet lined with parchment paper and chill in the refrigerator for about 10 minutes.
3 Prepare the Chocolate Coating
- Melt the Chocolate: In a microwave-safe bowl, melt the chocolate chips and coconut oil (if using) in 30-second increments, stirring between each, until smooth.
- Dip the Balls: Using a fork or toothpick, dip each peanut butter ball into the melted chocolate, ensuring it’s fully coated. Allow excess chocolate to drip off before placing it back on the parchment-lined sheet.
4 Add Toppings (Optional)
- Decorate: While the chocolate is still wet, sprinkle on toppings like crushed nuts, sprinkles, or a pinch of sea salt.
5 Chill and Serve
- Set the Chocolate: Return the coated peanut butter balls to the refrigerator for about 10 minutes, or until the chocolate is firm.
- Enjoy: Serve immediately or store for later!

how to serve
There are so many ways to present your peanut butter balls:
- On a Dessert Tray: Pair with cookies, brownies, or fudge for a festive platter.
- Wrapped as Gifts: Package in decorative tins or bags for a thoughtful homemade gift.
- With Coffee or Tea: Serve alongside your favorite hot beverage for a cozy treat.
- Mini Dessert Cups: Place each ball in a decorative mini cupcake liner for individual servings.
Additional Tips
Here are some handy tips to ensure perfect peanut butter balls every time:
- Use Room Temperature Butter: Softened butter blends more smoothly into the peanut butter mixture.
- Chill Before Dipping: Cold peanut butter balls hold their shape better during dipping.
- Thin the Chocolate: If the chocolate seems too thick, add a teaspoon of coconut oil or vegetable shortening.
- Work in Batches: Keep half the balls in the fridge while you dip the rest to prevent them from softening.
- Store Properly: Store in an airtight container to keep them fresh longer.
Recipe Variations
Feel free to get creative with these fun twists:
- Crunchy Peanut Butter: Swap creamy for crunchy peanut butter for added texture.
- Chocolate Peanut Butter: Add cocoa powder to the peanut butter mixture for double chocolate flavor.
- Vegan Option: Use vegan chocolate chips and plant-based butter for a dairy-free treat.
- Add Fillings: Place a mini marshmallow or whole almond in the center of each ball for a surprise.
- Drizzle Effect: After dipping, drizzle with white chocolate for an elegant touch.
- Holiday Theme: Use colored sprinkles to match any festive occasion.
Freezing and Storage
Proper storage ensures your peanut butter balls stay fresh and delicious:
- Refrigerate: Store in an airtight container in the refrigerator for up to two weeks.
- Freeze for Later: Place balls in a single layer in a freezer-safe container for up to three months. Thaw in the fridge before serving.
Special Equipment
To make this recipe even easier, consider having these tools on hand:
- Mixing bowl
- Parchment paper
- Baking sheet
- Microwave-safe bowl
- Fork or dipping tool
- Offset spatula – Ideal for spreading frosting smoothly.
- Cooling rack – Allows cupcakes to cool evenly without getting soggy on the bottom.
- Cupcake liners – Adds color and keeps cupcakes from sticking to the pan.
- Gel food coloring – For vibrant frosting colors without affecting the texture.Decorating turntable – Makes frosting and decorating cupcakes easier and more precise.
- Paring knife – Handy for shaping candies or cookies for decoration.
- Kitchen scale – Ensures accurate ingredient measurements.
- Silicone baking mat – Great for rolling out and cutting fondant if adding custom decorations.
- Pastry brushes – Useful for applying edible glitter or brushing off excess crumbs.
- Tweezers (food-safe) – Makes placing tiny candies or sprinkles on cupcakes super precise.
- Cupcake carrier – Protects your creations during transport.
FAQ Section
Here are some common questions about Old Fashioned Peanut Butter Balls:
- Can I make these ahead of time?
Yes! These are great for making in advance since they store beautifully. - Do I need coconut oil for the chocolate coating?
No, but it helps make the coating smoother and shinier. - What type of peanut butter works best?
Regular creamy peanut butter works best. Avoid natural peanut butter as it can be too oily. - Can I freeze them after dipping?
Absolutely! Just thaw them in the fridge before serving. - Can I double the recipe?
Definitely! This recipe scales easily for larger batches. - What’s the best way to store leftovers?
- Store in an airtight container at room temperature for up to three days, or refrigerate in warm climates.
- Can I make mini cupcakes instead?
- Sure! Adjust the baking time to 10-12 minutes and use smaller cookies for the hats.
- Can I double the recipe?
- Yes! Just double the ingredients and bake in batches if needed.
- What’s a fun way to display these cupcakes?
- Use a tiered dessert stand, or arrange them on a spooky-themed platter for extra flair.
Old Fashioned Peanut Butter Balls
- Total Time: 30 min.
Ingredients
For the Peanut Butter Mixture:
- 1 ½ cups creamy peanut butter
- ½ cup unsalted butter, softened
- 1 teaspoon vanilla extract
- 3 cups powdered sugar
For the Chocolate Coating:
- 2 cups semi-sweet chocolate chips
- 1 tablespoon coconut oil (optional, for smoother coating)
Optional Toppings:
- Sprinkles
- Crushed nuts
- Sea salt flakes
Instructions
Step 1: Make the Peanut Butter Mixture
- Combine Ingredients: In a large mixing bowl, beat together the peanut butter, softened butter, and vanilla extract until smooth and creamy.
- Add Powdered Sugar: Gradually mix in the powdered sugar, one cup at a time, until the mixture forms a stiff, dough-like consistency.
Step 2: Roll the Balls
- Form the Balls: Scoop out tablespoon-sized portions of the mixture and roll them into smooth balls between your palms.
- Chill: Place the peanut butter balls on a baking sheet lined with parchment paper and chill in the refrigerator for about 10 minutes.
Step 3: Prepare the Chocolate Coating
- Melt the Chocolate: In a microwave-safe bowl, melt the chocolate chips and coconut oil (if using) in 30-second increments, stirring between each, until smooth.
- Dip the Balls: Using a fork or toothpick, dip each peanut butter ball into the melted chocolate, ensuring it’s fully coated. Allow excess chocolate to drip off before placing it back on the parchment-lined sheet.
Step 4: Add Toppings (Optional)
- Decorate: While the chocolate is still wet, sprinkle on toppings like crushed nuts, sprinkles, or a pinch of sea salt.
Step 5: Chill and Serve
- Set the Chocolate: Return the coated peanut butter balls to the refrigerator for about 10 minutes, or until the chocolate is firm.
- Enjoy: Serve immediately or store for later!
Serving Ideas
There are so many ways to present your peanut butter balls:
- On a Dessert Tray: Pair with cookies, brownies, or fudge for a festive platter.
- Wrapped as Gifts: Package in decorative tins or bags for a thoughtful homemade gift.
- With Coffee or Tea: Serve alongside your favorite hot beverage for a cozy treat.
- Mini Dessert Cups: Place each ball in a decorative mini cupcake liner for individual servings.
- Prep Time: 20 min.
- Chill Time: 20 min.
Nutrition
- Serving Size: 24 peanut butter balls
- Calories: 150 kcal
Conclusion
Old Fashioned Peanut Butter Balls are a timeless dessert that brings a perfect blend of sweet nostalgia and rich flavor to your table. These no-bake delights feature creamy, nutty peanut butter centers coated in smooth, decadent chocolate, making them a treat that’s loved by both kids and adults alike. Whether you’re whipping up a batch for a holiday celebration, a party, or just a little indulgence at home, they’re always a crowd-pleaser.
What makes these treats even more special is their versatility. You can experiment with different coatings like milk chocolate, dark chocolate, or even white chocolate for a festive twist. For an extra flair, try topping them with crushed nuts, colorful sprinkles, shredded coconut, or a drizzle of contrasting chocolate. You can even make them more personal by customizing the size—whether you like bite-sized morsels or larger, more indulgent treats.
These peanut butter balls are also a joy to make, especially if you involve kids or loved ones in the process. Rolling the peanut butter mixture into perfect spheres and dipping them into melted chocolate is not only fun but also a wonderful way to create memories in the kitchen.
If you’re planning to gift these treats, packaging them in decorative boxes or bags adds a thoughtful touch that’s sure to impress. They’re a fantastic way to spread sweetness and joy during any season

