Introduction
No-Bake Spider Cookies: A Fun and Easy Treat
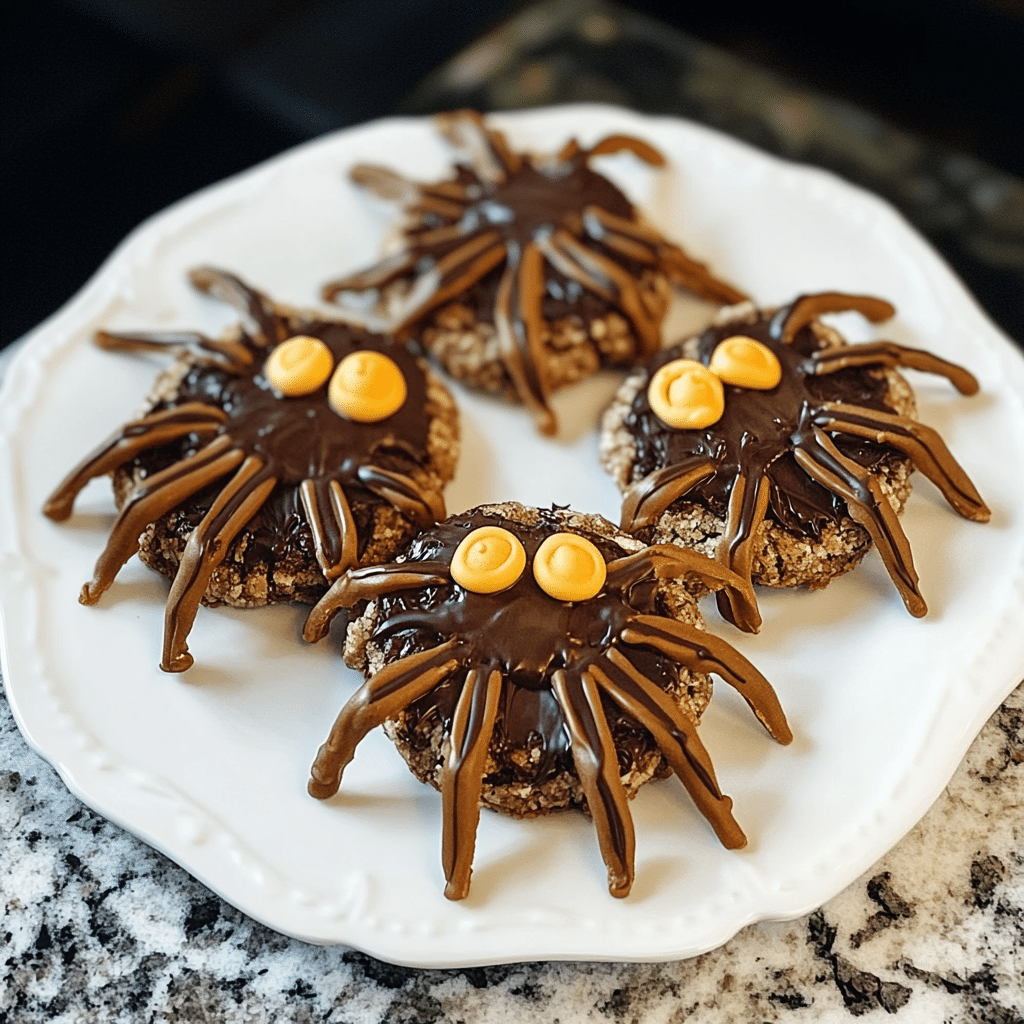
Hey there! Are you ready to add a little spooky fun to your day? I’ve got the perfect recipe for you: No-Bake Spider Cookies! These little treats are a blast to make, and they’re so easy that even if you’re new to the kitchen, you’ll feel like a pro. Trust me, you won’t need any fancy baking skills here—just some simple ingredients and a bit of creativity!
I love this recipe not just for how quick and easy it is but also for the nostalgia it brings. My kids and I started making these cookies every Halloween, and now it’s a tradition we look forward to each year. There’s something magical about watching chocolate and peanut butter come together, then transforming into cute little spiders. Plus, the crunchy pretzels add the perfect texture, making each bite a delightful mix of flavors.
What I adore most is how versatile these cookies can be. You can make them as spooky or as fun as you want, and the kids can really get involved in the decorating. It’s a wonderful way to spend time together in the kitchen, sharing laughs and creating memories. So, grab your ingredients, roll up your sleeves, and let’s get started on these No-Bake Spider Cookies. You’ll impress everyone with your culinary skills, and who knows, you might even become the go-to person for all things spooky treats! Let’s dive in!
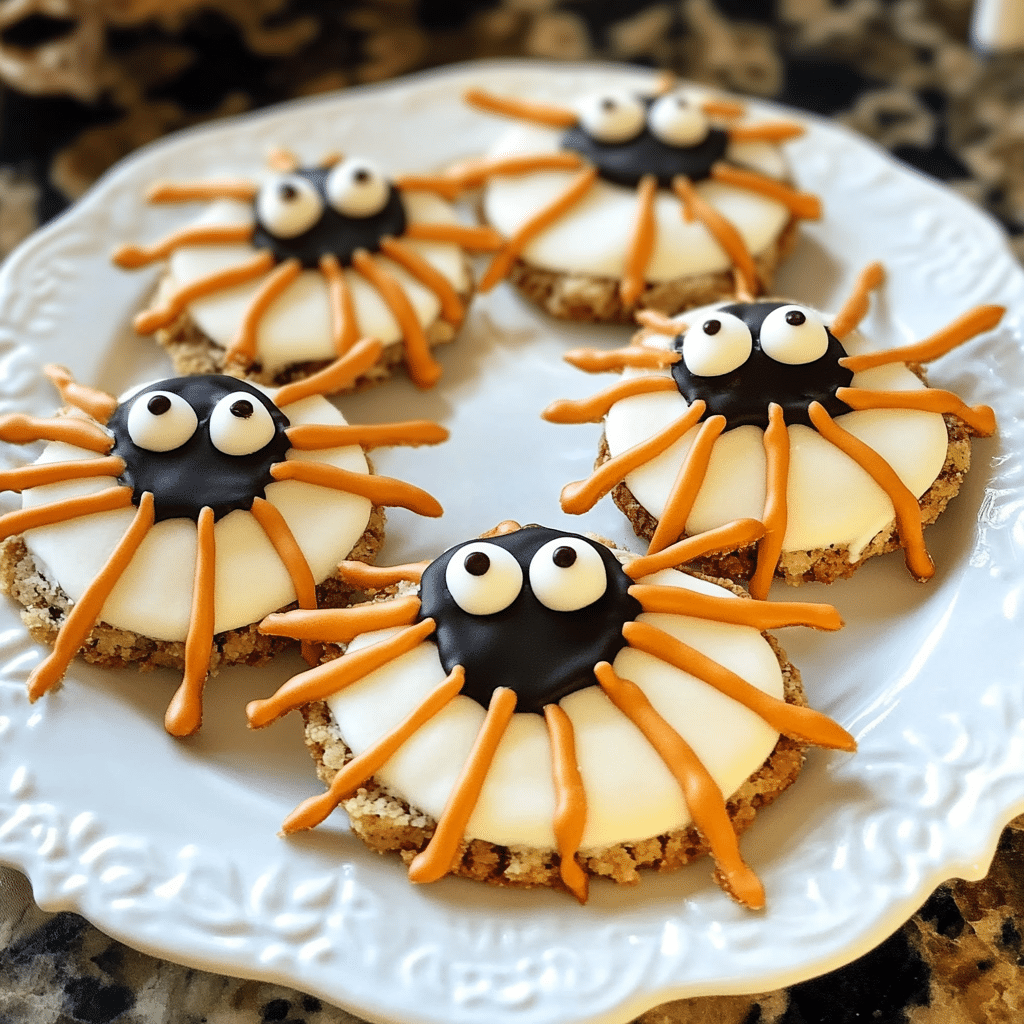
Why You’ll Love This Recipe
Here are several reasons to fall in love with No-Bake Spider Cookies:
- Easy and Quick: No baking required, making these cookies a breeze to prepare.
- Fun and Creative: The spider shape makes them a hit with kids and adds a playful element to your dessert table.
- Deliciously Peanut Butter: The combination of peanut butter and chocolate creates a mouthwatering flavor.
- Customizable: Feel free to switch up the toppings or shapes to match your preferences.
- Great for Any Skill Level: Perfect for novice cooks and experienced bakers alike.
- Make-Ahead Option: These cookies can be made ahead of time and stored for later enjoyment.
- Perfect for Parties: A fun and unique treat to bring to gatherings or share with friends.
- No Special Equipment Needed: You can create these cookies with just a few basic kitchen tools.
- Kid-Friendly: Get the little ones involved in the fun of assembling their own spider cookies.
- Satisfyingly Crunchy: The pretzel legs add a delightful crunch to each bite.
Preparation Time
- Total Time: 30 minutes
- Preparation Time: 20 minutes
- Chilling Time: 10 minutes
- Servings: 12 cookies
- Calories per cookie: Approximately 150 calories
- Key Nutrients: Fiber: 2g, Fat: 8g, Carbohydrates: 16g, Protein: 3g
Ingredients
Gather the following ingredients to create your No-Bake Spider Cookies:
For the Cookies:
- 1 cup creamy peanut butter
- 1 cup powdered sugar
- 1 cup graham cracker crumbs
- 1 cup chocolate chips (for melting)
For the Spider Legs:
- 24 pretzel sticks
- 24 chocolate chips (for the eyes)
Ingredient Highlights
- Peanut Butter: Provides a rich and creamy base with a delicious nutty flavor.
- Graham Cracker Crumbs: Adds a delightful crunch and sweetness to the cookies.
- Chocolate Chips: Used for both melting and as eyes, enhancing the overall chocolatey goodness.
Step-by-Step Instructions
Follow these steps to create your No-Bake Spider Cookies:
Prepare the Cookie Mixture
- Mix Ingredients: In a mixing bowl, combine the peanut butter, powdered sugar, and graham cracker crumbs. Mix until well combined and a dough forms.
- Shape the Cookies: Using your hands, form small balls of the mixture (about 1 inch in diameter) and place them on a baking sheet lined with parchment paper.
Melt the Chocolate
- Melt Chocolate Chips: In a microwave-safe bowl, melt the chocolate chips in 30-second intervals, stirring in between until smooth and fully melted.
Assemble the Spiders
- Dip Cookies: Using a fork, dip each cookie ball into the melted chocolate, making sure to coat it evenly. Place the chocolate-covered cookie back on the parchment paper.
- Add Legs: Quickly insert four pretzel sticks into each side of the cookie for spider legs before the chocolate sets.
- Create Eyes: Place two chocolate chips on top of each cookie for the spider’s eyes.
Chill the Cookies
- Chill: Place the cookies in the refrigerator for about 10 minutes to allow the chocolate to set.
How to Serve
Here are some fun serving ideas for your No-Bake Spider Cookies:
- Display on a Platter: Arrange cookies on a decorative platter for an eye-catching presentation.
- Use as Party Treats: Bring these cookies to gatherings for a fun snack.
- Serve with Milk: Pair with a glass of milk for a classic combination.
- Create a Cookie Jar: Fill a jar with cookies for a charming centerpiece.
- Individual Portions: Serve each cookie on a small plate for easy enjoyment.
Additional Tips
Maximize your enjoyment of No-Bake Spider Cookies with these helpful tips:
- Use Fresh Ingredients: Ensure your peanut butter and chocolate chips are fresh for the best flavor.
- Experiment with Shapes: Try different shapes or sizes for a variety of fun treats.
- Store Properly: Keep cookies in an airtight container at room temperature for up to a week.
- Chill Before Serving: Allow the cookies to chill longer for firmer chocolate.
- Add a Twist: Incorporate other toppings or fillings, like crushed nuts or sprinkles, for added flavor.
Recipe Variations
Consider these creative variations for your No-Bake Spider Cookies:
- Use Crunchy Peanut Butter: Swap creamy for crunchy peanut butter for added texture.
- Chocolate Coating Alternatives: Use white chocolate or colored candy melts for a different look.
- Add Flavor: Incorporate a pinch of salt or vanilla extract to enhance the flavor.
- Different Types of Cookies: Experiment with cookie bases like rice cereal or crushed cookies for a unique twist.
- Mini Versions: Make smaller cookies for bite-sized treats.
Freezing and Storage
Ensure proper storage to maintain the quality of your No-Bake Spider Cookies:
- Storage: Keep any leftover cookies in an airtight container at room temperature for up to 7 days.
- Freezing: Freeze individual cookies for up to 3 months. Place in a freezer-safe container, separated by parchment paper.
- Thawing: Thaw frozen cookies at room temperature before serving.
Special Equipment
You may need these kitchen tools to create your No-Bake Spider Cookies:
- Mixing Bowls: For combining the cookie mixture.
- Parchment Paper: To line the baking sheet.
- Fork: For dipping the cookies in chocolate.
- Baking Sheet: For setting the shaped cookies.
FAQ Section
Here are answers to common questions about No-Bake Spider Cookies:
- What if I can’t find pretzel sticks?
You can use any thin, crunchy snack as an alternative. - Can I add other toppings?
Absolutely! Feel free to get creative with toppings like shredded coconut or mini M&Ms. - Can I freeze these cookies?
- Yes, these cookies freeze well. Place them in a freezer-safe container, separating layers with parchment paper, and they’ll keep for up to 3 months.
- Can I add other toppings?
- Absolutely! Feel free to get creative with toppings like shredded coconut, mini M&Ms, or even sprinkles for a fun twist.
- How do I ensure the chocolate coating is smooth?
- Melt the chocolate chips in a microwave-safe bowl in 30-second intervals, stirring between each to avoid burning. Adding a teaspoon of vegetable oil can help make the chocolate smoother and easier to work with.
- Can I make these cookies in advance?
- Yes, these cookies can be made a day or two in advance.
- What is the best way to shape the cookies?
- Use your hands to roll the mixture into balls, and for a more uniform shape, you can use a cookie scoop. Just make sure to compact the mixture well to hold its shape.
- Can I double the recipe?
- Absolutely! Feel free to double or even triple the recipe to make more cookies for parties or gatherings.
- What do I do if my mixture is too crumbly?
- If your mixture is too crumbly, you can add a little more peanut butter or a splash of milk to help bind it together.
No-Bake Spider Cookies
- Total Time: 30 min.
Ingredients
For the Cookies:
- 1 cup creamy peanut butter
- 1 cup powdered sugar
- 1 cup graham cracker crumbs
- 1 cup chocolate chips (for melting)
For the Spider Legs:
- 24 pretzel sticks
- 24 chocolate chips (for the eyes)
Instructions
repare the Cookie Mixture
- Mix Ingredients: In a mixing bowl, combine the peanut butter, powdered sugar, and graham cracker crumbs. Mix until well combined and a dough forms.
- Shape the Cookies: Using your hands, form small balls of the mixture (about 1 inch in diameter) and place them on a baking sheet lined with parchment paper.
Melt the Chocolate
- Melt Chocolate Chips: In a microwave-safe bowl, melt the chocolate chips in 30-second intervals, stirring in between until smooth and fully melted.
Assemble the Spiders
- Dip Cookies: Using a fork, dip each cookie ball into the melted chocolate, making sure to coat it evenly. Place the chocolate-covered cookie back on the parchment paper.
- Add Legs: Quickly insert four pretzel sticks into each side of the cookie for spider legs before the chocolate sets.
- Create Eyes: Place two chocolate chips on top of each cookie for the spider’s eyes.
Chill the Cookies
- Chill: Place the cookies in the refrigerator for about 10 minutes to allow the chocolate to set.
- Prep Time: 10 min.
- Cook Time: 20 min.
Nutrition
- Serving Size: 12 cookies
- Calories: 150 kcal
- Fat: 8g
- Carbohydrates: 16g
- Fiber: 2g
- Protein: 3g
Conclusion
I hope you’re as excited to make these No-Bake Spider Cookies as I am! They’re not just a treat; they’re an experience, bringing together the delightful flavors of peanut butter and chocolate in a fun and spooky shape. Perfect for gatherings, school parties, or just a cozy night in, these cookies are sure to bring smiles to everyone’s faces.
I can’t wait to hear how your spider cookies turn out! Whether you add your own twist to the design or keep them classic, I’m sure they’ll be a hit. Remember, the best part of making these treats is sharing them with loved ones and creating memories together. So, gather the kids, roll up your sleeves, and enjoy the process of whipping up these yummy bites.
Once you’ve crafted your spooky snacks, don’t forget to snap a photo and share your masterpiece! I absolutely love seeing your delicious creations, so tag me on Instagram or drop a comment here to let me know how they turned out. Your feedback not only inspires me but also helps others in our community discover new favorites. Happy baking (or no-baking, in this case)!

