Introduction
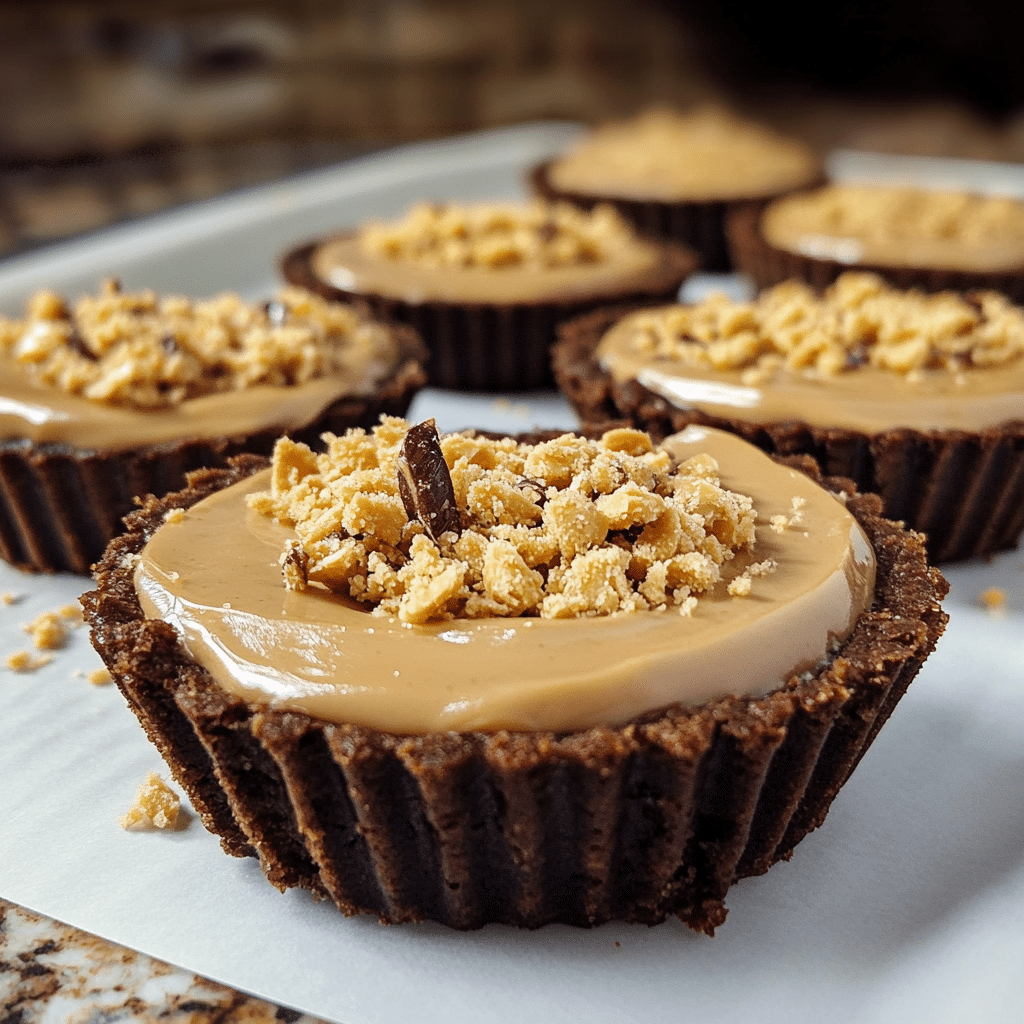
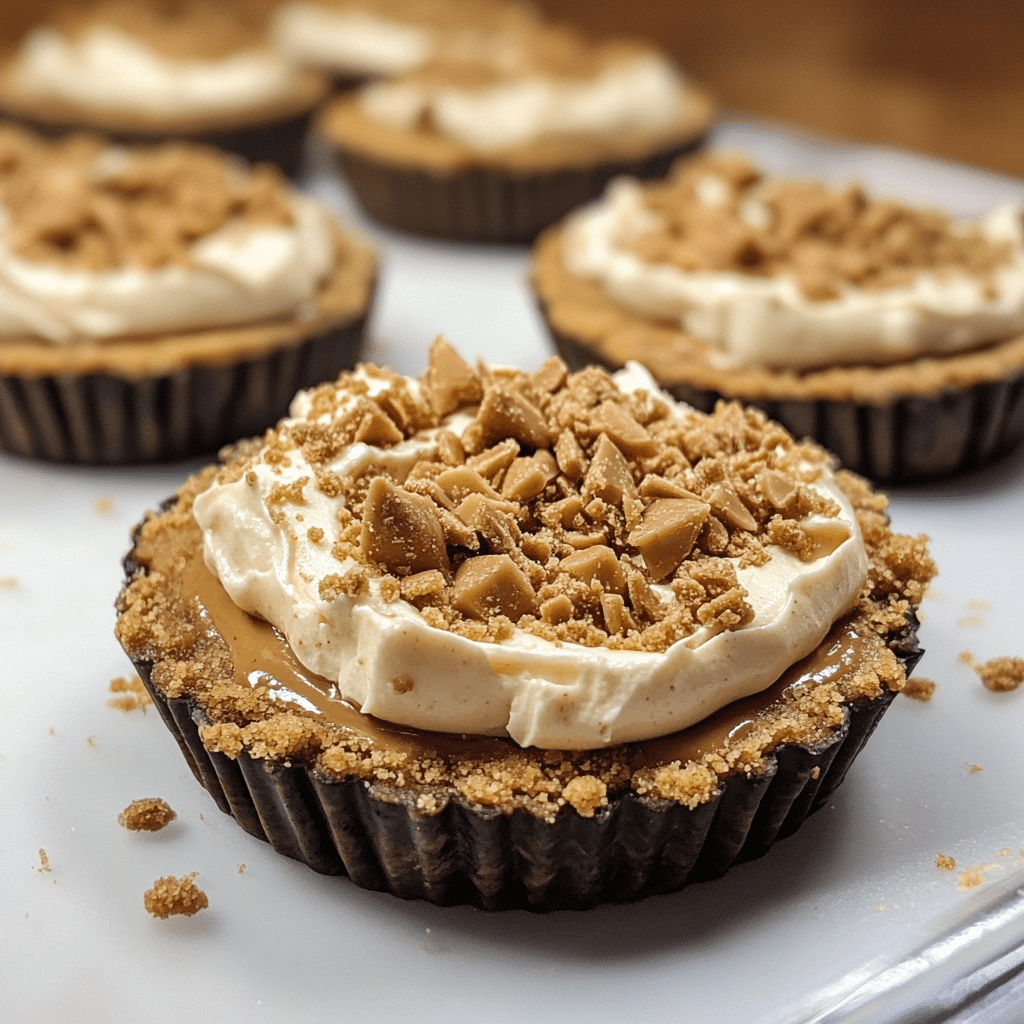
Looking for a quick and easy dessert that’s both indulgent and adorable? Look no further than these Mini Peanut Butter Pies! These bite-sized treats pack all the creamy, sweet, and nutty flavor of a traditional peanut butter pie but in a fun, personal portion that’s perfect for any occasion. Whether you’re hosting a party, bringing a dessert to a gathering, or just treating yourself to something special, these mini pies are sure to steal the spotlight. With a crunchy graham cracker crust, rich peanut butter filling, and a dollop of whipped cream on top, they’re practically impossible to resist!
Why You’ll Love This Recipe
There are plenty of reasons you’ll fall head over heels for these Mini Peanut Butter Pies:
- Perfectly Portable: These mini pies are easy to serve and enjoy, making them great for parties, picnics, or family gatherings.
- Peanut Butter Lovers Dream: If you’re a fan of peanut butter, this dessert is a must-try! It’s packed with that creamy, nutty goodness in every bite.
- No Bake: No oven required! Just mix, chill, and you’re ready to go—perfect for when you don’t want to heat up the kitchen.
- Quick and Easy: You can have these little pies ready in just under 30 minutes, and they’ll be chilling in the fridge while you relax.
- Customizable: Want to add a drizzle of chocolate or crushed peanuts on top? Feel free to get creative and make these pies your own.
- Kid-Friendly: Little hands can easily help assemble these mini pies, making them a fun family activity.
- Impressive Yet Simple: These pies look fancy but require minimal effort, so you’ll always impress your guests without all the fuss.
- Make-Ahead: You can prepare them the day before, freeing up time on the day of your event. Just chill and serve!
- Great for Small Portions: Perfect for those who want just a little taste of something sweet without the guilt of a huge slice.
Preparation Time and Cook Time
- Total Time: 30 minutes (plus chilling time)
- Preparation Time: 15 minutes
- Cook Time: None
- Chill Time: 2 hours
- Servings: 12 mini pies
- Calories per mini pie: Approximately 230 calories
- Key Nutrients: Protein: 6g, Fat: 18g, Carbohydrates: 18g, Fiber: 2g
Ingredients
Gather the following ingredients to whip up your Mini Peanut Butter Pies:
For the Crust:
- 1 1/2 cups graham cracker crumbs
- 1/4 cup granulated sugar
- 1/2 cup unsalted butter, melted
the Filling:
- 1 cup creamy peanut butter (preferably natural)
- 8 oz cream cheese, softened
- 1 cup powdered sugar
- 1 teaspoon vanilla extract
- 1 cup whipped topping (like Cool Whip)
For Topping:
- Whipped cream (optional)
- Mini chocolate chips or chopped peanuts (optional for garnish)
Ingredient Highlights
- Graham Cracker Crumbs: The foundation for the crust, giving it that perfect crunch and sweetness.
- Peanut Butter: A rich and creamy base for the filling that adds a nutty, savory flavor.
- Cream Cheese: Smooths out the peanut butter filling and provides a subtle tang.
- Whipped Topping: Lightens the filling, making it airy and creamy without the need for any baking.
- Powdered Sugar: Sweetens the filling without making it gritty, giving it the perfect texture.
- Whipped Cream and Garnishes: For that extra touch of fluff and flavor on top.
Step-by-Step Instructions
Prepare the Crust
- Mix the Crust Ingredients: In a medium bowl, combine the graham cracker crumbs, sugar, and melted butter. Stir until everything is evenly coated and the crumbs are moist.
- Form the Crust: Press the crumb mixture evenly into the bottoms of 12 mini tart pans or muffin tin cups. Use the back of a spoon or your fingers to pack it in tightly.
- Chill the Crust: Place the crust-filled pans in the fridge for at least 15 minutes to set while you prepare the filling.
Make the Filling
- Mix Peanut Butter and Cream Cheese: In a large bowl, beat the peanut butter and softened cream cheese together with an electric mixer until smooth and creamy.
- Add Powdered Sugar and Vanilla: Add the powdered sugar and vanilla extract to the peanut butter mixture, continuing to mix until it’s smooth and fluffy.
- Fold in Whipped Topping: Gently fold in the whipped topping to lighten the mixture, creating a fluffy, creamy filling.
Assemble the Mini Pies
- Fill the Crusts: Spoon the peanut butter filling into each crust, spreading it evenly to the top of the mini pans. Use a spatula to smooth the tops.
- Chill: Return the mini pies to the fridge and let them chill for at least 2 hours, or until the filling has firmed up.
Add the Toppings
- Top with Whipped Cream: Once the pies are chilled, top each one with a dollop of whipped cream for extra fluffiness.
- Garnish: Add mini chocolate chips, crushed peanuts, or a drizzle of chocolate syrup for that finishing touch. You could even add a sprinkle of sea salt for a sweet-salty contrast!
How to Serve
These Mini Peanut Butter Pies are perfect for any gathering or celebration, and there are a variety of fun ways to present them:
- On a Dessert Platter: Arrange the mini pies on a cute platter with festive garnishes for a simple but elegant look.
- As Individual Treats: Serve each mini pie on a small plate with a fork for an easy and neat presentation.
- With Coffee or Milk: Pair with a cup of coffee or a glass of milk to balance out the sweetness.
- With Other Desserts: Serve alongside other mini desserts like mini cheesecakes or brownies for a variety-packed dessert table.
- Wrap for Gifts: Place the mini pies in clear treat bags with colorful ribbons for a charming homemade gift.
- Kids’ Party Dessert: These pies are the perfect size for little hands, making them a hit at kids’ birthday parties or school events.
- For a Picnic: These mini pies are portable and easy to pack, so they make a great addition to any outdoor event.
Additional Tips
Here are a few helpful tips to make your Mini Peanut Butter Pies even more amazing:
- Use a Food Processor: For a perfectly smooth graham cracker crust, use a food processor to crush the graham crackers instead of doing it by hand.
- Chill Longer for Firmness: If you like your pies extra firm, feel free to chill them for longer than the recommended time.
- Make the Crust Ahead: Prepare the crust ahead of time, so all you need to do is make the filling and assemble the pies.
- Don’t Skip the Chill Time: Be sure to give the pies enough time to chill, so the filling firms up and doesn’t spill when you serve them.
- Add a Touch of Salt: A sprinkle of flaky sea salt on top can enhance the flavor of the peanut butter filling and balance out the sweetness.
Recipe Variations
If you’re feeling creative, here are some fun twists on the classic Mini Peanut Butter Pies:
- Chocolate Peanut Butter Pie: Drizzle melted chocolate on top of the filling before chilling to create a chocolate-peanut butter layer.
- Peanut Butter and Banana: Add a layer of sliced bananas to the filling for a fun twist.
- Crushed Pretzel Crust: Use crushed pretzels instead of graham crackers for a salty-sweet crust.
- Nut-Free Version: Substitute sunflower seed butter for peanut butter to make these pies nut-free.
- Mini Oreo Crusts: Swap out the graham cracker crust for mini Oreo crusts for a chocolatey, crunchy bottom.
Freezing and Storage
To keep your Mini Peanut Butter Pies fresh and ready for later, follow these storage tips:
- Storage: Keep the pies in an airtight container in the fridge for up to 3 days.
- Freezing: You can freeze the mini pies for up to 1 month. Just make sure to wrap them tightly in plastic wrap and place them in a freezer-safe bag.
- Thawing: Allow frozen pies to thaw in the fridge overnight before serving.
Special Equipment
Here’s what you’ll need to make your Mini Peanut Butter Pies:
- Mini Tart Pans or Muffin Tin: These are essential for forming the mini pies.
- Electric Mixer: For making the smooth peanut butter filling.
- Spatula: To fill and smooth the pies.
- Whisk: For whipping the cream or mixing the crust.
FAQ Section
Here are answers to some common questions about Mini Peanut Butter Pies:
- Can I use crunchy peanut butter?
Yes! Feel free to use crunchy peanut butter if you want a little extra texture in your filling. - Can I make these mini pies dairy-free?
Absolutely! Use dairy-free cream cheese and whipped topping to make this a dairy-free treat. - What other toppings can I use?
You can top your mini pies with anything from chopped nuts, sprinkles, or even a drizzle of caramel or butterscotch sauce. - Can I make the crust gluten-free?
Yes! Simply substitute gluten-free graham crackers or crushed gluten-free cookies in place of the regular graham crackers.
Mini Peanut Butter Pies
- Total Time: 30 min.
Ingredients
For the Crust:
- 1 1/2 cups graham cracker crumbs
- 1/4 cup granulated sugar
- 1/2 cup unsalted butter, melted
For the Filling:
- 1 cup creamy peanut butter (preferably natural)
- 8 oz cream cheese, softened
- 1 cup powdered sugar
- 1 teaspoon vanilla extract
- 1 cup whipped topping (like Cool Whip)
For Topping:
- Whipped cream (optional)
- Mini chocolate chips or chopped peanuts (optional for garnish)
Instructions
Prepare the Crust
- Mix the Crust Ingredients: In a medium bowl, combine the graham cracker crumbs, sugar, and melted butter. Stir until everything is evenly coated and the crumbs are moist.
- Form the Crust: Press the crumb mixture evenly into the bottoms of 12 mini tart pans or muffin tin cups. Use the back of a spoon or your fingers to pack it in tightly.
- Chill the Crust: Place the crust-filled pans in the fridge for at least 15 minutes to set while you prepare the filling.
Make the Filling
- Mix Peanut Butter and Cream Cheese: In a large bowl, beat the peanut butter and softened cream cheese together with an electric mixer until smooth and creamy.
- Add Powdered Sugar and Vanilla: Add the powdered sugar and vanilla extract to the peanut butter mixture, continuing to mix until it’s smooth and fluffy.
- Fold in Whipped Topping: Gently fold in the whipped topping to lighten the mixture, creating a fluffy, creamy filling.
Assemble the Mini Pies
- Fill the Crusts: Spoon the peanut butter filling into each crust, spreading it evenly to the top of the mini pans. Use a spatula to smooth the tops.
- Chill: Return the mini pies to the fridge and let them chill for at least 2 hours, or until the filling has firmed up.
Add the Toppings
- Top with Whipped Cream: Once the pies are chilled, top each one with a dollop of whipped cream for extra fluffiness.
- Garnish: Add mini chocolate chips, crushed peanuts, or a drizzle of chocolate syrup for that finishing touch. You could even add a sprinkle of sea salt for a sweet-salty contrast!
- Prep Time: 15 min.
- Chill Time: 2 hrs
Nutrition
- Serving Size: 12 mini pies
- Calories: 230 kcal
- Fat: 18g
- Carbohydrates: 18g
- Fiber: 2g
- Protein: 6g
Conclusion
These Mini Peanut Butter Pies are perfect for satisfying your sweet tooth in a fun, personal-sized way. They’re quick, easy, and full of flavor—what more could you want from a dessert? Whether you’re serving them at a gathering or enjoying them as an after-dinner treat, they’re sure to be a hit with everyone who tries them. So what are you waiting for? Grab those ingredients, get mixing, and enjoy the creamy, nutty goodness of these irresistible mini pies. Don’t forget to snap a photo and tag me on social media—I love seeing your delicious creations! Happy baking!

