Introduction
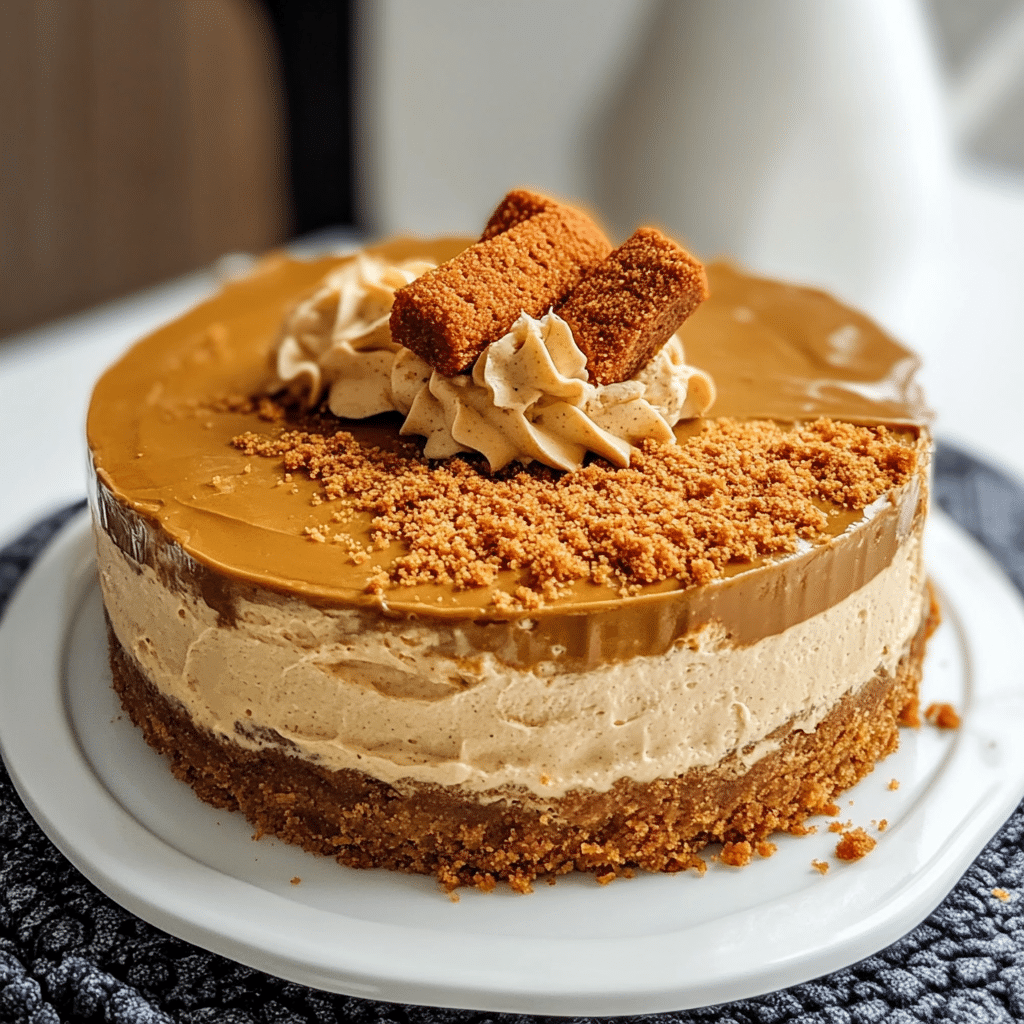
Looking for a cheesecake that’s as indulgent as it is unique? Let me introduce you to the Lotus Biscoff Cheesecake. This dessert combines the creamy richness of a traditional cheesecake with the warm, spiced goodness of Lotus Biscoff cookies, creating a flavor experience you won’t forget. Whether you’re hosting a dinner party, treating yourself, or impressing your guests, this cheesecake is a showstopper that pairs perfectly with a cup of coffee or tea. What’s even better? The crunchy cookie crust adds a delightful contrast to the creamy, smooth filling, making each bite a perfect balance of textures. Trust me, this dessert will quickly become a favorite in your recipe repertoire!
Why You’ll Love This Recipe
There are so many reasons why you’re going to love this Lotus Biscoff Cheesecake:
- Unique Flavor: The combination of creamy cheesecake and spiced Lotus Biscoff cookies offers a flavor unlike anything you’ve had before.
- No-Bake Option: For a hassle-free treat, you can skip the oven altogether and make this cheesecake in the fridge.
- Easy to Make: While this cheesecake looks elegant, it’s surprisingly simple to prepare, requiring minimal effort for a big payoff.
- Perfect for Any Occasion: Whether it’s a holiday celebration, a birthday, or a simple weeknight treat, this cheesecake fits the bill.
- Make Ahead: You can prepare it a day or two in advance, making it perfect for entertaining or meal prep.
- Impress Your Guests: It’s one of those desserts that’ll make everyone ask for the recipe, and you’ll be able to share how simple it is to make!
- Creamy and Dreamy: The luscious, smooth cheesecake filling paired with the crunchy, spiced cookie base creates a mouthwatering contrast.
- Customizable: You can tweak the flavor by adding a swirl of caramel, chocolate ganache, or even a fruit topping if you’re feeling adventurous.
Preparation Time and Cook Time
- Total Time: 4 hours (including chilling time)
- Preparation Time: 20 minutes
- Cook Time: 0 minutes (this cheesecake is no-bake!)
- Chilling Time: 3-4 hours (or overnight for best results)
- Servings: 10-12 slices
- Calories per slice: Approximately 350 calories
- Key Nutrients: Fat: 26g, Carbohydrates: 28g, Protein: 4g
Ingredients
Here’s everything you’ll need to make your Lotus Biscoff Cheesecake:
For the Crust:
- 1 1/2 cups Lotus Biscoff cookie crumbs (about 20 cookies)
- 1/4 cup granulated sugar
- 1/4 cup melted butter
the Cheesecake Filling:
- 3 (8 oz) packages cream cheese, softened
- 1 cup powdered sugar
- 1 teaspoon vanilla extract
- 1 1/2 cups heavy cream
- 1/2 cup Lotus Biscoff spread (cookie butter)
For the Topping (Optional):
- Crushed Lotus Biscoff cookies
- Caramel drizzle (optional)
Ingredient Highlights
- Lotus Biscoff Cookies: These cookies bring a delicious spiced flavor with hints of cinnamon, making them the perfect base for the crust and a topping for extra crunch.
- Cream Cheese: A classic ingredient that adds richness and creaminess to the filling.
- Heavy Cream: Whipping the cream gives the cheesecake its light, fluffy texture.
- Lotus Biscoff Spread: This velvety spread infuses the filling with even more of that irresistible spiced flavor.
Step-by-Step Instructions
Let’s dive into how you can make this delightful Lotus Biscoff Cheesecake. Don’t worry—each step is easy to follow, and the results are so worth it!
Prepare the Crust
- Crush the Cookies: Start by crushing the Lotus Biscoff cookies into fine crumbs. You can use a food processor for this, or place the cookies in a zip-top bag and crush them with a rolling pin.
- Mix the Ingredients: In a medium bowl, combine the cookie crumbs, granulated sugar, and melted butter. Stir until the mixture resembles wet sand.
- Press into Pan: Press the cookie mixture firmly into the bottom of a springform pan or a 9-inch pie dish to form a smooth, even crust. Use the back of a spoon to pack it down well.
- Chill the Crust: Place the crust in the refrigerator to chill while you prepare the filling. This helps it firm up and hold its shape.
Make the Cheesecake Filling
- Beat the Cream Cheese: In a large mixing bowl, beat the softened cream cheese until it’s smooth and creamy. You can use a hand mixer or a stand mixer for this step.
- Add Powdered Sugar and Vanilla: Gradually add the powdered sugar and vanilla extract to the cream cheese, continuing to beat until everything is well combined.
- Whip the Heavy Cream: In a separate bowl, whip the heavy cream until stiff peaks form. This will give the cheesecake its airy, creamy texture.
- Add the Biscoff Spread: Gently fold in the Lotus Biscoff spread (cookie butter) into the cream cheese mixture. This will infuse the filling with that signature spiced flavor.
- Combine the Mixtures: Carefully fold the whipped cream into the cream cheese and Biscoff mixture. Be gentle to maintain the fluffiness of the whipped cream, but make sure everything is thoroughly combined.
Assemble the Cheesecake
- Pour the Filling: Once the filling is smooth and fluffy, pour it over the chilled cookie crust. Use a spatula to spread it out evenly.
- Smooth the Top: Smooth the top of the cheesecake with the back of a spoon or spatula to create an even layer.
- Chill: Place the cheesecake in the refrigerator and let it chill for at least 3-4 hours, or ideally overnight. This allows the cheesecake to set properly.
Add the Toppings
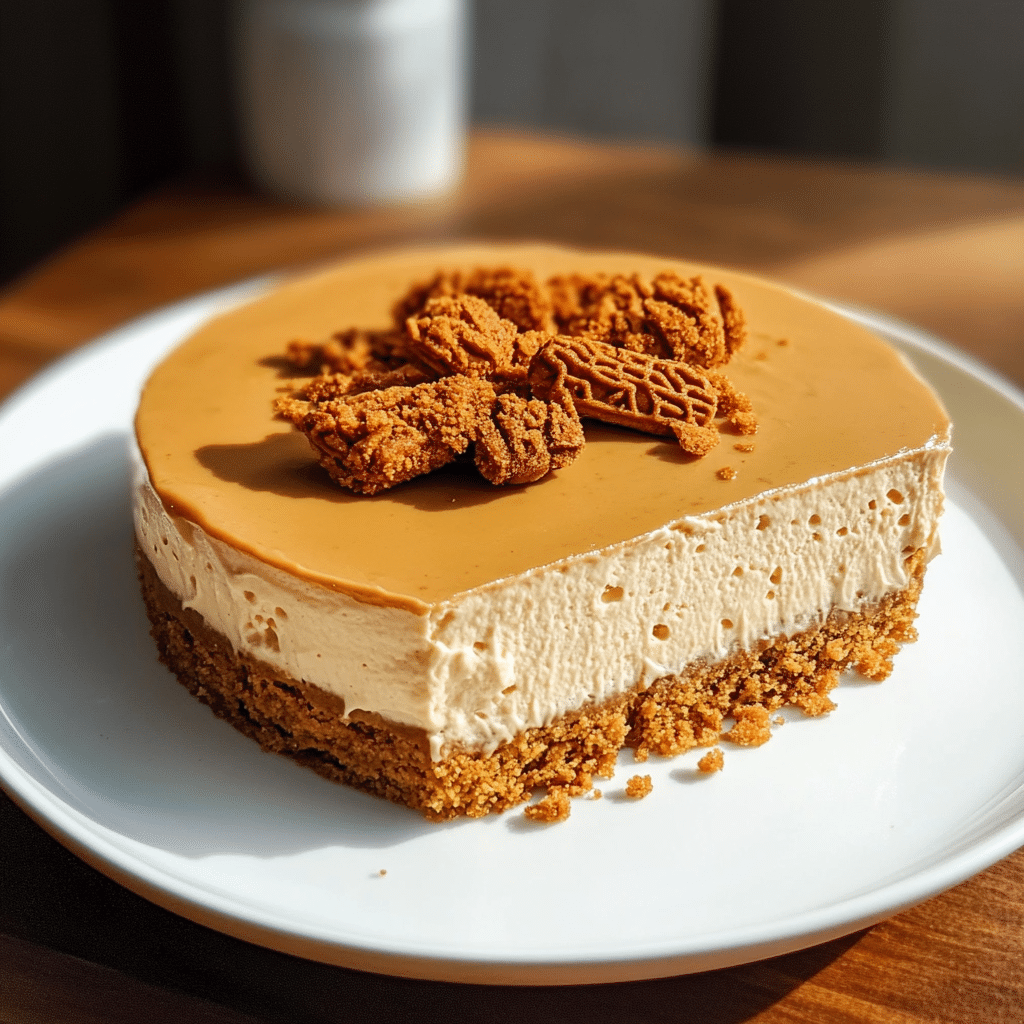
- Crushed Cookies: Once the cheesecake has set, sprinkle some crushed Lotus Biscoff cookies on top for added texture and flavor.
- Caramel Drizzle: If you’re feeling extra indulgent, drizzle some caramel sauce over the top for a sweet contrast to the spiced cookies.
How to Serve
Now that your Lotus Biscoff Cheesecake is ready, here are a few ideas on how to serve it:
- Slice and Serve: Use a sharp knife to slice the cheesecake into 10-12 pieces. Serve each slice on a small plate with a fork.
- Pair with Drinks: This cheesecake goes wonderfully with a cup of coffee or tea, making it a great after-dinner treat.
- Elegant Display: Place your cheesecake on a beautiful platter or cake stand to make it the centerpiece of your dessert table.
- Add Fresh Fruit: For a fresh contrast, top with some berries like raspberries or strawberries for a pop of color and freshness.
Additional Tips
To make your Lotus Biscoff Cheesecake even better, consider these tips:
- Chill Longer for Better Texture: The longer the cheesecake chills, the firmer and more flavorful it becomes. I recommend leaving it overnight if you have the time.
- Use Room Temperature Ingredients: Ensure your cream cheese is softened and your heavy cream is cold for the best results.
- Make a Larger Batch: You can easily double the recipe and use a larger pan if you’re expecting a crowd.
- Optional Add-ins: Try adding a layer of Biscoff spread on top of the cheesecake filling before chilling for a marbled effect.
- Keep It Simple: If you’re in a rush, you can skip the topping and just serve the cheesecake as is. It’s still delicious!
Recipe Variations
While the Lotus Biscoff Cheesecake is already perfect as it is, you can get creative with these variations:
- Chocolate Drizzle: For a richer touch, drizzle some melted chocolate over the top before serving.
- Peanut Butter: Add a swirl of peanut butter to the cheesecake filling for a peanut butter and Biscoff flavor combo.
- Gluten-Free Version: Use gluten-free cookies for the crust and ensure your Biscoff spread is gluten-free.
- Mini Cheesecakes: Make individual cheesecakes by dividing the ingredients between smaller pans or cupcake liners.
Freezing and Storage
To store your cheesecake:
- Refrigerate: Keep the cheesecake in the fridge, covered, for up to 4-5 days.
- Freezing: You can freeze the cheesecake for up to 3 months. Just be sure to wrap it tightly in plastic wrap and then foil before freezing.
- Thawing: To thaw, move the cheesecake from the freezer to the refrigerator for several hours or overnight.
Special Equipment
You’ll need these kitchen tools for your Lotus Biscoff Cheesecake:
- Springform Pan: This is perfect for cheesecakes because it allows you to easily remove the dessert from the pan.
- Mixer: Either a hand mixer or stand mixer will work for beating the cream cheese and whipping the cream.
- Spatula: For spreading the filling and smoothing the top.
faq section
Curious about the details of making this Lotus Biscoff Cheesecake? Here are some answers to common questions that will help you make this dessert as perfect as possible. Whether you’re wondering about ingredient substitutions, storage, or how to get the best results, I’ve got you covered!
- Can I use a different type of cookie for the crust?
- Yes, you can easily substitute the Lotus Biscoff cookies with other types of cookies like graham crackers, Oreos, or even digestive biscuits. However, keep in mind that using a different cookie may slightly alter the flavor profile, so if you’re aiming for that signature caramelized taste, Biscoff cookies are the way to go!
- Can I make this cheesecake without an electric mixer?
- While an electric mixer can help achieve a smooth, creamy filling, you can also use a hand whisk or even mix by hand, though it may take a little more time and effort. Just make sure to beat the cream cheese well to avoid any lumps and ensure a velvety texture.
- Can I make this cheesecake ahead of time?
- Absolutely! In fact, this cheesecake tastes even better after sitting in the fridge for a few hours or overnight. Making it ahead of time allows the flavors to meld and the texture to set perfectly. Just make sure to cover it tightly with plastic wrap or a cake dome to prevent it from absorbing any fridge odors.
- Can I freeze this cheesecake?
- Yes, you can freeze the cheesecake! After it’s set in the fridge, cover it with plastic wrap and aluminum foil, then freeze for up to 3 months. When you’re ready to serve, let it thaw in the fridge overnight for the best results. Just keep in mind that the texture might change slightly after freezing and thawing, but it will still be delicious.
Lotus Biscoff Cheesecake
- Total Time: 4 hrs
Ingredients
For the Crust:
- 1 1/2 cups Lotus Biscoff cookie crumbs (about 20 cookies)
- 1/4 cup granulated sugar
- 1/4 cup melted butter
For the Cheesecake Filling:
- 3 (8 oz) packages cream cheese, softened
- 1 cup powdered sugar
- 1 teaspoon vanilla extract
- 1 1/2 cups heavy cream
- 1/2 cup Lotus Biscoff spread (cookie butter)
For the Topping (Optional):
- Crushed Lotus Biscoff cookies
- Caramel drizzle (optional)
Instructions
Prepare the Crust
- Crush the Cookies: Start by crushing the Lotus Biscoff cookies into fine crumbs. You can use a food processor for this, or place the cookies in a zip-top bag and crush them with a rolling pin.
- Mix the Ingredients: In a medium bowl, combine the cookie crumbs, granulated sugar, and melted butter. Stir until the mixture resembles wet sand.
- Press into Pan: Press the cookie mixture firmly into the bottom of a springform pan or a 9-inch pie dish to form a smooth, even crust. Use the back of a spoon to pack it down well.
- Chill the Crust: Place the crust in the refrigerator to chill while you prepare the filling. This helps it firm up and hold its shape.
Make the Cheesecake Filling
- Beat the Cream Cheese: In a large mixing bowl, beat the softened cream cheese until it’s smooth and creamy. You can use a hand mixer or a stand mixer for this step.
- Add Powdered Sugar and Vanilla: Gradually add the powdered sugar and vanilla extract to the cream cheese, continuing to beat until everything is well combined.
- Whip the Heavy Cream: In a separate bowl, whip the heavy cream until stiff peaks form. This will give the cheesecake its airy, creamy texture.
- Add the Biscoff Spread: Gently fold in the Lotus Biscoff spread (cookie butter) into the cream cheese mixture. This will infuse the filling with that signature spiced flavor.
- Combine the Mixtures: Carefully fold the whipped cream into the cream cheese and Biscoff mixture. Be gentle to maintain the fluffiness of the whipped cream, but make sure everything is thoroughly combined.
Assemble the Cheesecake
- Pour the Filling: Once the filling is smooth and fluffy, pour it over the chilled cookie crust. Use a spatula to spread it out evenly.
- Smooth the Top: Smooth the top of the cheesecake with the back of a spoon or spatula to create an even layer.
- Chill: Place the cheesecake in the refrigerator and let it chill for at least 3-4 hours, or ideally overnight. This allows the cheesecake to set properly.
Add the Toppings
- Crushed Cookies: Once the cheesecake has set, sprinkle some crushed Lotus Biscoff cookies on top for added texture and flavor.
- Caramel Drizzle: If you’re feeling extra indulgent, drizzle some caramel sauce over the top for a sweet contrast to the spiced cookies.
- Prep Time: 20 min.
- Chill Time: 3-4 hours (or overnight for best results)
Nutrition
- Serving Size: 10-12 slices
- Calories: 350 kcal
- Fat: 26g
- Carbohydrates: 28g
- Protein: 4g
Conclusion
This Lotus Biscoff Cheesecake is not just a dessert; it’s an experience. With its creamy texture, unique flavor, and easy prep, it’s a recipe you’ll return to again and again. Don’t forget to snap a photo and tag me on social media—I love seeing your delicious creations!

