Introduction
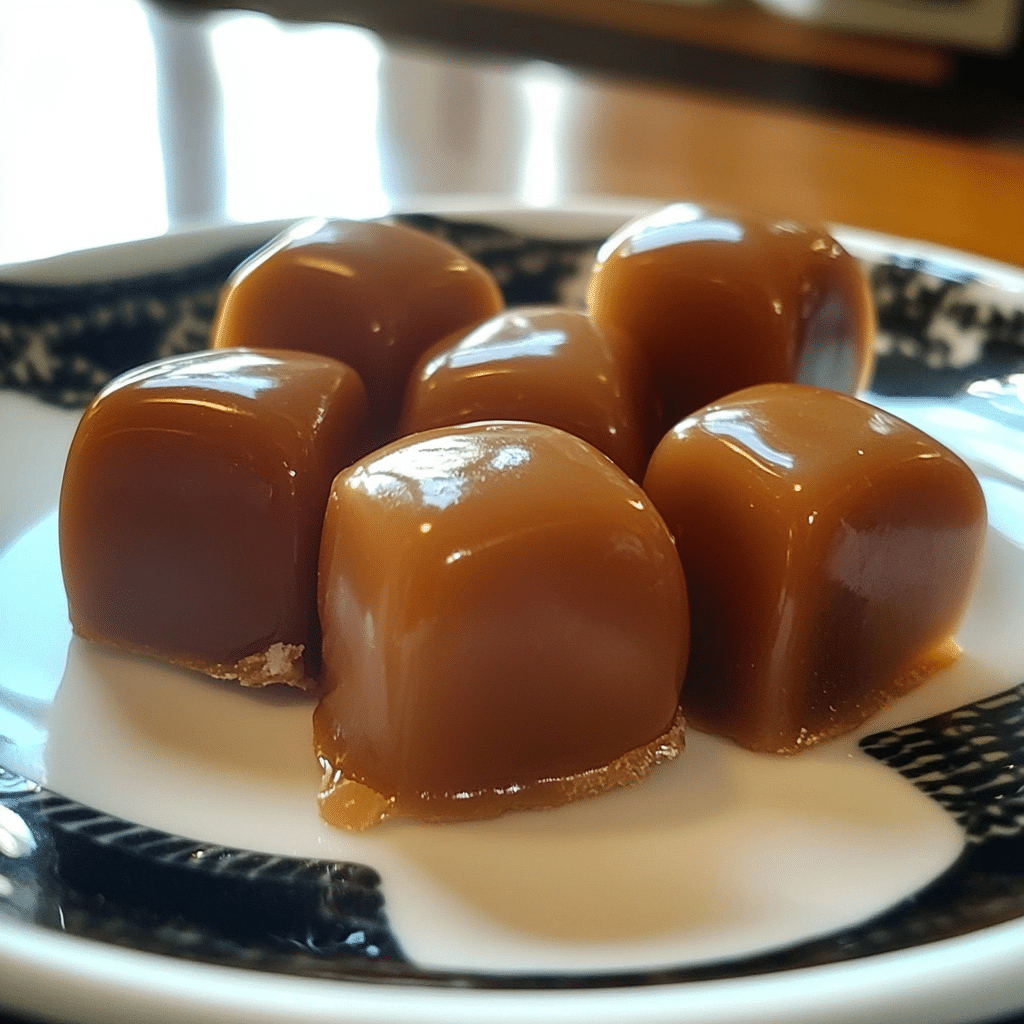
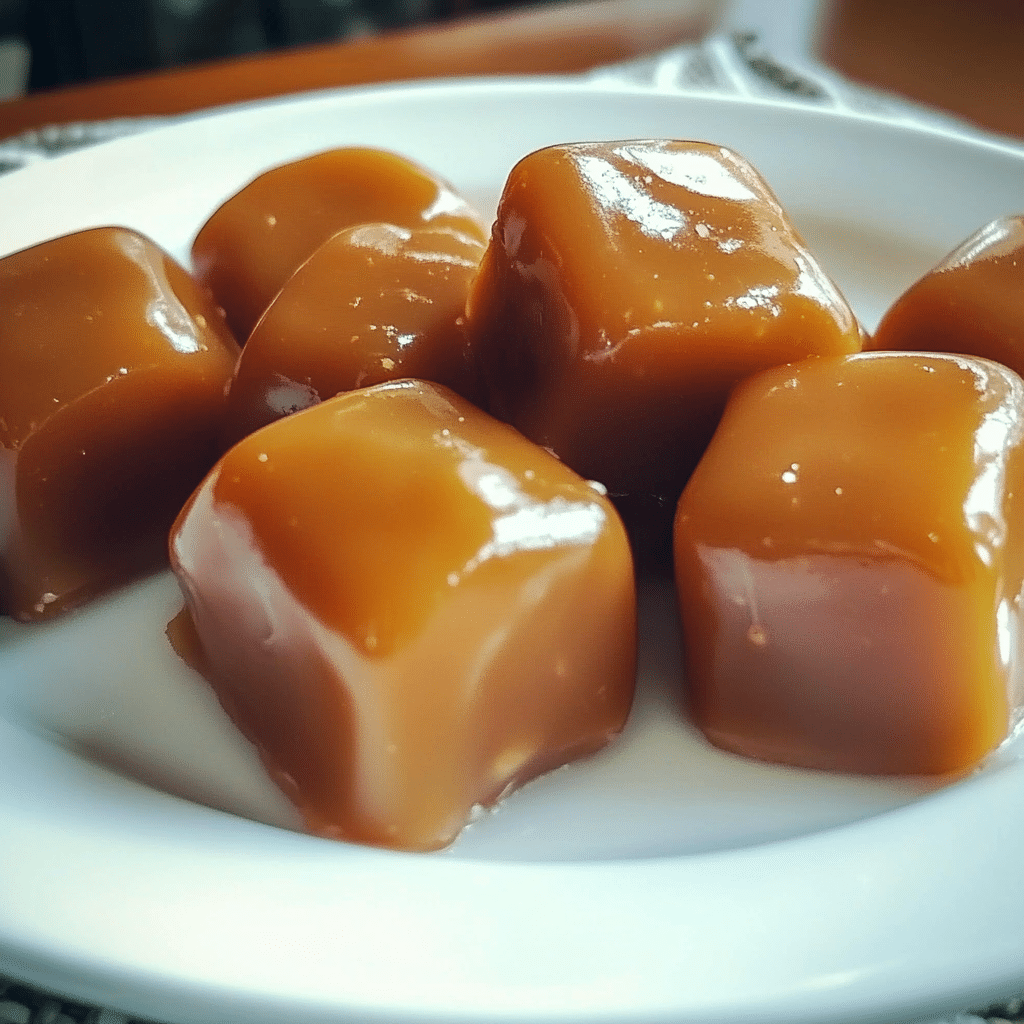
Indulge your sweet tooth with Homemade Caramels, the ultimate treat for candy lovers! These rich, buttery confections strike the perfect balance between sweet and creamy, with a soft, chewy texture that melts in your mouth with every bite. Whether you’re looking to satisfy a craving, impress guests with a handcrafted treat, or create thoughtful gifts for loved ones, this classic recipe is here to make every occasion sweeter.
What makes homemade caramels so special is the personal touch—they’re made with love and simple pantry staples you likely already have on hand. With just a bit of patience and careful attention, you can transform sugar, butter, and cream into little squares of golden perfection. The process is not only rewarding but also surprisingly straightforward, even for beginners. Plus, you can customize them with a pinch of sea salt, a drizzle of chocolate, or a sprinkle of nuts to make them truly your own.
Picture this: a beautifully wrapped box of Homemade Caramels, tied with a ribbon, ready to be gifted—or a jar of these buttery delights waiting on your kitchen counter for those moments when you need a little pick-me-up. They’re perfect for holidays, birthdays, or simply as a treat to savor after a long day.
Let’s dive into the recipe and discover just how easy (and fun!) it is to create this timeless candy at home. Trust me, once you’ve tried these, store-bought will never compare!
Why You’ll Love This Recipe
There are countless reasons to adore these Homemade Caramels:
- Rich and Creamy: Buttery, melt-in-your-mouth goodness in every bite.
- Perfect Texture: Achieves that balance between soft and chewy.
- Customizable: Add a sprinkle of sea salt or dip them in chocolate for variety.
- Simple Ingredients: Everything you need is likely already in your pantry.
- Fun to Make: The process is as enjoyable as the result.
- Great for Gifts: Wrap them individually for a beautiful homemade present.
- Kid-Friendly: A wonderful recipe to involve the little ones in the kitchen.
- No Special Equipment Needed: You can create these caramels with basic kitchen tools.
- Impressive Result: Everyone will think you spent hours on these professional-quality treats.
- Perfect for Any Occasion: Ideal for holidays, parties, or everyday indulgence.
Preparation and Cook Time
- Total Time: 1 hour and 15 minutes
- Preparation Time: 15 minutes
- Cook Time: 40-50 minutes
- Cooling Time: 1 hour
- Servings: 64 caramels
- Calories per caramel: Approximately 50 calories
- Key Nutrients: Fat: 3g, Sugar: 7g, Protein: 1g
Ingredients
Gather these simple ingredients for your Homemade Caramels:
- 1 cup (2 sticks) unsalted butter
- 2 1/4 cups packed light brown sugar
- 1 cup light corn syrup
- 1 can (14 oz) sweetened condensed milk
- 1 teaspoon vanilla extract
- 1/4 teaspoon salt
Ingredient Highlights
- Butter: Adds a rich, creamy flavor and smooth texture.
- Brown Sugar: Enhances the depth of sweetness with a hint of molasses.
- Corn Syrup: Prevents crystallization, ensuring smooth caramels.
- Sweetened Condensed Milk: The secret to that irresistible creaminess.
- Vanilla Extract: Infuses warmth and aroma into the candy.
- Salt: Balances the sweetness and enhances the overall flavor.
Step-by-Step Instructions
Prepare Your Workspace
- Line the Pan: Line an 8×8-inch baking dish with parchment paper, leaving overhang for easy removal. Lightly grease with butter or nonstick spray.
- Gather Tools: Have a medium saucepan, candy thermometer, wooden spoon, and knife ready.
Cook the Caramel
- Melt the Butter: In a medium saucepan, melt the butter over medium heat.
- Add Sugars: Stir in the brown sugar, corn syrup, and sweetened condensed milk until fully combined.
- Heat Slowly: Continue stirring while bringing the mixture to a gentle boil.
- Monitor Temperature: Attach a candy thermometer to the pan and heat the caramel until it reaches 245°F (firm-ball stage), stirring constantly to prevent burning.
- Add Vanilla and Salt: Remove the pan from heat and stir in the vanilla extract and salt.
Set the Caramel
- Pour into Pan: Carefully pour the hot caramel into the prepared baking dish.
- Smooth the Surface: Use a spatula to spread the caramel evenly.
- Cool Completely: Let the caramel cool at room temperature for at least 1 hour or until fully set.
Cut and Wrap
- Slice into Squares: Lift the caramel out of the pan using the parchment overhang and cut into 1-inch squares.
- Wrap Individually: Wrap each caramel in a square of wax paper or cellophane, twisting the ends to seal.
How to Serve
Here are some creative serving ideas for your Homemade Caramels:
- As-Is: Serve plain for a timeless treat.
- Chocolate-Dipped: Dip in melted chocolate for an extra indulgence.
- Sprinkled with Salt: Add a pinch of flaky sea salt for a sweet-salty combination.
- Paired with Coffee: Enjoy alongside a hot cup of coffee or tea.
- Gift-Wrapped: Package in decorative tins or boxes for thoughtful gifts.
Additional Tips
- Use a Candy Thermometer: Precision is key to achieving the perfect texture.
- Don’t Rush: Stir constantly and heat slowly to avoid burning.
- Test for Doneness: If you don’t have a thermometer, drop a small amount into cold water; it should form a firm, pliable ball.
- Keep the Heat Low: High heat can scorch the caramel.
- Store Properly: Wrap caramels individually to keep them fresh and prevent sticking.
Recipe Variations
- Sea Salt Caramels: Sprinkle sea salt over the top before the caramel sets.
- Nutty Caramels: Add chopped pecans or almonds for crunch.
- Spiced Caramels: Mix in a pinch of cinnamon or nutmeg for warmth.
- Vanilla Bean Caramels: Use vanilla bean paste instead of extract for flecks of vanilla.
- Chocolate Caramels: Stir in cocoa powder for a chocolaty twist.
- Bourbon Caramels: Add a splash of bourbon for a grown-up flavor.
Freezing and Storage
- Storage: Wrap caramels individually and store in an airtight container at room temperature for up to 2 weeks.
- Freezing: For longer storage, freeze caramels in an airtight container for up to 3 months.
FAQ Section
We know you may have a few lingering questions about making Homemade Caramels, so we’ve compiled answers to some of the most common inquiries. Whether you’re a seasoned candy maker or trying caramel for the first time, these helpful tips will ensure your caramels turn out perfectly every time. Keep reading for all the essential info you need!
- Can I make caramels without a candy thermometer?
Yes, but using a thermometer ensures the best results. - Why are my caramels too hard?
This happens if the temperature goes above 245°F. Be sure to monitor closely. - Can I double the recipe?
Yes, use a larger pan to accommodate the extra caramel. - Can I use salted butter instead of unsalted butter?
Absolutely! If you prefer a salted caramel flavor, you can use salted butter instead of unsalted. Just be mindful of the extra salt content, as it will affect the final taste. If you’re unsure, you can always add a pinch of salt to the caramel mixture and adjust the flavor later. The salted butter will give your caramels that extra richness and depth of flavor. - Can I use a candy thermometer, or do I have to test the consistency manually?
A candy thermometer is definitely recommended for making Homemade Caramels. It ensures that the caramel reaches the perfect temperature, which is key to achieving that smooth, chewy texture. However, if you don’t have a candy thermometer, you can also use the cold-water test to check the consistency. Simply drop a bit of caramel into cold water and check if it forms a soft ball. If you prefer a firmer caramel, continue cooking it longer.
Homemade Caramels
- Total Time: 1 hour 15 minutes
Ingredients
- 1 cup (2 sticks) unsalted butter
- 2 1/4 cups packed light brown sugar
- 1 cup light corn syrup
- 1 can (14 oz) sweetened condensed milk
- 1 teaspoon vanilla extract
- 1/4 teaspoon salt
Instructions
Prepare Your Workspace
- Line the Pan: Line an 8×8-inch baking dish with parchment paper, leaving overhang for easy removal. Lightly grease with butter or nonstick spray.
- Gather Tools: Have a medium saucepan, candy thermometer, wooden spoon, and knife ready.
Cook the Caramel
- Melt the Butter: In a medium saucepan, melt the butter over medium heat.
- Add Sugars: Stir in the brown sugar, corn syrup, and sweetened condensed milk until fully combined.
- Heat Slowly: Continue stirring while bringing the mixture to a gentle boil.
- Monitor Temperature: Attach a candy thermometer to the pan and heat the caramel until it reaches 245°F (firm-ball stage), stirring constantly to prevent burning.
- Add Vanilla and Salt: Remove the pan from heat and stir in the vanilla extract and salt.
Set the Caramel
- Pour into Pan: Carefully pour the hot caramel into the prepared baking dish.
- Smooth the Surface: Use a spatula to spread the caramel evenly.
- Cool Completely: Let the caramel cool at room temperature for at least 1 hour or until fully set.
Cut and Wrap
- Slice into Squares: Lift the caramel out of the pan using the parchment overhang and cut into 1-inch squares.
- Wrap Individually: Wrap each caramel in a square of wax paper or cellophane, twisting the ends to seal.
- Prep Time: 15 min.
- Cooling Time: 1 hour
- Cook Time: 40-50 min.
Nutrition
- Serving Size: 64 caramels
- Calories: 50 kcal
- Sugar: 7g
- Fat: 3g
- Protein: 1g
Conclusion
Homemade Caramels are the kind of treat that transforms any day into something a little more special. The rich, buttery flavor paired with a perfect, melt-in-your-mouth chewiness makes them irresistible. While the process might take a bit of time, the payoff is totally worth it. Once you’ve mastered this simple yet delicious recipe, you’ll find yourself making these caramels for every occasion—whether it’s a holiday gathering, a birthday, or just an afternoon treat.
These Homemade caramels are so versatile, too. You can keep them classic with just a pinch of sea salt for a delightful contrast or dip them in melted chocolate for an extra indulgence. Wrap them up in cute packaging, and they make a perfect homemade gift that anyone will appreciate. Plus, they’re fun to make and share with loved ones. Nothing beats the joy of pulling off a batch of these sticky-sweet confections from your kitchen.
The beauty of making Homemade Caramels at home is the control you have over the ingredients. There’s no need for artificial flavorings or preservatives—just butter, sugar, cream, and a dash of vanilla come together to create a treat that’s both timeless and homemade. The process itself is a bit of a slow burn, but when you pull that first piece of caramel from the pan, it’s a moment of sweet satisfaction.
So, whether you’re indulging on your own, wrapping them up to share with friends, or gifting them to someone special, Homemade Caramels are sure to become a new favorite. Gather your ingredients, grab your candy thermometer, and get ready to create some delicious, chewy magic!
Don’t forget to snap a photo and tag me on social media—I love seeing your sweet creations! Happy caramel-making!

