Introduction
If you’re looking for a quick, fun, and festive treat this holiday season, Chocolate Dipped Peppermint Sticks are the way to go! These little indulgences combine the refreshing crunch of peppermint with the rich, smooth taste of chocolate—a match made in holiday heaven. Whether you’re looking to gift something homemade, share a fun snack at a holiday party, or just satisfy your own sweet cravings, these peppermint sticks are guaranteed to spread some cheer.
The first time I made these, it was during a cozy evening of holiday baking with my family. The kitchen smelled incredible, and we had so much fun dipping the peppermint sticks into the melted chocolate. Everyone enjoyed how simple yet festive they were, and they quickly became one of our favorite holiday traditions. The cool peppermint and sweet chocolate combination is just perfect for the season!
Making these is super easy too. All you need are a few simple ingredients: peppermint sticks, your favorite chocolate (milk, dark, or white—take your pick!), and a handful of festive sprinkles or crushed candy canes for that extra holiday flair. Melt the chocolate, dip the peppermint sticks, and decorate with your toppings—so simple, yet so delicious!
These Chocolate Dipped Peppermint Sticks are perfect for gifting or as a little treat to enjoy while you cozy up by the fire. And trust me, once you start nibbling, you won’t be able to stop at just one! So go ahead and spread some holiday magic—these treats are sure to bring smiles to everyone’s face.
Why You’ll Love This Recipe
Here’s why Chocolate Dipped Peppermint Sticks will become your new favorite holiday treat:
- Refreshing and Sweet: The peppermint’s crisp, cool flavor balances perfectly with the rich chocolate.
- Simple Yet Elegant: A few simple steps lead to a treat that looks and tastes fancy.
- Perfect for Gifting: Wrapped up in a little festive paper, these peppermint sticks make a perfect homemade gift.
- Holiday Cheer: They’re great for spreading festive vibes at holiday parties or as stocking stuffers.
- Quick and Easy: No complicated techniques—just dip and chill!
- Customizable: Feel free to add sprinkles, drizzle extra chocolate, or even roll them in crushed nuts for added flair.
- Great for All Ages: Kids and adults alike will love these sweet, crunchy treats.
- Minimal Ingredients: You only need a few pantry staples to make these festive goodies.
- Fun Activity: A great treat to make with little ones—let them help with the dipping!
- No Baking Required: These peppermint sticks don’t require an oven, making them a perfect last-minute holiday treat.
Preparation Time and Cook Time
- Total Time: 25 minutes
- Preparation Time: 10 minutes
- Chill Time: 15 minutes
- Servings: 12 peppermint sticks
- Calories per peppermint stick: Approximately 130 calories
- Key Nutrients: Sugar: 15g, Fat: 8g, Carbohydrates: 18g, Protein: 1g
Ingredients
Gather the following ingredients to create your Chocolate Dipped Peppermint Sticks:
the Peppermint Sticks:
- 12 large peppermint sticks (candy canes)
For the Chocolate Coating:
- 1 cup semi-sweet chocolate chips (or milk chocolate for a sweeter option)
- 2 tablespoons vegetable oil (for smooth melting)
the Toppings (Optional):
- Crushed peppermint candy or candy cane pieces
- Sprinkles (holiday-themed or just festive)
- Chopped nuts (like crushed almonds or pecans)
Step-by-Step Instructions
Follow these easy steps to create your Chocolate Dipped Peppermint Sticks:
Prepare the Peppermint Sticks
- Melt the Chocolate: In a microwave-safe bowl, melt the chocolate chips with vegetable oil. Heat in 20-30 second intervals, stirring in between, until smooth and fully melted.
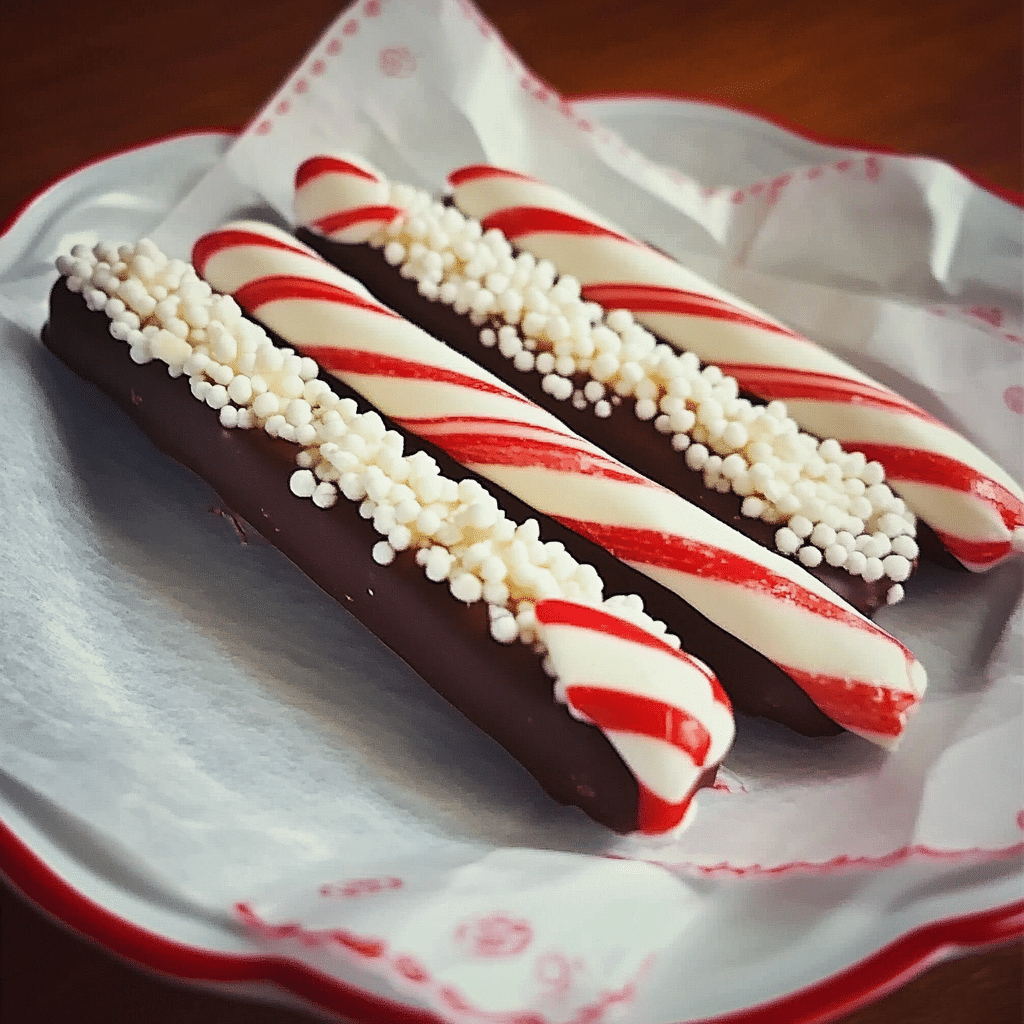
- Dip the Peppermint Sticks: Hold each peppermint stick by the curved end and dip it into the melted chocolate, covering about half of the stick. Allow any excess chocolate to drip off.
- Add Toppings: While the chocolate is still wet, roll or sprinkle crushed peppermint candy, sprinkles, or nuts onto the chocolate-coated part of the stick.
- Chill: Place the dipped peppermint sticks onto a parchment-lined baking sheet and refrigerate for about 15 minutes, or until the chocolate hardens completely.
How to Serve
Here are some fun serving ideas for your Chocolate Dipped Peppermint Sticks:
- Serve as a Sweet Snack: Enjoy these peppermint sticks as a holiday snack with hot chocolate or coffee.
- Gift Them: Wrap each peppermint stick in clear cellophane bags tied with festive ribbons for a sweet homemade gift.
- Holiday Table Display: Arrange them in a festive dish or jar as a centerpiece for a holiday gathering.
- Add to Gift Baskets: Include these chocolate-dipped peppermint sticks in holiday gift baskets along with other homemade treats.
- Mix into Desserts: Chop up the peppermint sticks and add them as a topping for ice cream or brownies.
Additional Tips
Maximize your enjoyment of Chocolate Dipped Peppermint Sticks with these helpful tips:
- Use High-Quality Chocolate: For a rich, smooth coating, opt for high-quality chocolate chips.
- Decorate Creatively: Try using colorful sprinkles, crushed cookies, or different types of nuts for variety.
- Make a Peppermint Stick Stand: For an elegant touch, place your sticks in a decorative mug or glass to display them.
- Customize the Chocolate: Experiment with white chocolate or dark chocolate for a twist.
- Use a Double Boiler: If you don’t want to use the microwave, melt the chocolate in a double boiler for more controlled heating.
- Store Properly: Keep them in an airtight container at room temperature for up to a week, or refrigerate them for longer freshness.
- Perfect for Parties: Set up a peppermint stick dipping station at your holiday party and let guests make their own creations.
- Make Mini Sticks: If you can’t find large candy canes, mini ones work just as well for bite-sized treats.
Recipe Variations
Get creative with these fun twists on Chocolate Dipped Peppermint Sticks:
- Dark Chocolate Peppermint Sticks: Use dark chocolate for a more intense flavor.
- Minty Chocolate: Add a drop of peppermint extract to the melted chocolate for an extra minty kick.
- Peppermint Mocha Sticks: Mix a little instant coffee powder into the melted chocolate for a mocha-flavored coating.
- Add More Crunch: Roll the sticks in crushed cookies, like Oreos or graham crackers, for added texture.
- Peanut Butter Chocolate: Dip the peppermint sticks in peanut butter chocolate for a sweet and salty twist.
Freezing and Storage
Ensure proper storage to maintain the quality of your Chocolate Dipped Peppermint Sticks:
- Storage: Store leftover peppermint sticks in an airtight container at room temperature for up to 1 week.
- Refrigerate for Extra Freshness: If you prefer them colder, refrigerate the dipped sticks.
- Freezing: These treats can also be frozen for up to 3 months. Make sure they’re wrapped tightly to avoid freezer burn.
- Thawing: To serve, let them thaw at room temperature for about 15-20 minutes before enjoying.
Special Equipment
You may need these kitchen tools to create your Chocolate Dipped Peppermint Sticks:
- Microwave-safe Bowl or Double Boiler: For melting the chocolate.
- Parchment Paper: To line the baking sheet and keep things tidy.
- Tongs or Fork: To dip the peppermint sticks without getting chocolate on your fingers.
- Storage Containers: To keep your peppermint sticks fresh.
FAQ Section
Here are answers to common questions about Chocolate Dipped Peppermint Sticks:
- Can I use candy melts instead of chocolate chips?
Yes, candy melts work great for a smooth and colorful coating! - How do I make these peppermint sticks in advance?
You can prepare them a few days ahead and store them in an airtight container. - Can I use other types of candy for the coating?
Yes! Try using crushed toffee, mini marshmallows, or even colored sprinkles for variety. - Are there other peppermint options I can use?
You can use peppermint bark or even peppermint-flavored chocolate for the coating. - Can I dip other treats in the chocolate?
Absolutely! You can dip pretzels, marshmallows, fruit, or even shortbread cookies for a fun twist on this recipe. - Can I make this recipe gluten-free?
Yes! Since the recipe doesn’t call for flour, these peppermint sticks are naturally gluten-free. Just be sure that your chocolate is certified gluten-free if that’s a concern. - How can I make the chocolate coating extra thick?
If you want a thicker chocolate coating, dip the peppermint sticks twice, allowing the chocolate to set between layers. This will give your sticks a more indulgent coating!

Chocolate Dipped Peppermint Sticks
- Total Time: 25 min.
Ingredients
For the Peppermint Sticks:
- 12 large peppermint sticks (candy canes)
For the Chocolate Coating:
- 1 cup semi-sweet chocolate chips (or milk chocolate for a sweeter option)
- 2 tablespoons vegetable oil (for smooth melting)
For the Toppings (Optional):
- Crushed peppermint candy or candy cane pieces
- Sprinkles (holiday-themed or just festive)
- Chopped nuts (like crushed almonds or pecans)
Instructions
Prepare the Peppermint Sticks
- Melt the Chocolate: In a microwave-safe bowl, melt the chocolate chips with vegetable oil. Heat in 20-30 second intervals, stirring in between, until smooth and fully melted.
- Dip the Peppermint Sticks: Hold each peppermint stick by the curved end and dip it into the melted chocolate, covering about half of the stick. Allow any excess chocolate to drip off.
- Add Toppings: While the chocolate is still wet, roll or sprinkle crushed peppermint candy, sprinkles, or nuts onto the chocolate-coated part of the stick.
- Chill: Place the dipped peppermint sticks onto a parchment-lined baking sheet and refrigerate for about 15 minutes, or until the chocolate hardens completely.
- Prep Time: 10 min.
- Cook Time: 15 min.
Nutrition
- Serving Size: 12 peppermint sticks
- Calories: 130 kcal
- Sugar: 15g
- Fat: 8g
- Carbohydrates: 18g
- Protein: 1g
Conclusion
Chocolate Dipped Peppermint Sticks are the perfect holiday treat that combines a crunchy, refreshing peppermint stick with smooth, decadent chocolate for the ultimate festive bite. They’re incredibly easy to make, yet so charming, making them the perfect addition to your holiday treats. Whether you’re sharing them at a party, giving them as a thoughtful gift, or just savoring them alongside a cozy cup of cocoa, these peppermint sticks are sure to spread holiday cheer and bring a smile to everyone who tries them.
The best part? You can get creative with your toppings—dip them in crushed candy canes, sprinkles, or even a little sea salt for a fun twist. It’s a great project for the whole family, and the results are as delicious as they are beautiful. These treats not only taste amazing but also make your home smell wonderfully festive as the chocolate melts and the peppermint aroma fills the air.
So grab your peppermint sticks, melt that chocolate, and get ready for some fun decorating! These treats are sure to be a hit wherever you share them. Don’t forget to snap a photo and tag me on social media—I love seeing your delicious creations and how you make them your own. Happy holidays and happy snacking!


