Introduction
If you’re looking for a simple yet delightful treat to brighten up any occasion, these Butter Mints are a perfect choice! Creamy, smooth, and absolutely melt-in-your-mouth, they’re the kind of treat that everyone loves, whether it’s for a holiday gathering, a wedding, or just as a sweet little indulgence after dinner.
These mints aren’t just delicious—they’re also incredibly fun to make! With just a few basic ingredients, you can whip up a batch in no time. They’re the perfect go-to treat when you want something homemade, impressive, and easy. Imagine the joy of presenting these little beauties at your next gathering or packaging them up as thoughtful gifts—trust me, they’ll be a hit!
The best part? These Butter Mints are so versatile! Whether you’re serving them at a big celebration, creating a candy jar for a special occasion, or just sneaking a handful for yourself (no judgment here!), they add a touch of sweetness to any moment. And because they’re so quick and easy to make, you can have a batch ready whenever you need it.
So, grab your mixing bowls, get ready to mix up a batch, and let these Butter Mints add a bit of sweetness to your day! Whether it’s a casual treat or part of a grand celebration, these mints will surely bring a smile to your face. Enjoy!
Why You’ll Love This Recipe
Here’s why this Butter Mints recipe will become a go-to in your dessert repertoire:
- Creamy & Smooth: The combination of butter and powdered sugar creates a soft, melt-in-your-mouth texture.
- Customizable Flavors: You can adjust the minty flavor to your liking, from mild to bold.
- Quick to Make: With just a few ingredients and minimal effort, you can have a batch of mints ready in no time.
- Perfect for Gifting: Package these mints in cute boxes or bags and you’ve got the perfect homemade gift.
- Family-Friendly: Kids love these mints, and they’re fun to make together. Plus, there’s no baking required!
- Classic Dessert: These mints are a timeless treat that’ll transport you back to family gatherings and celebrations.
Preparation Time and Cook Time
- Total Time: 30 minutes
- Preparation Time: 20 minutes
- Chill Time: 10 minutes
- Servings: 30-40 mints (depending on size)
- Calories per mint: Approximately 50 calories
- Key Nutrients: Fat: 3g, Carbohydrates: 6g, Protein: 0g
Ingredients
You’ll need just a few simple ingredients to make your Butter Mints:
For the Mints:
- 1/2 cup unsalted butter, softened
- 2 1/2 cups powdered sugar
- 2 tablespoons sweetened condensed milk
- 1 teaspoon peppermint extract (or to taste)
- 1-2 drops food coloring (optional)
For the Coating (optional):
- 1/4 cup powdered sugar (for rolling)
Ingredient Highlights
- Unsalted Butter: The rich, creamy butter is the base of this recipe, providing a smooth texture and deep flavor.
- Powdered Sugar: This helps the mints achieve their melt-in-your-mouth texture.
- Peppermint Extract: Adds that signature minty taste; adjust the amount to suit your preference.
- Sweetened Condensed Milk: Helps bind the ingredients together, adding to the creaminess of the mints.
Step-by-Step Instructions
Making these Butter Mints is super simple. Just follow these easy steps:
Prepare the Mint Mixture
- Mix the Butter and Sugar: In a large mixing bowl, beat the softened butter with the powdered sugar until smooth and creamy. This step may take a couple of minutes to get the perfect consistency.
- Add the Sweetened Condensed Milk: Add the sweetened condensed milk and beat until fully combined. This gives the mints their soft, melt-in-your-mouth texture.
- Flavor and Color: Stir in the peppermint extract and adjust the flavor by adding more or less to taste. If you’d like to add a fun twist, drop in some food coloring and mix until the color is evenly distributed.
Shape the Mints
- Roll into Balls: Scoop out small portions of the mint mixture (about a teaspoon) and roll them into balls with your hands.
- Flatten Slightly: Place each ball onto a parchment-lined baking sheet and gently flatten each one using the back of a fork or your fingers to form little mint discs.
- Optional Coating: If you prefer, you can lightly dust the mints with powdered sugar to give them a nice finish. This helps prevent them from sticking together too!
Chill the Mints
- Chill to Set: Once all the mints are shaped, pop the tray into the fridge for about 10 minutes to help them set and firm up.
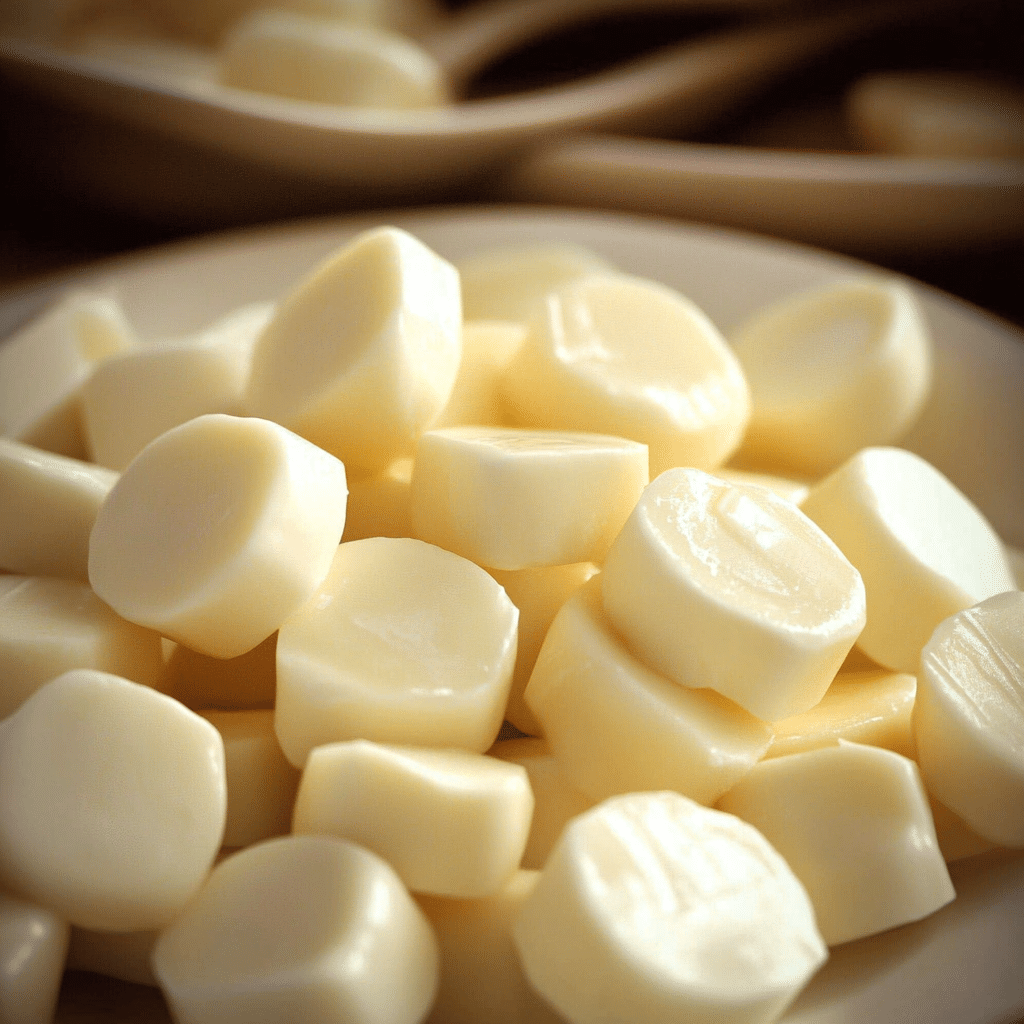
How to Serve
Here are some fun ideas for serving your Butter Mints:
- Gift Packaging: Pack your mints in small jars, gift boxes, or treat bags and tie with a ribbon for a thoughtful homemade gift.
- Dessert Table: Place the mints in a cute dish as part of a dessert spread for a fun and easy sweet addition.
- Party Favor: If you’re hosting a party, wrap up individual portions of mints as favors for your guests to take home.
- After-Dinner Mint: Serve the mints in a small bowl as a delightful after-dinner treat for your guests.
Additional Tips
For the best possible Butter Mints, consider these helpful tips:
- Soften Butter Properly: Be sure to soften the butter before mixing—it’ll help everything come together smoothly.
- Use Fresh Peppermint Extract: Fresh extract gives a more potent and vibrant mint flavor, so choose a good-quality one.
- Adjust the Sweetness: If you prefer your mints less sweet, reduce the amount of powdered sugar slightly.
- Make Mini Mints: Roll the mixture into smaller balls for bite-sized portions.
- Experiment with Flavors: Swap out peppermint extract for other flavors like cinnamon or chocolate for a fun twist.
Recipe Variations
Want to get creative with your Butter Mints? Here are a few variations you can try:
- Chocolate Mint: Add a tablespoon of cocoa powder to the mixture for a chocolatey mint variation.
- Cinnamon: Swap the peppermint extract for cinnamon extract for a warm, spicy treat.
- Lemon or Orange: Try adding citrus zest or a few drops of lemon or orange extract for a fresh and zesty flavor.
- Lavender: For a unique twist, add a few drops of lavender extract for a floral mint flavor.
- Colored Mints: Use different colors of food coloring for a festive look, especially for holidays like Christmas or Easter.
- Coconut: Add a handful of shredded coconut to the mixture for a tropical twist.
Freezing and Storage
Make sure your Butter Mints stay fresh with these storage tips:
- Storage: Keep the mints in an airtight container at room temperature for up to 1 week.
- Refrigeration: If you live in a warm climate, store the mints in the fridge to keep them firm and fresh.
- Freezing: These mints freeze beautifully! Place them in an airtight container and freeze for up to 3 months. Let them thaw at room temperature for a few minutes before serving.
Special Equipment
While these mints are simple to make, there are a few tools that can make the process easier:
- Mixing Bowls: To combine the ingredients.
- Electric Mixer: To beat the butter and powdered sugar quickly and efficiently.
- Parchment Paper: To line your baking sheet and make cleanup a breeze.
- Cookie Scoop: If you want uniform-sized mints, a cookie scoop is helpful for portioning the mixture.
FAQ Section
Here are answers to some of the most common questions about Butter Mints:
- Can I use margarine instead of butter?
Yes, margarine will work, but butter gives the mints a richer flavor and smoother texture. - Can I use a different extract?
Absolutely! You can experiment with different extracts like vanilla, lemon, or almond for a different flavor. - Can I skip the food coloring?
Yes, food coloring is optional. The mints will taste just as delicious without it! - What if I don’t have sweetened condensed milk?
You can substitute it with heavy cream or whole milk, but the texture may be slightly different. - Can I make these cupcakes in advance? Yes, you can make the cupcakes and frost them in advance. Store the frosted cupcakes in an airtight container for up to 2 days at room temperature. You can also freeze unfrosted cupcakes for later use.
- Can I use a different type of cookie for the witch hats? Absolutely! While chocolate cookies are traditional, you can use vanilla cookies, graham crackers, or even pretzels for a unique twist. The key is finding something that holds the candy corn or alternative candy securely on top.
- How do I get a smoother frosting finish? To achieve a smooth, professional-looking finish, try using a piping bag and a large round tip. You can also heat your frosting slightly in the microwave for a few seconds to make it easier to spread or pipe onto the cupcakes.
- Can I make these cupcakes without frosting? If you prefer, you can skip the frosting and top the cupcakes with a dusting of powdered sugar or a glaze. You can also use whipped cream for a lighter topping.
- Can I use another type of candy for the hat’s tip? Yes! If you’re not a fan of candy corn, you can use gummy candies, small chocolate pieces, or even mini marshmallows to create the witch hat’s tip.
Butter Mints
- Total Time: 30 min.
Ingredients
For the Mints:
- 1/2 cup unsalted butter, softened
- 2 1/2 cups powdered sugar
- 2 tablespoons sweetened condensed milk
- 1 teaspoon peppermint extract (or to taste)
- 1–2 drops food coloring (optional)
For the Coating (optional):
- 1/4 cup powdered sugar (for rolling)
Instructions
Prepare the Mint Mixture
- Mix the Butter and Sugar: In a large mixing bowl, beat the softened butter with the powdered sugar until smooth and creamy. This step may take a couple of minutes to get the perfect consistency.
- Add the Sweetened Condensed Milk: Add the sweetened condensed milk and beat until fully combined. This gives the mints their soft, melt-in-your-mouth texture.
- Flavor and Color: Stir in the peppermint extract and adjust the flavor by adding more or less to taste. If you’d like to add a fun twist, drop in some food coloring and mix until the color is evenly distributed.
Shape the Mints
- Roll into Balls: Scoop out small portions of the mint mixture (about a teaspoon) and roll them into balls with your hands.
- Flatten Slightly: Place each ball onto a parchment-lined baking sheet and gently flatten each one using the back of a fork or your fingers to form little mint discs.
- Optional Coating: If you prefer, you can lightly dust the mints with powdered sugar to give them a nice finish. This helps prevent them from sticking together too!
Chill the Mints
- Chill to Set: Once all the mints are shaped, pop the tray into the fridge for about 10 minutes to help them set and firm up.
- Prep Time: 20 min.
- Chill Time: 10 min.
Nutrition
- Serving Size: 30-40 mints (depending on size)
- Calories: 50 kcal
- Fat: 3g
- Carbohydrates: 6g
Conclusion
These Butter Mints are a delightful combination of smooth, creamy sweetness and a melt-in-your-mouth texture that will have everyone coming back for more. Whether you’re serving them at a party, giving them as thoughtful gifts, or simply treating yourself to something sweet, these mints add a special touch to any occasion.
The best part? They’re incredibly easy to make! With just a handful of ingredients, you can create a batch of these soft, buttery mints that melt effortlessly on your tongue. You can even customize the flavor by adding a hint of peppermint or vanilla, making them perfect for any season or celebration.
So, get ready to roll up your sleeves and make these irresistible mints that are sure to be a hit. Don’t forget to snap a photo and tag me on social media—I love seeing your delicious creations!


