Introduction
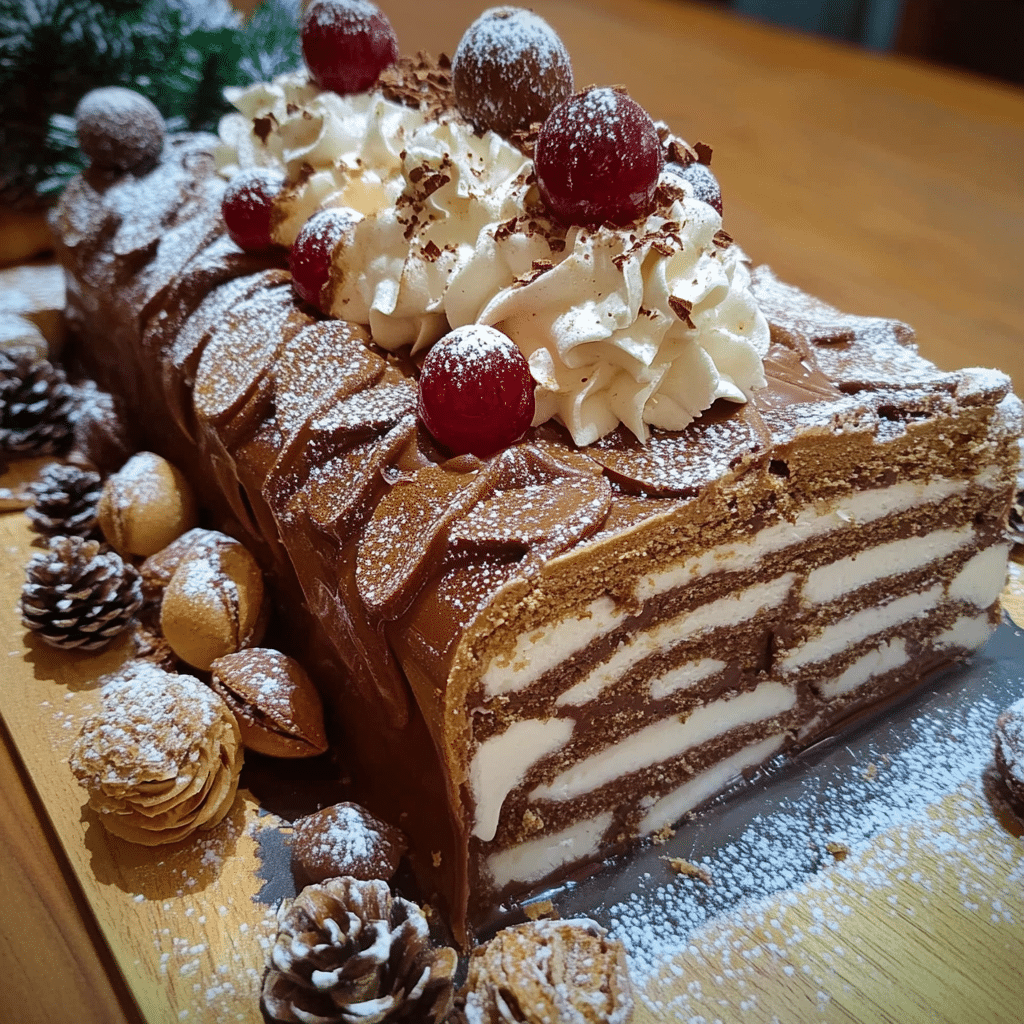
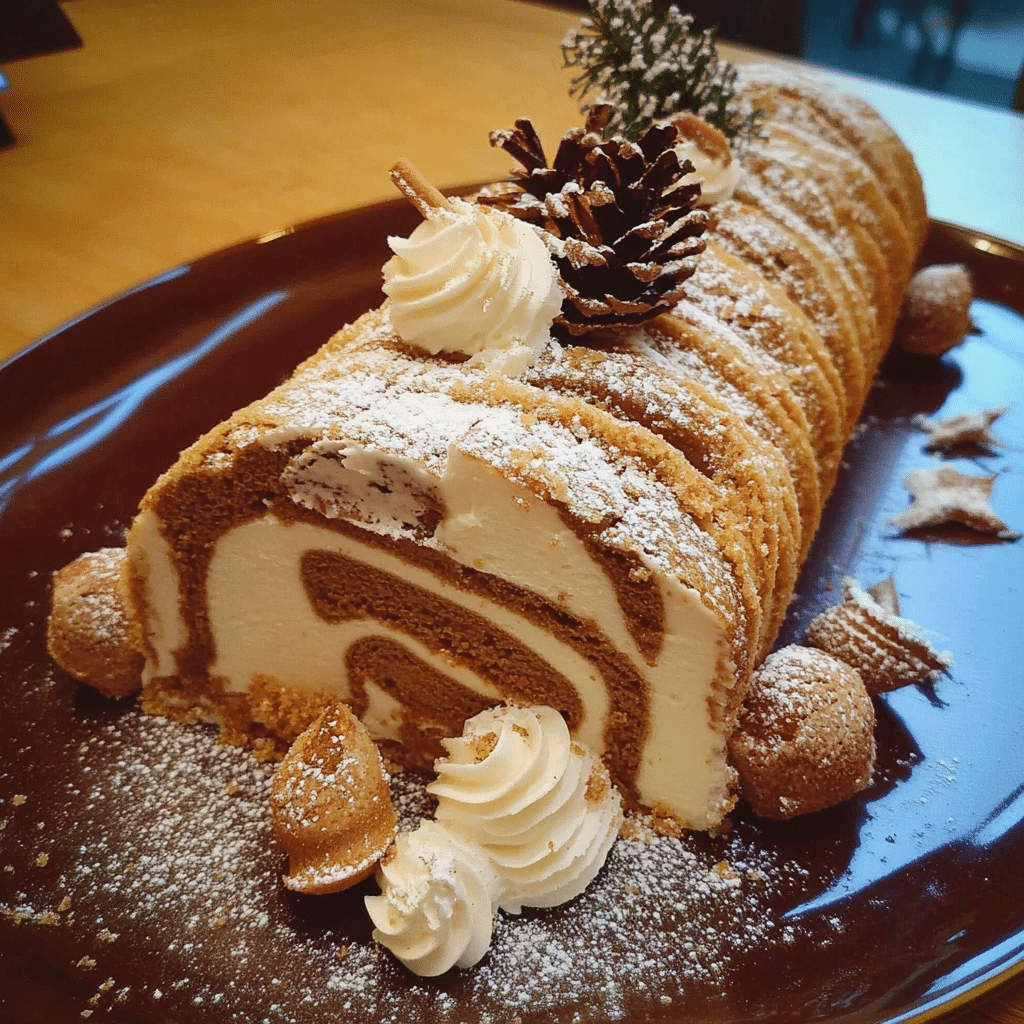
Bring a touch of French elegance to your holiday celebrations with the classic Buche de Noel, also known as Yule Log Cake. This dessert is more than just a sweet treat; it’s a centerpiece that’s as delightful to admire as it is to eat. Picture a soft, rolled sponge cake filled with creamy frosting, all wrapped in a rich, chocolatey exterior that resembles a festive log dusted with powdered sugar snow. It’s the perfect blend of holiday charm and decadence.
If you’ve ever thought this dessert was too complicated to tackle, I promise it’s more approachable than it looks. With a little patience and a few simple techniques, you’ll have a stunning cake that’ll impress your guests and spark plenty of “oohs” and “ahhs.” I remember the first time I made a Buche de Noel—it felt like an ambitious endeavor, but by the end, I couldn’t stop smiling at how beautiful it turned out. And let’s just say there weren’t any leftovers that year!
What makes this dessert extra special is its versatility. You can keep it classic with chocolate and vanilla, or add your own twist with coffee, hazelnut, or even peppermint flavors. Decorating it is half the fun—think meringue mushrooms, sugared cranberries, or a sprinkling of edible glitter to make it truly magical.
Whether it’s your first time making a Buche de Noel or it’s already a family tradition, this cake is sure to bring joy and a little extra sparkle to your holiday celebrations. Ready to roll? Let’s create a dessert to remember!
Why You’ll Love This Recipe
- Elegant Presentation: A centerpiece-worthy dessert that will wow your guests.
- Rich Chocolate Flavor: Perfectly moist sponge cake paired with decadent chocolate buttercream.
- Fun and Customizable: Decorate with meringue mushrooms, sugared cranberries, or edible holly.
- Perfect for Gatherings: Serves a crowd while adding a touch of nostalgia and charm.
- Surprisingly Easy: With step-by-step instructions, even beginners can create this classic.
- Make-Ahead Friendly: Prepare parts of the recipe in advance to save time.
- Great for All Ages: Both kids and adults will enjoy the festive appearance and delicious taste.
- Versatile: Adapt the flavors with different fillings or frostings for a personalized touch.
- A Holiday Classic: Bring tradition to your holiday menu with this timeless dessert.
- Instagram-Worthy: The finished cake is as much a feast for the eyes as for the palate!
Preparation Time and Cook Time
- Total Time: 2 hours
- Preparation Time: 30 minutes
- Cook Time: 15 minutes
- Decorating Time: 1 hour
- Servings: 8–10
- Calories per serving: Approximately 350 calories
- Key Nutrients: Protein: 5g, Carbohydrates: 40g, Fat: 15g
Ingredients
For the Sponge Cake:
- 4 large eggs (separated)
- 1/2 cup granulated sugar
- 1/3 cup unsweetened cocoa powder
- 1/4 cup all-purpose flour
- 1/4 tsp salt
- 1 tsp vanilla extract
the Chocolate Buttercream Frosting:
- 1 cup unsalted butter (softened)
- 2 cups powdered sugar
- 1/2 cup cocoa powder
- 2–3 tbsp milk
- 1 tsp vanilla extract
For Decoration:
- Powdered sugar (for snow effect)
- Meringue mushrooms (optional)
- Sugared cranberries or rosemary sprigs
Step-by-Step Instructions
1. Prepare the Sponge Cake
- Preheat the Oven: Preheat your oven to 350°F (175°C). Line a 10×15-inch jelly roll pan with parchment paper.
- Beat Egg Yolks: In a large mixing bowl, beat egg yolks and sugar until thick and pale. Add vanilla extract.
- Sift Dry Ingredients: In a separate bowl, sift together cocoa powder, flour, and salt. Gradually fold into the yolk mixture.
- Whip Egg Whites: Beat egg whites in another bowl until stiff peaks form. Gently fold them into the batter in three parts to maintain the airy texture.
- Bake: Pour the batter into the prepared pan, spreading it evenly. Bake for 12–15 minutes, or until the cake springs back when touched.
2. Roll the Cake
- Dust with Sugar: Place a clean kitchen towel on a flat surface and dust it generously with powdered sugar.
- Invert the Cake: Turn the warm cake out onto the sugared towel, peel off the parchment, and roll the cake tightly with the towel. Allow it to cool completely.
3. Make the Buttercream Frosting
- Cream Butter: In a mixing bowl, beat the softened butter until creamy.
- Add Dry Ingredients: Gradually add powdered sugar and cocoa powder, alternating with milk, until smooth and spreadable. Add vanilla for flavor.
4. Assemble the Buche de Noel
- Unroll the Cake: Carefully unroll the cooled cake. Spread a layer of buttercream over the surface, leaving a small border.
- Roll and Frost: Re-roll the cake without the towel. Frost the outside with the remaining buttercream, using a spatula to create a bark-like texture.
- Decorate: Dust with powdered sugar for snow, add meringue mushrooms, and garnish with sugared cranberries or sprigs of rosemary.
5. Chill and Serve
Refrigerate the assembled cake for at least 30 minutes before serving to allow the flavors to meld and the frosting to set.
how to serve
- Festive Platter: Place the Buche de Noel on a holiday-themed platter and surround it with decorative elements like pinecones or ornaments.
- Slice and Serve: Cut into 1-inch slices and serve with a dollop of whipped cream or a drizzle of caramel.
- Pair with Coffee or Hot Chocolate: Perfect for a cozy holiday evening by the fire.
Additional Tips
- Use a Serrated Knife: For clean slices, use a serrated knife when serving.
- Don’t Overbake: Keep an eye on the sponge cake to avoid dryness.
- Room Temperature Butter: Ensure the butter is soft for a smooth frosting.
- Practice Rolling: If this is your first rolled cake, practice with a plain sheet of cake to perfect the technique.
- Store Properly: Keep the cake refrigerated in an airtight container for up to 3 days.
- Create Stable Frosting: To keep your frosting smooth and hold its shape:
- Chill the Bowl and Whisk: Use a chilled bowl when whipping cream-based frosting.
- Add Cornstarch: A teaspoon of cornstarch can stabilize frosting without altering the taste.
- Use a Piping Bag: For precise application, use a piping bag with a star or round tip.
Recipe Variations
- Mocha Filling: Add a teaspoon of espresso powder to the buttercream for a coffee twist.
- Fruit Filling: Spread a layer of raspberry or apricot jam before the buttercream.
- Vanilla Frosting: Swap chocolate frosting for vanilla for a snowy log effect.
- Nutty Crunch: Add crushed hazelnuts or almonds to the filling for added texture
Freezing and Storage
To store your Buche De Noel, wrap it tightly in plastic wrap and aluminum foil and freeze for up to 2 months. Thaw in the refrigerator for several hours before serving. For short-term storage, keep the cake in an airtight container in the fridge for up to 3 days.
FAQ Section
Before you get started, you might have a few questions about making Buche De Noel. Don’t worry — I’ve got you covered! Here are some of the most common questions I get about this delightful holiday dessert, along with helpful answers to make sure your Yule log turns out just as delicious as it looks.
- Can I freeze the Buche de Noel?
Yes, wrap it tightly in plastic wrap and foil. Freeze for up to 3 months. - Can I make it ahead of time?
Absolutely! Assemble the cake a day in advance and store in the fridge. - What if my sponge cake cracks when rolling it up?
- Don’t worry — this happens to even experienced bakers! If your cake cracks slightly, simply cover the cracks with frosting or decorative elements. A little imperfection only adds to the rustic charm of the Yule log. Just make sure the cake is still slightly warm when rolling to help it hold its shape.
- Can I make Buche De Noel without the traditional chocolate frosting?
- Of course! While chocolate is the classic choice for frosting, you can get creative with different flavors. Try a coffee-flavored frosting, or even a simple vanilla buttercream. If you prefer a lighter look, you can dust the cake with powdered sugar and skip the frosting altogether.
- Can I make a smaller Buche De Noel?
- Yes! You can scale down the recipe by halving the ingredients. Just be sure to adjust the baking time accordingly, and keep an eye on the cake to prevent overbaking. A smaller version of the Buche De Noel would make a lovely gift or personal-sized treat!
- I hope these answers help make your baking experience even smoother. If you have any other questions, feel free to ask — I’m always here to help! Happy baking!

Buche de Noel
- Total Time: 2 hrs.
Ingredients
For the Sponge Cake:
- 4 large eggs (separated)
- 1/2 cup granulated sugar
- 1/3 cup unsweetened cocoa powder
- 1/4 cup all-purpose flour
- 1/4 tsp salt
- 1 tsp vanilla extract
For the Chocolate Buttercream Frosting:
- 1 cup unsalted butter (softened)
- 2 cups powdered sugar
- 1/2 cup cocoa powder
- 2–3 tbsp milk
- 1 tsp vanilla extract
For Decoration:
- Powdered sugar (for snow effect)
- Meringue mushrooms (optional)
- Sugared cranberries or rosemary sprigs
Instructions
Prepare the Sponge Cake
- Preheat the Oven: Preheat your oven to 350°F (175°C). Line a 10×15-inch jelly roll pan with parchment paper.
- Beat Egg Yolks: In a large mixing bowl, beat egg yolks and sugar until thick and pale. Add vanilla extract.
- Sift Dry Ingredients: In a separate bowl, sift together cocoa powder, flour, and salt. Gradually fold into the yolk mixture.
- Whip Egg Whites: Beat egg whites in another bowl until stiff peaks form. Gently fold them into the batter in three parts to maintain the airy texture.
- Bake: Pour the batter into the prepared pan, spreading it evenly. Bake for 12–15 minutes, or until the cake springs back when touched.
2. Roll the Cake
- Dust with Sugar: Place a clean kitchen towel on a flat surface and dust it generously with powdered sugar.
- Invert the Cake: Turn the warm cake out onto the sugared towel, peel off the parchment, and roll the cake tightly with the towel. Allow it to cool completely.
3. Make the Buttercream Frosting
- Cream Butter: In a mixing bowl, beat the softened butter until creamy.
- Add Dry Ingredients: Gradually add powdered sugar and cocoa powder, alternating with milk, until smooth and spreadable. Add vanilla for flavor.
4. Assemble the Buche de Noel
- Unroll the Cake: Carefully unroll the cooled cake. Spread a layer of buttercream over the surface, leaving a small border.
- Roll and Frost: Re-roll the cake without the towel. Frost the outside with the remaining buttercream, using a spatula to create a bark-like texture.
- Decorate: Dust with powdered sugar for snow, add meringue mushrooms, and garnish with sugared cranberries or sprigs of rosemary.
5. Chill and Serve
Refrigerate the assembled cake for at least 30 minutes before serving to allow the flavors to meld and the frosting to set.
- Prep Time: 30 min.
- Cook Time: 15 min.
Nutrition
- Serving Size: 8-10 servings
- Calories: 350 kcal
- Fat: 15g
- Carbohydrates: 40g
- Protein: 5g
Conclusion
Making a Bûche de Noël (Yule log) is a fantastic way to celebrate the holiday season in a delicious and festive way. This iconic dessert, with its layers of fluffy sponge cake and rich, velvety filling, is as impressive as it is delicious. It’s perfect for holiday gatherings, family dinners, or even as a fun baking project to enjoy with loved ones. The best part? You can really make it your own with different flavors, fillings, and decorations—go for classic chocolate buttercream, a spiced cream filling, or even something more adventurous like a coffee-flavored mousse.
While the process may seem a little tricky, it’s a lot easier than it looks! The rolling step adds a bit of drama, and decorating the log is where you can get really creative. You could make it look like an actual tree log with bark details, or even add little touches like holly leaves, snowflakes, or sprigs of rosemary for a touch of greenery. It’s a fun dessert that invites you to add your personal flair.
Once you slice into that beautiful log, you’ll reveal the soft layers and creamy filling inside, and I promise, the smiles it brings will be worth every moment. If you’re looking to impress your guests or create a memorable holiday tradition, this is the perfect dessert to share with friends and family.
So gather your ingredients, preheat your oven, and get ready to bake up some holiday magic. Don’t forget to snap a photo and tag me on social media—I love seeing your delicious creations! Happy baking, and here’s to a festive holiday season!

