Introduction
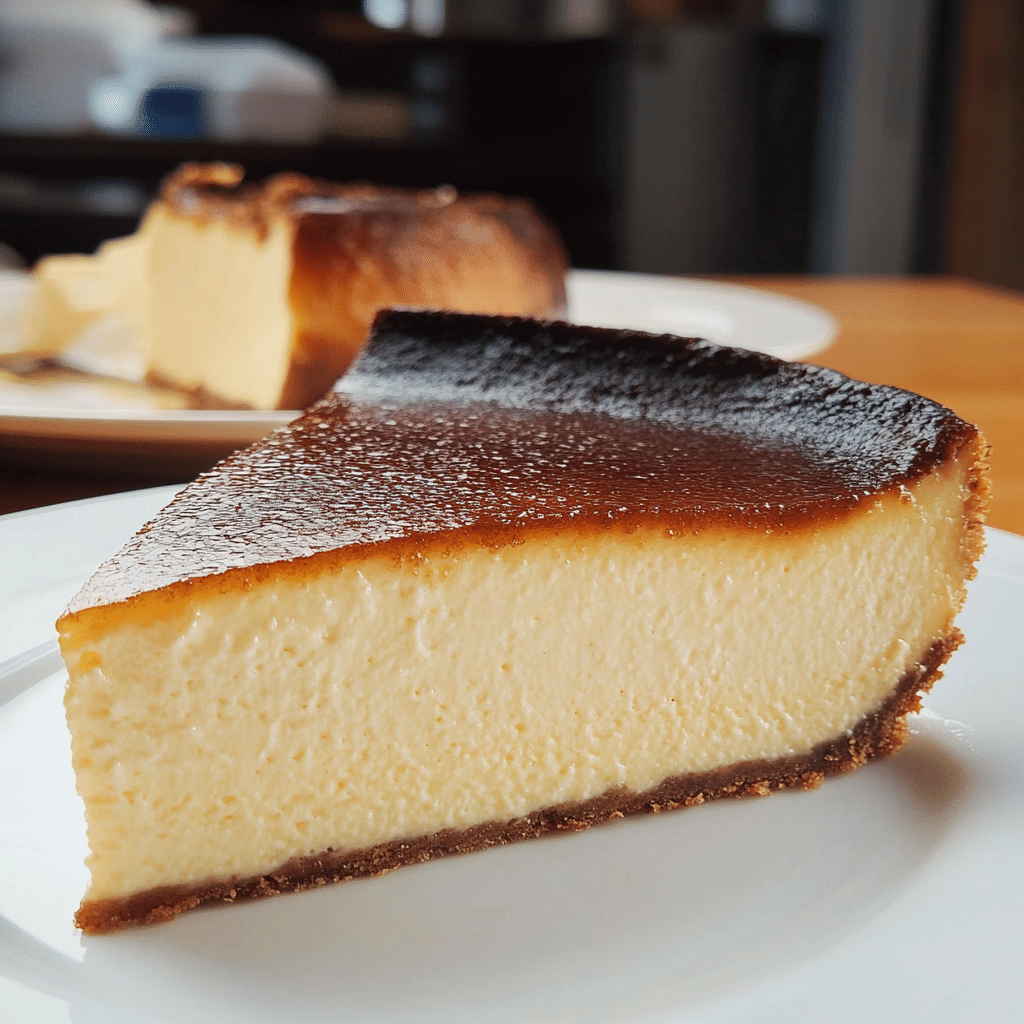
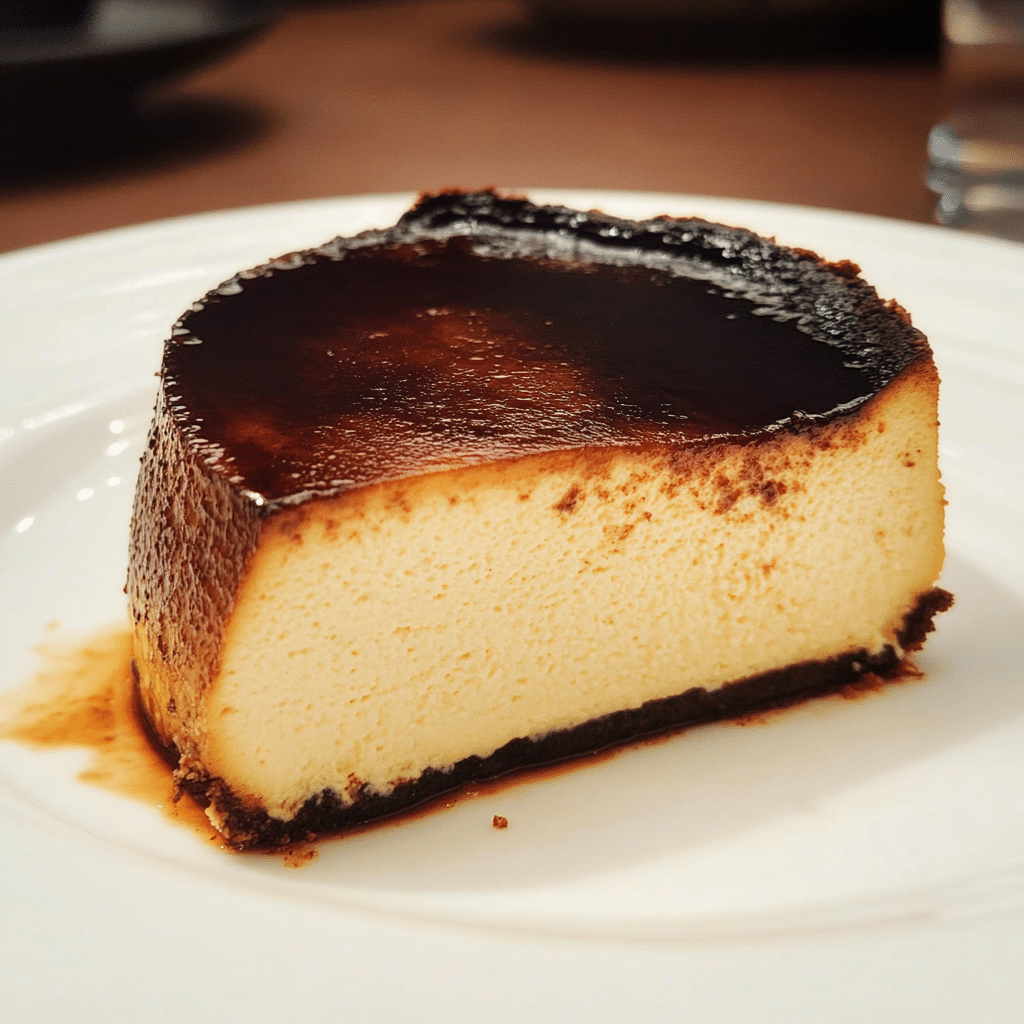
Let me tell you a little secret—Basque Burnt Cheesecake is not your typical cheesecake. With its rustic, caramelized top and creamy, custard-like center, this dessert is a delightful paradox. It’s bold yet simple, elegant yet approachable. Originating from the Basque region of Spain, this cheesecake defies all expectations with its charred exterior and irresistible flavor. Whether you’re looking to impress dinner guests or indulge in a luxurious treat at home, this dessert is the perfect choice.
What sets it apart? Unlike traditional cheesecakes, there’s no crust to fuss over. Instead, the magic lies in its burnt top, achieved by baking at a high temperature. The result? A cheesecake that’s unapologetically imperfect, oozing charm with every bite. The caramelized exterior brings a subtle bitterness that contrasts beautifully with the rich and creamy interior, creating a perfect balance of flavors.
What’s more, this cheesecake is surprisingly easy to make. You don’t need any fancy techniques or special equipment—just a handful of ingredients and a high-temperature oven. Its rustic appeal makes it wonderfully forgiving, so even baking novices can achieve stunning results.
Serve it warm for an extra gooey center, or chill it for a more set texture. Either way, Basque Burnt Cheesecake is a showstopper that will leave everyone at the table swooning. Ready to embrace this delightfully imperfect dessert? Let’s get baking!
Why You’ll Love This Recipe
Here’s why this Basque Burnt Cheesecake deserves a spot in your dessert rotation:
- Effortlessly Elegant: Minimal ingredients and steps yield a gourmet result.
- Uniquely Flavorful: The caramelized top adds depth to the creamy cheesecake.
- Beginner-Friendly: No water baths or intricate techniques required!
- Showstopping Appearance: Its charred exterior is eye-catching and perfect for special occasions.
- Versatile: Pair it with fruits, sauces, or enjoy it plain.
- Gluten-Free Option: It’s naturally gluten-free, with no crust to worry about.
- Quick Prep: Mix, pour, and bake—it’s that simple.
- Make-Ahead Dessert: Tastes even better after chilling overnight.
- Crowd-Pleasing Texture: The creamy center and firm edges offer something for everyone.
- Customizable: Adjust sweetness or flavors to suit your taste.
Preparation Time and Cook Time
- Total Time: 1 hour 15 minutes (plus chilling)
- Preparation Time: 15 minutes
- Bake Time: 50-60 minutes
- Cooling Time: At least 4 hours
- Servings: 8-10 slices
- Calories per slice: Approximately 320 calories
Ingredients
Gather these simple ingredients for your Basque Burnt Cheesecake:
- 2 cups (16 oz) cream cheese, softened
- 1 cup granulated sugar
- 4 large eggs
- 1 1/4 cups heavy cream
- 1/3 cup all-purpose flour (or cornstarch for a gluten-free version)
- 1 tsp pure vanilla extract
- 1/4 tsp salt
Ingredient Highlights
- Cream Cheese: The star ingredient for a smooth, creamy texture.
- Heavy Cream: Adds richness and silkiness.
- Sugar: Balances the tanginess of the cream cheese.
- Eggs: Provide structure while keeping the cheesecake creamy.
- Flour or Cornstarch: Helps stabilize the filling for a perfect consistency.
- Vanilla Extract: Enhances the overall flavor with a subtle sweetness.
Step-by-Step Instructions
Follow these steps for a flawless Basque Burnt Cheesecake:
Prepare the Batter
- Preheat Oven: Preheat your oven to 400°F (200°C). Line a 9-inch springform pan with parchment paper, ensuring it extends above the edges of the pan for easy removal.
- Beat Cream Cheese and Sugar: In a large bowl, beat the cream cheese and sugar until smooth and creamy. Use a hand mixer or stand mixer for the best results.
- Incorporate Eggs: Add the eggs one at a time, beating well after each addition. Scrape down the sides of the bowl as needed.
- Add Cream and Vanilla: Slowly pour in the heavy cream and vanilla extract, mixing until fully combined.
- Mix in Flour and Salt: Sift in the flour (or cornstarch) and salt, gently folding it into the batter until smooth.
Bake the Cheesecake
- Pour the Batter: Pour the batter into the prepared pan, smoothing the top with a spatula.
- Bake: Place the pan in the oven and bake for 50-60 minutes, or until the top is deeply golden and slightly jiggly in the center.
- Cool: Remove the cheesecake from the oven and allow it to cool in the pan for 30 minutes before transferring to the refrigerator.
Chill and Serve
- Chill: Refrigerate the cheesecake for at least 4 hours or overnight for the best texture.
- Serve: Slice and serve chilled or at room temperature. Pair with fresh fruit, whipped cream, or a drizzle of caramel.
How to Serve
Consider these serving ideas to elevate your Basque Burnt Cheesecake experience:
- With Fresh Fruit: Add a pop of color and freshness with sliced strawberries, raspberries, or blueberries.
- Drizzle with Sauce: Caramel, chocolate, or berry compote enhances the cheesecake’s flavor.
- Top with Whipped Cream: A dollop of whipped cream adds lightness.
- Pair with Coffee: The rich flavors of the cheesecake complement a bold espresso or cappuccino.
- Serve on Elegant Plates: Showcase its rustic charm on sleek, modern tableware.
Additional Tips
Maximize your Basque Burnt Cheesecake success with these helpful tips:
- Use Room Temperature Ingredients: This ensures a smooth batter and even baking.
- Don’t Overmix: Avoid incorporating too much air into the batter to maintain a creamy texture.
- Adjust Baking Time: For a firmer texture, bake a little longer. For a gooier center, reduce the time slightly.
- Line the Pan Generously: Ensure the parchment paper extends above the edges of the pan to catch any spills.
- Check for Jiggle: A slight jiggle in the center indicates the perfect doneness.
- Chill Overnight: This allows the flavors to meld and the texture to set.
Recipe Variations
Make your cheesecake uniquely yours with these variations:
- Chocolate Swirl: Add melted chocolate to the batter and swirl it for a marbled effect.
- Citrus Infusion: Mix in lemon or orange zest for a zesty twist.
- Spiced Version: Add cinnamon, nutmeg, or cardamom for warm, aromatic flavors.
- Nutty Crust: Create a crust with ground almonds or hazelnuts for added crunch.
- Savory Option: Experiment with savory herbs and cheeses for a unique appetizer.
Freezing and Storage
Keep your cheesecake fresh with these storage tips:
- Refrigerate: Store in an airtight container in the fridge for up to 5 days.
- Freeze: Wrap individual slices in plastic wrap and foil, then freeze for up to 3 months.
- Thaw: Allow frozen slices to thaw in the refrigerator overnight.
Special Equipment
Make the process seamless with these kitchen tools:
- Springform Pan: For easy removal of the cheesecake.
- Parchment Paper: Prevents sticking and ensures even baking.
- Mixing Bowls: For combining ingredients.
- Electric Mixer: Makes blending the batter effortless.
- Spatula: For smoothing the top of the cheesecake.
FAQ Section
Here are answers to common questions about Basque Burnt Cheesecake:
- Can I use a different pan size?
Yes, but adjust the baking time accordingly. - What if I don’t have parchment paper?
Grease the pan thoroughly, but parchment is highly recommended. - Can I make this cheesecake ahead?
Absolutely! It tastes better after chilling overnight. - Why is my cheesecake too jiggly?
It may need a few more minutes in the oven. Check for a slightly firm top with a jiggle in the center. - Can I reduce the sugar?
Yes, but keep in mind that sugar contributes to the texture and caramelization. - Can I use different types of frosting?
- Absolutely! You can experiment with vanilla frosting, cream cheese frosting, or even a whipped frosting for a lighter texture. Add food coloring for extra Halloween flair.
- Can I make these cupcakes in advance?
- Yes, you can bake the cupcakes a day or two in advance and store them in an airtight container. Add the frosting and decorations closer to your event for the freshest presentation.
- What if I don’t have candy corn?
- If candy corn isn’t available, you can use other candies like Hershey’s Kisses, chocolate chips, or even gumdrops to create the tip of the witch hat.
- Can I make mini versions of these cupcakes?
- Definitely! Use a mini cupcake pan and adjust the baking time to 10-12 minutes. These bite-sized treats are perfect for parties or kids’ events.
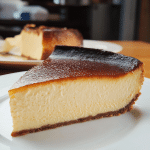
Basque Burnt Cheesecake
- Total Time: 1 hour 15 minutes
Ingredients
- 2 cups (16 oz) cream cheese, softened
- 1 cup granulated sugar
- 4 large eggs
- 1 1/4 cups heavy cream
- 1/3 cup all-purpose flour (or cornstarch for a gluten-free version)
- 1 tsp pure vanilla extract
- 1/4 tsp salt
Instructions
Prepare the Batter
- Preheat Oven: Preheat your oven to 400°F (200°C). Line a 9-inch springform pan with parchment paper, ensuring it extends above the edges of the pan for easy removal.
- Beat Cream Cheese and Sugar: In a large bowl, beat the cream cheese and sugar until smooth and creamy. Use a hand mixer or stand mixer for the best results.
- Incorporate Eggs: Add the eggs one at a time, beating well after each addition. Scrape down the sides of the bowl as needed.
- Add Cream and Vanilla: Slowly pour in the heavy cream and vanilla extract, mixing until fully combined.
- Mix in Flour and Salt: Sift in the flour (or cornstarch) and salt, gently folding it into the batter until smooth.
Bake the Cheesecake
- Pour the Batter: Pour the batter into the prepared pan, smoothing the top with a spatula.
- Bake: Place the pan in the oven and bake for 50-60 minutes, or until the top is deeply golden and slightly jiggly in the center.
- Cool: Remove the cheesecake from the oven and allow it to cool in the pan for 30 minutes before transferring to the refrigerator.
Chill and Serve
- Chill: Refrigerate the cheesecake for at least 4 hours or overnight for the best texture.
- Serve: Slice and serve chilled or at room temperature. Pair with fresh fruit, whipped cream, or a drizzle of caramel.
- Prep Time: 15 min.
- Bake Time: 50-60 min.
Nutrition
- Serving Size: 8-10 slices
- Calories: 320 kcal
Conclusion
Basque Burnt Cheesecake is a dessert that redefines perfection with its beautifully imperfect look and unforgettable flavor. The caramelized top gives it a rustic charm, while the creamy, custard-like interior melts in your mouth with every bite. It’s a bold yet simple treat, making it a favorite for both seasoned bakers and those just starting out.
This cheesecake is more than just a dessert—it’s a conversation starter. Serve it at a dinner party to wow your guests, or enjoy a quiet slice paired with a hot cup of coffee for a moment of pure indulgence. Its versatility and unique character make it a dessert you’ll want to return to again and again.
Making a Basque Burnt Cheesecake is also incredibly straightforward. No need to fuss over a water bath or a perfect crust—just let the oven do the work as the top caramelizes into a rich, golden masterpiece. It’s the kind of recipe that rewards you with maximum flavor for minimal effort.
So, roll up your sleeves, preheat that oven, and let this cheesecake bring a little magic to your kitchen. Don’t forget to snap a photo and tag me on social media—I love seeing your delicious creations! Enjoy!

